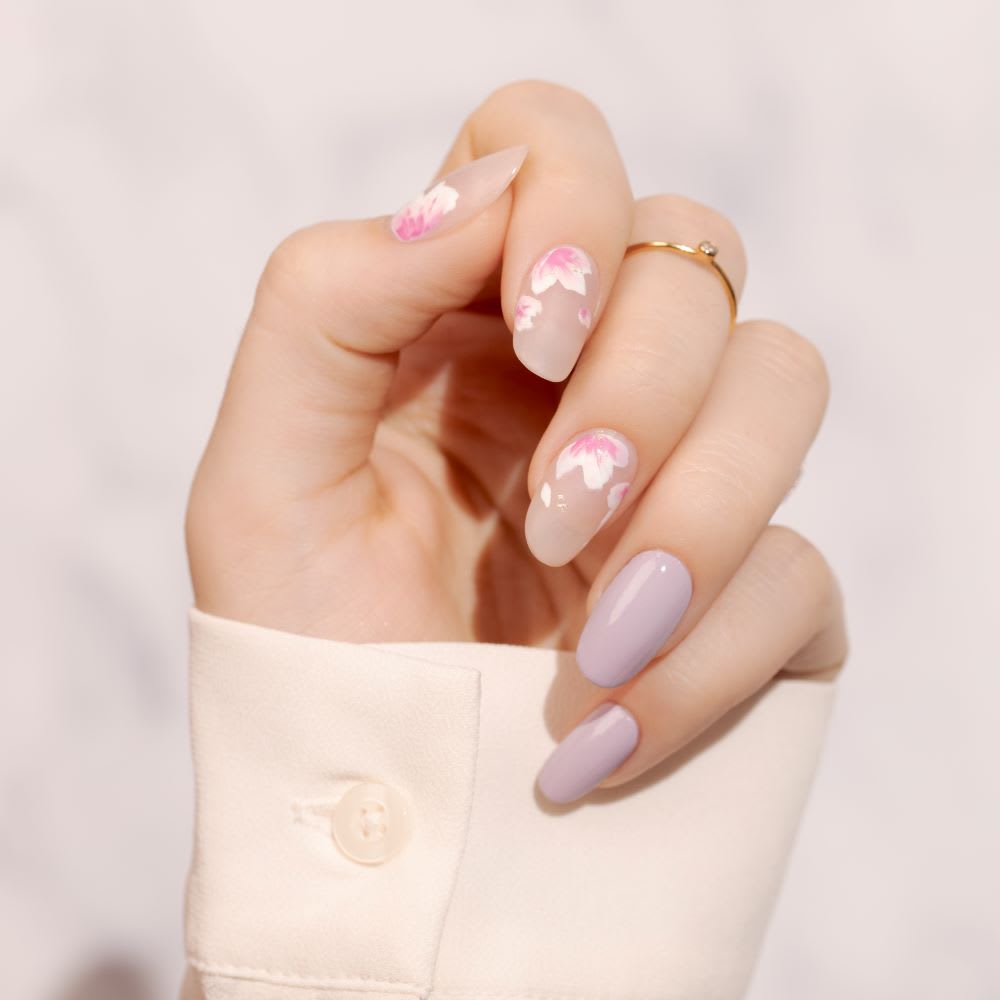
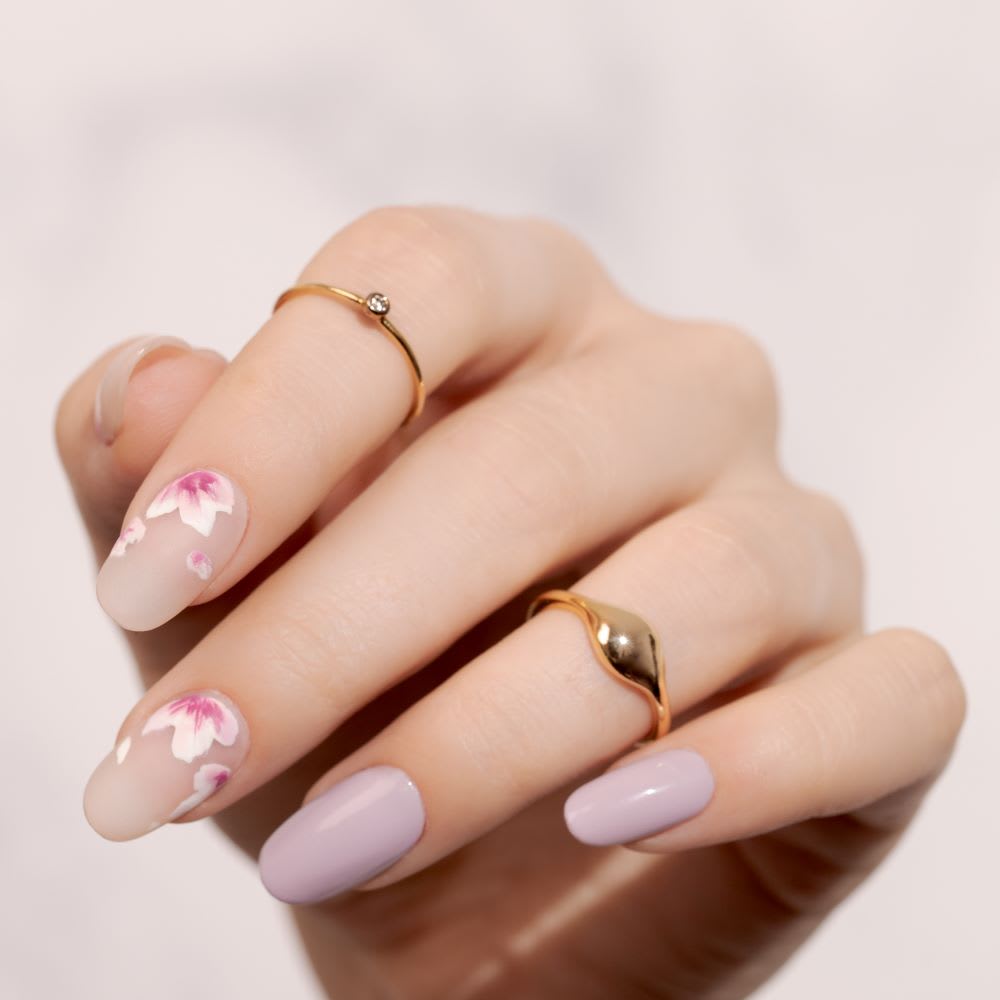
Flower nails are currently everywhere and wedding season is arguably the perfect time to try the trend. If you can’t get to a salon, creating a floral negative space mani at home is easier than you think. Taking inspiration from a perfectly pretty Lulus bridesmaid dress, the Loving You Dusty Purple Floral Print Long Sleeve Wrap Maxi Dress, this design makes for a perfect beginner DIY nail art look. It’s also a gorgeous option for the bride or anyone who wants to subtly coordinate with the bridesmaids’ looks. Especially with mismatched ‘maids, it’s the little details–like nails–that make an impact and keep the crew cohesive!
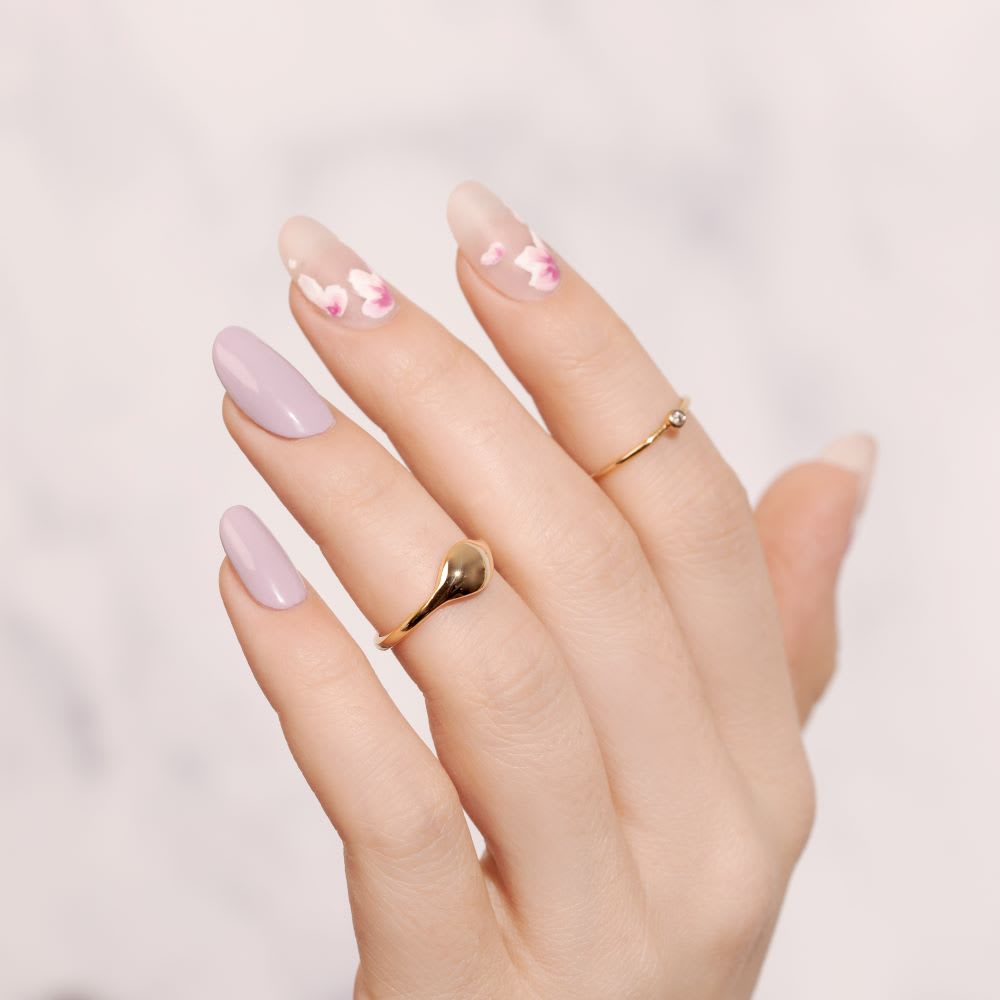
Like I said, you don’t need to be a nail pro to achieve this look. The only part of the design you’ll need a nail art brush for is the final step; most of these flowers can be painted with the brush from the bottle! Try this look on just one or two naked nails, aka: blank canvases, and mix and match with your favorite solid colors on the others (think of this as the mani equivalent of the mismatched bridesmaids dress trend)! You’ll need white nail polish to create the base for the petals but the pink shading can be done with any number of pink polishes you have on hand.
Ready to try this blooming beauty look? Scroll on to see all the supplies and instructions you’ll need to create your own wedding-ready nail art.
Flower Nails
Supplies:
- Lavender nail polish
- White nail polish
- Three different shades of pink nail polish: one light pink, one medium pink, and one orchid or neon pink
- Matte or glossy top coat
- Thin nail art brush
Instructions:
Step 1: Paint three clean, filed nails with one coat of your desired lavender shade. For this tutorial, I painted the thumb, ring, and pinky fingers. Let them dry for five minutes and apply your second coat of lavender polish.
Step 2: Let dry for five minutes and prep your index and middle finger for painting the flowers. You can leave these nails totally naked or apply one thin coat of your favorite sheer polish or base coat. Let dry for another five minutes.
Step 3: Take the brush from the bottle for the white polish and angle the brush so it’s flat on its side. Dab white polish on each side of the nail and drag it forward gently to create a ‘petal’. You can create two of these petal shapes for each flower, for a total of four petal shapes on the nail. As you can see in the photos, the two fingers have a flower on each side of the nail. You can randomly add white petal shapes elsewhere as desired (and as shown in the photo).
Step 4: Now that you have your base white petals, take turns with your pink shades by gently swiping your lightest pink shade first on the white base. You’ll want to paint small petal shapes in a similar pattern as the white base, but keeping inside the white shape.
Step 5: Once you have used two of your pink polishes to create shading, take a thin nail art brush and use your darkest pink to paint small lines at the base of the petal, as shown in the photo. Feel free to create random orchid-colored swipes of the brush near the base of the center to look like the stamen of the flower.
Step 6: Let your nail art completely dry for another 10 minutes, then cover with your favorite matte or glossy top coat.
Did you try this mismatched mani? Show us your flower nails on Instagram @lulus using #lovelulus and shop more pretty floral picks in our Bridesmaid Dress selection!
Cassandre Banel is a Seattle-based nail artist.
Join The Conversation (0)