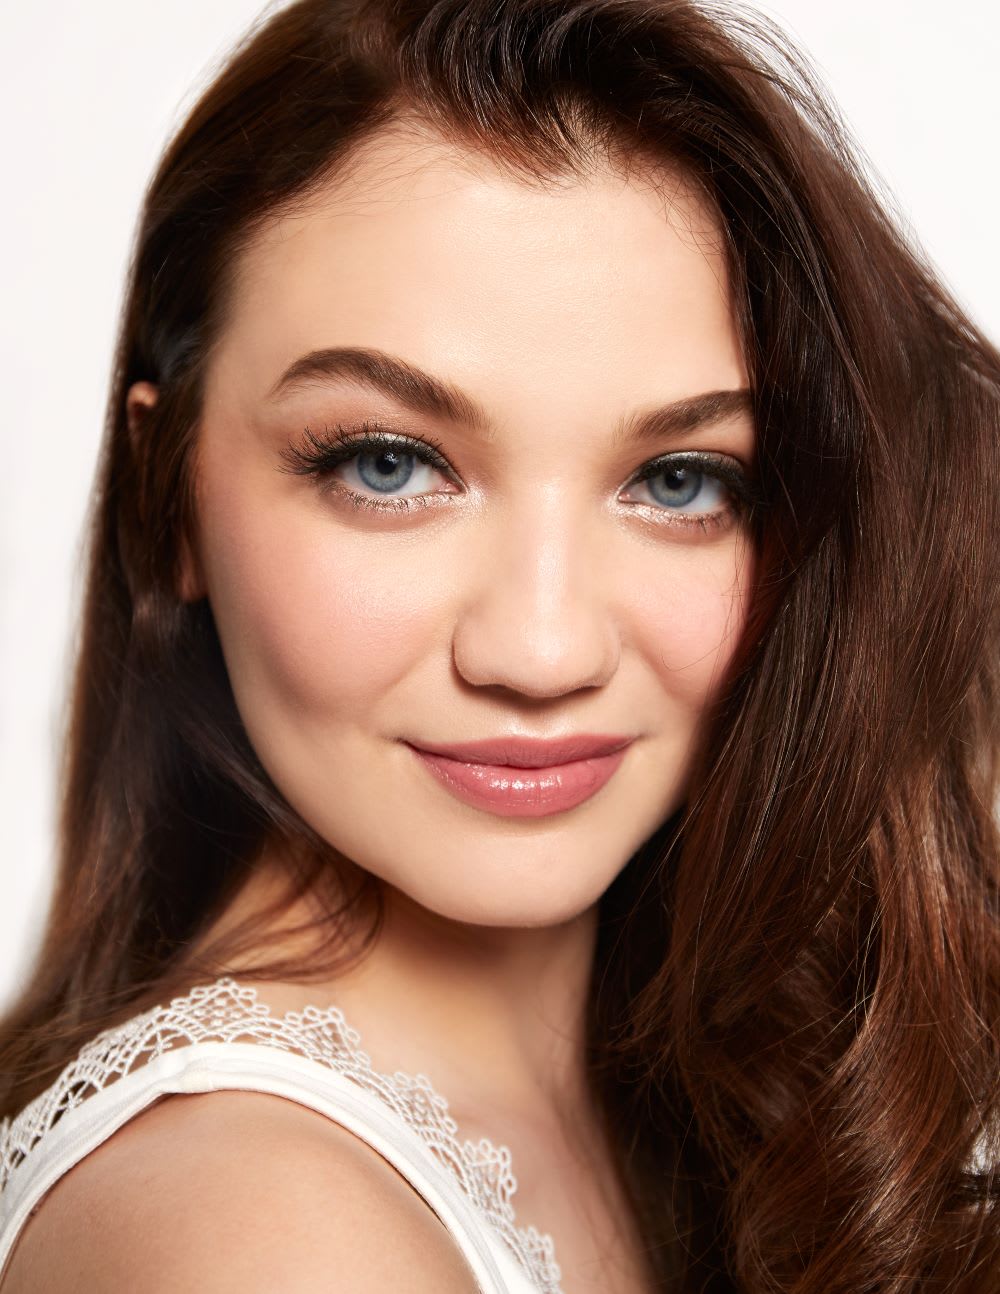
Full disclosure: This pretty, natural look was originally created as a natural makeup tutorial for weddings but it really works for everything from date nights to graduation photos. Since many nuptials are being downsized and DIY’d, or postponed, you’ve got the option to take this lovely look for a spin now and later. Because why wait?
Scroll on for step-by-step instructions, as well as a video of this would-be wedding makeup tutorial!
Skin Prep:
Step 1: I always start with a mild exfoliant to help prep skin for makeup. My favorite are Peter Thomas Roth Firming Peeling Gel, Charlotte Tilbury Goddess Clay Mask and Tatcha Violet- C Radiant Face mask. These masks are quick and make the most difference while applying makeup. Always patch test in your inner forearm to make sure you’re not allergic to any ingredients.
Step 2: Moisturize with your regular moisturizer–the one your skin is used to. A change in moisturizer might affect the skin. If your dermatologist has recommended one, please continue with that.
Step 3: Priming the skin before is crucial if you’re using this look as a wedding makeup tutorial–we want the makeup to stay all day. My go-to’s are Hourglass No. 28 Primer (for dry skin), Hourglass Mineral Veil Primer (for normal to oily skin), and Lancome LA Base Pro Perfecting Makeup Primer (for those who have visible pores).
Pretty Natural Makeup Tutorial:
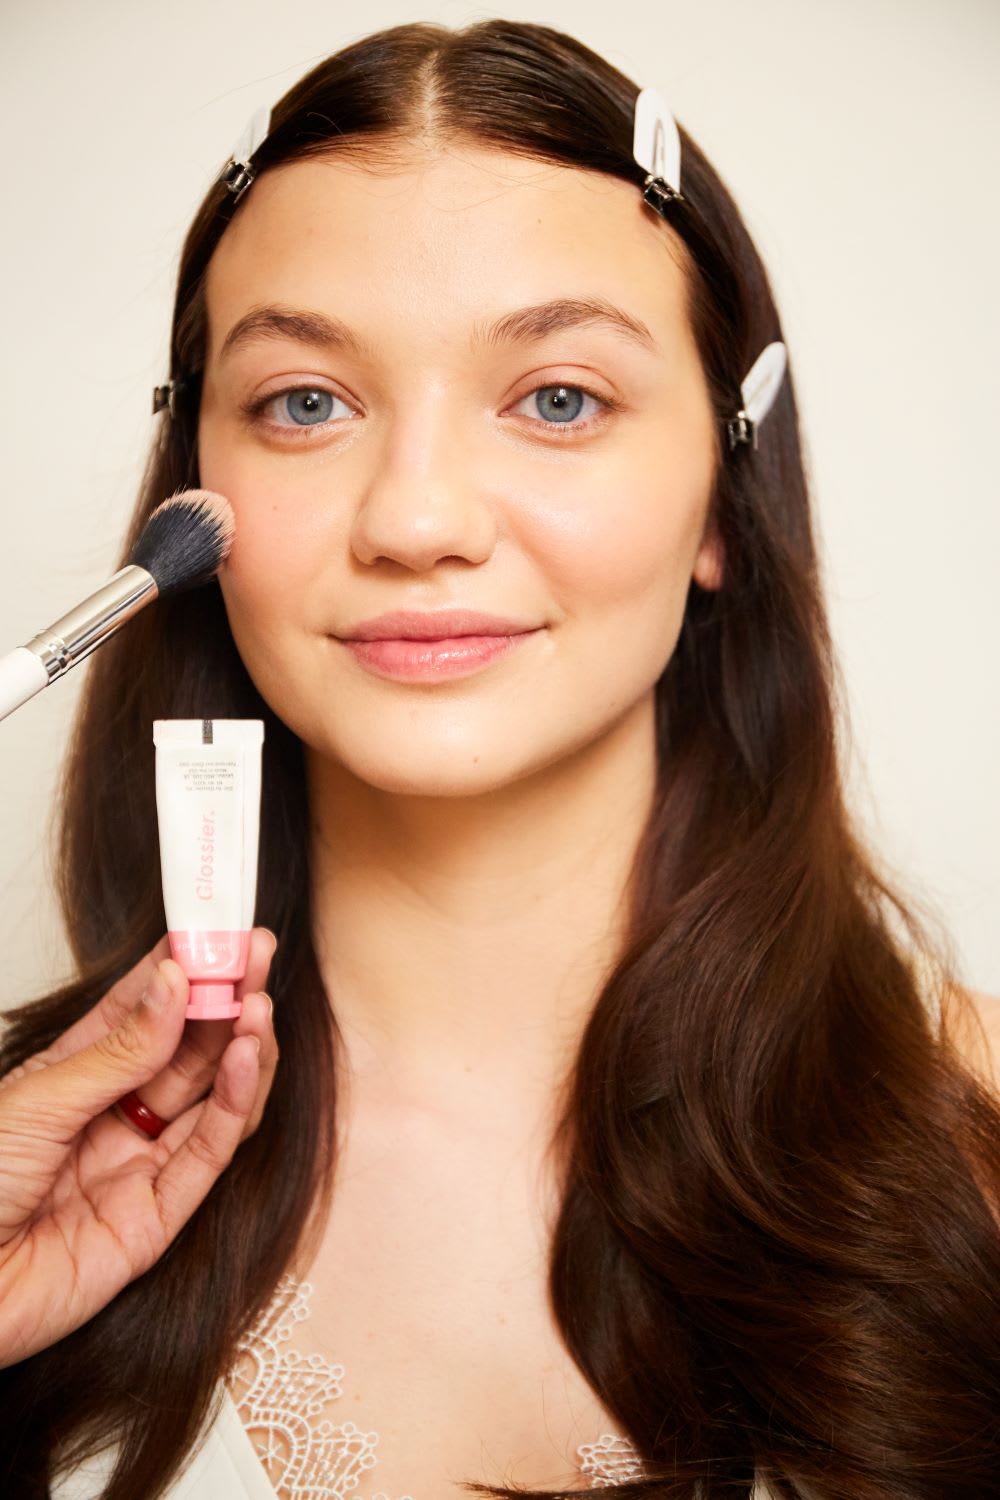
Step 4: Perfect skin with a foundation that works with your skin. My favorites are Charlotte Tilbury Light Wonder Foundation, Nars Natural Radiant Longwear Foundation, and Tom Ford Traceless Foundation Stick. *The model is wearing Tom Ford. I usually conceal with a second layer of foundation where needed. This gives the most natural skin-like finish. If added coverage is needed I use the Nars Radiant Creamy concealer.
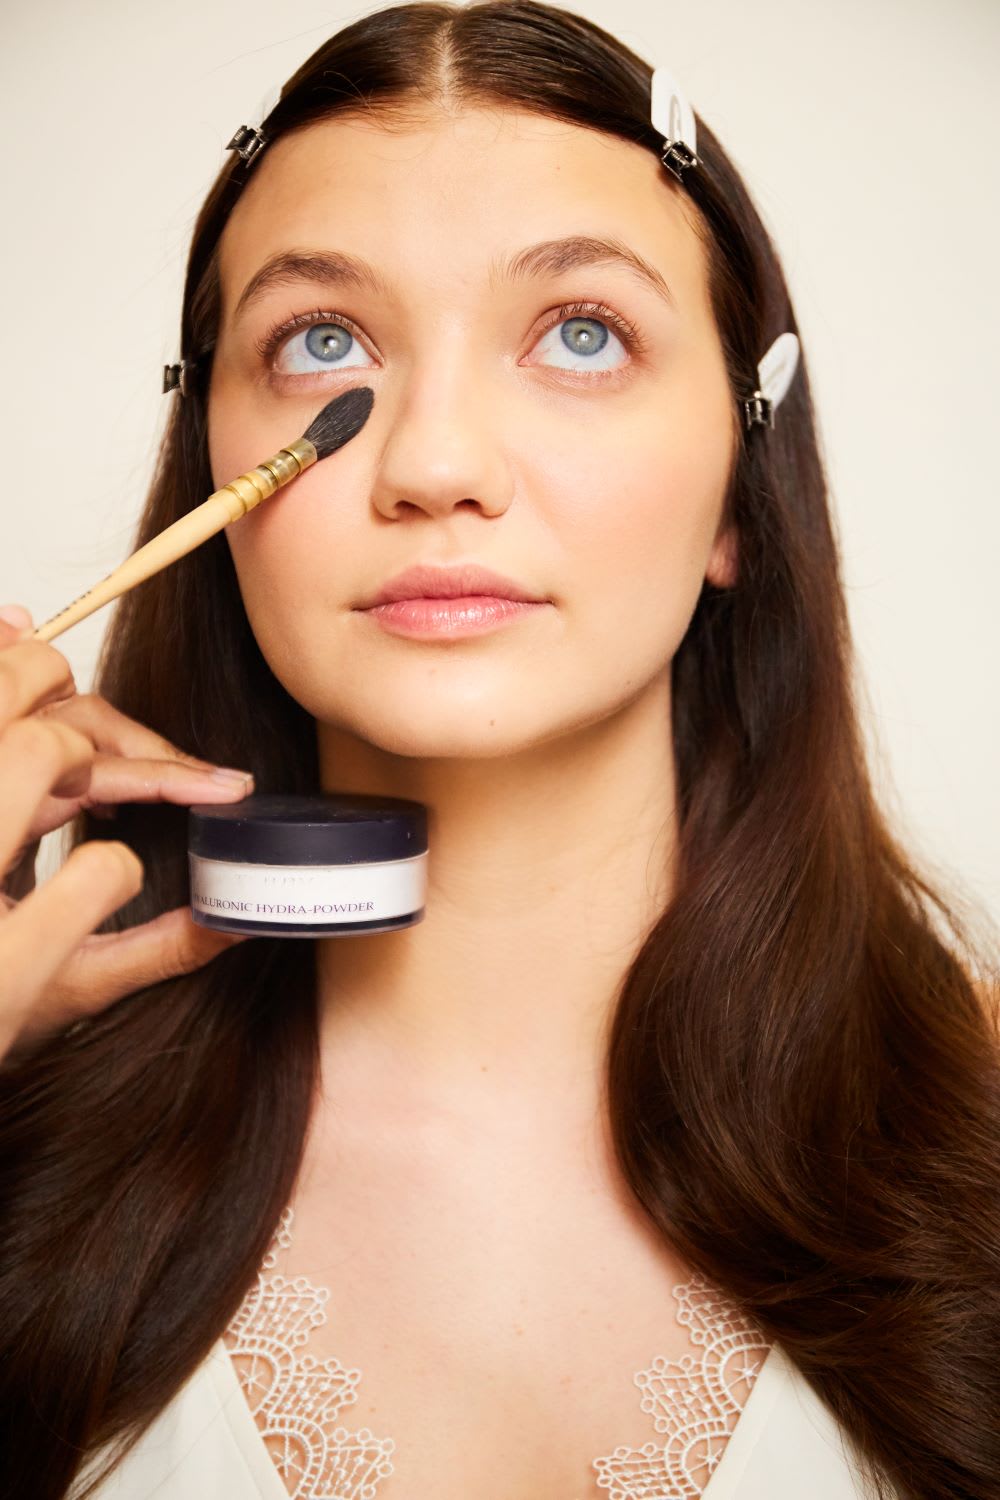
Step 5: Set the makeup with a translucent powder such as the By Terry Hyaluronic Powder or Laura Mercier Translucent Loose Setting powder.
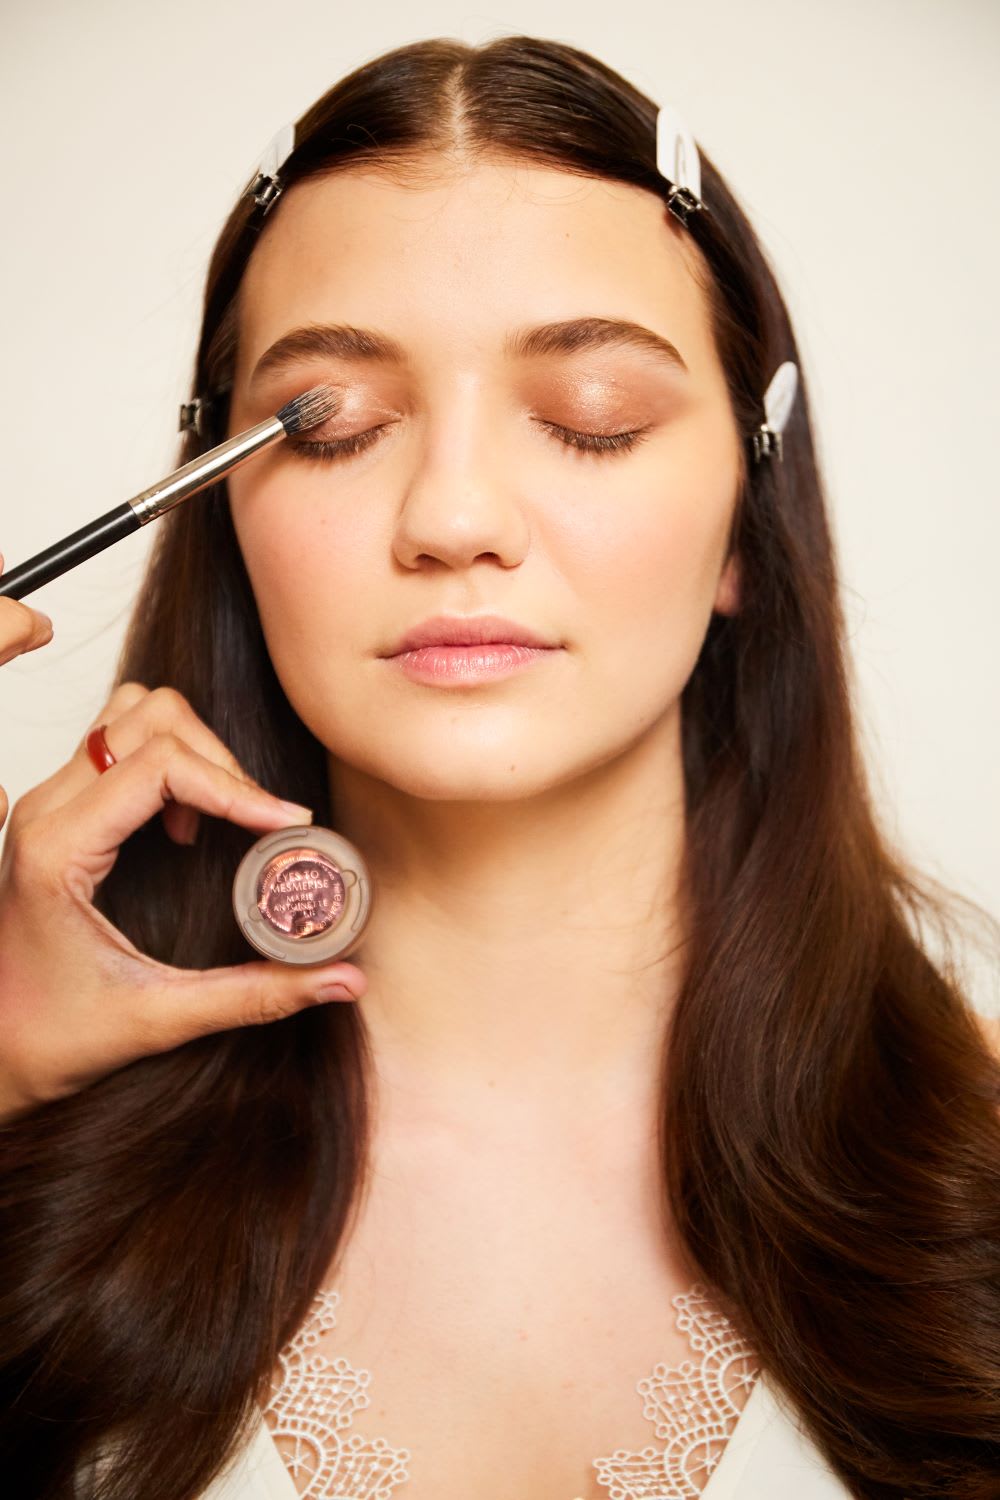
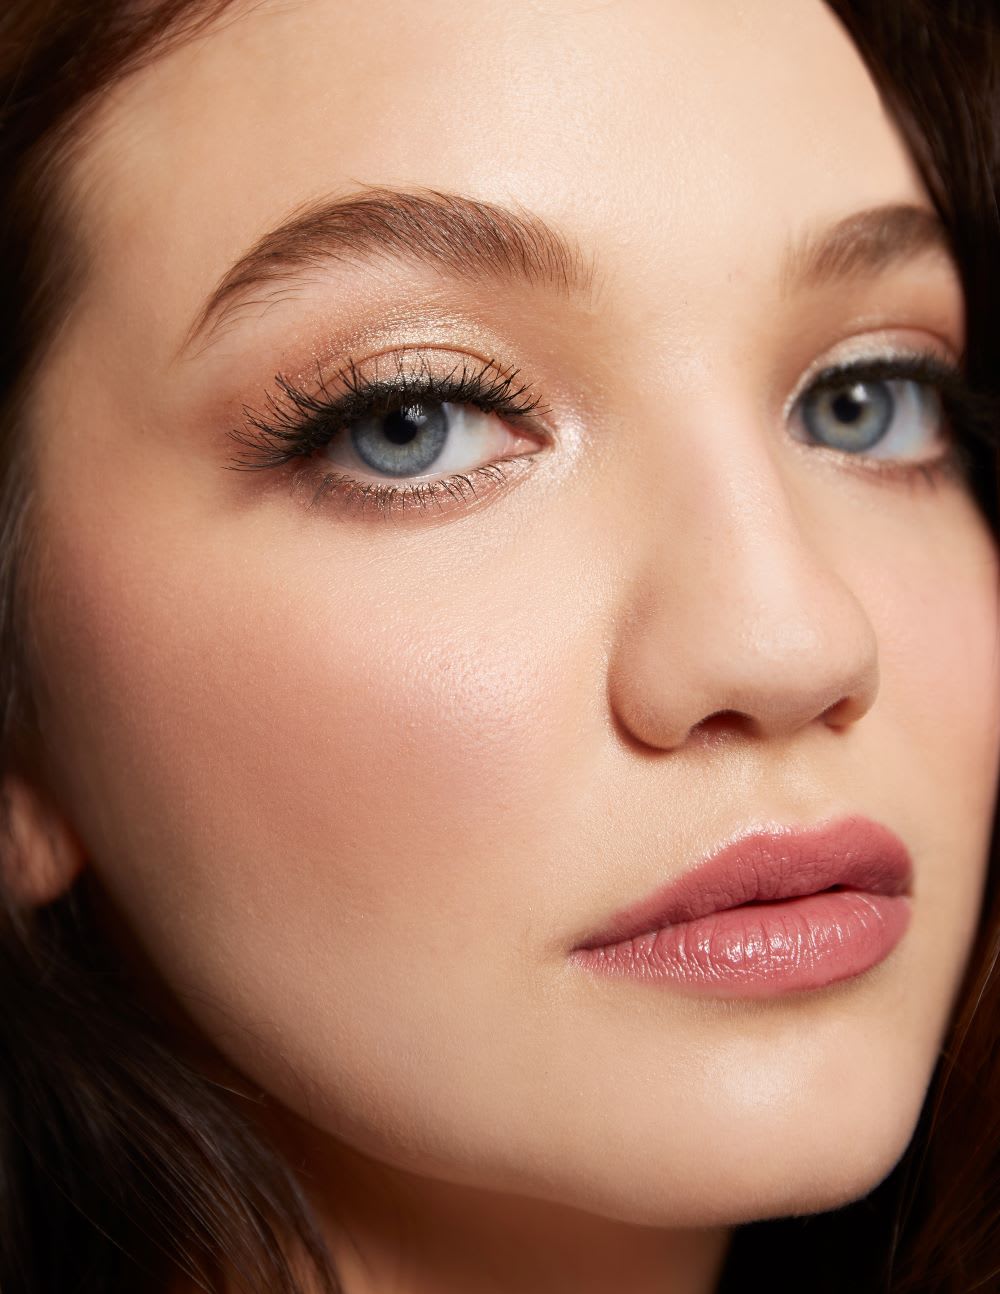
Step 6: Prep the eyelids with a cream eye shadow to give it an even base such as the Charlotte Tilbury Eyes to Mesmerize. Here, I have used the shade Marie Antoinette.
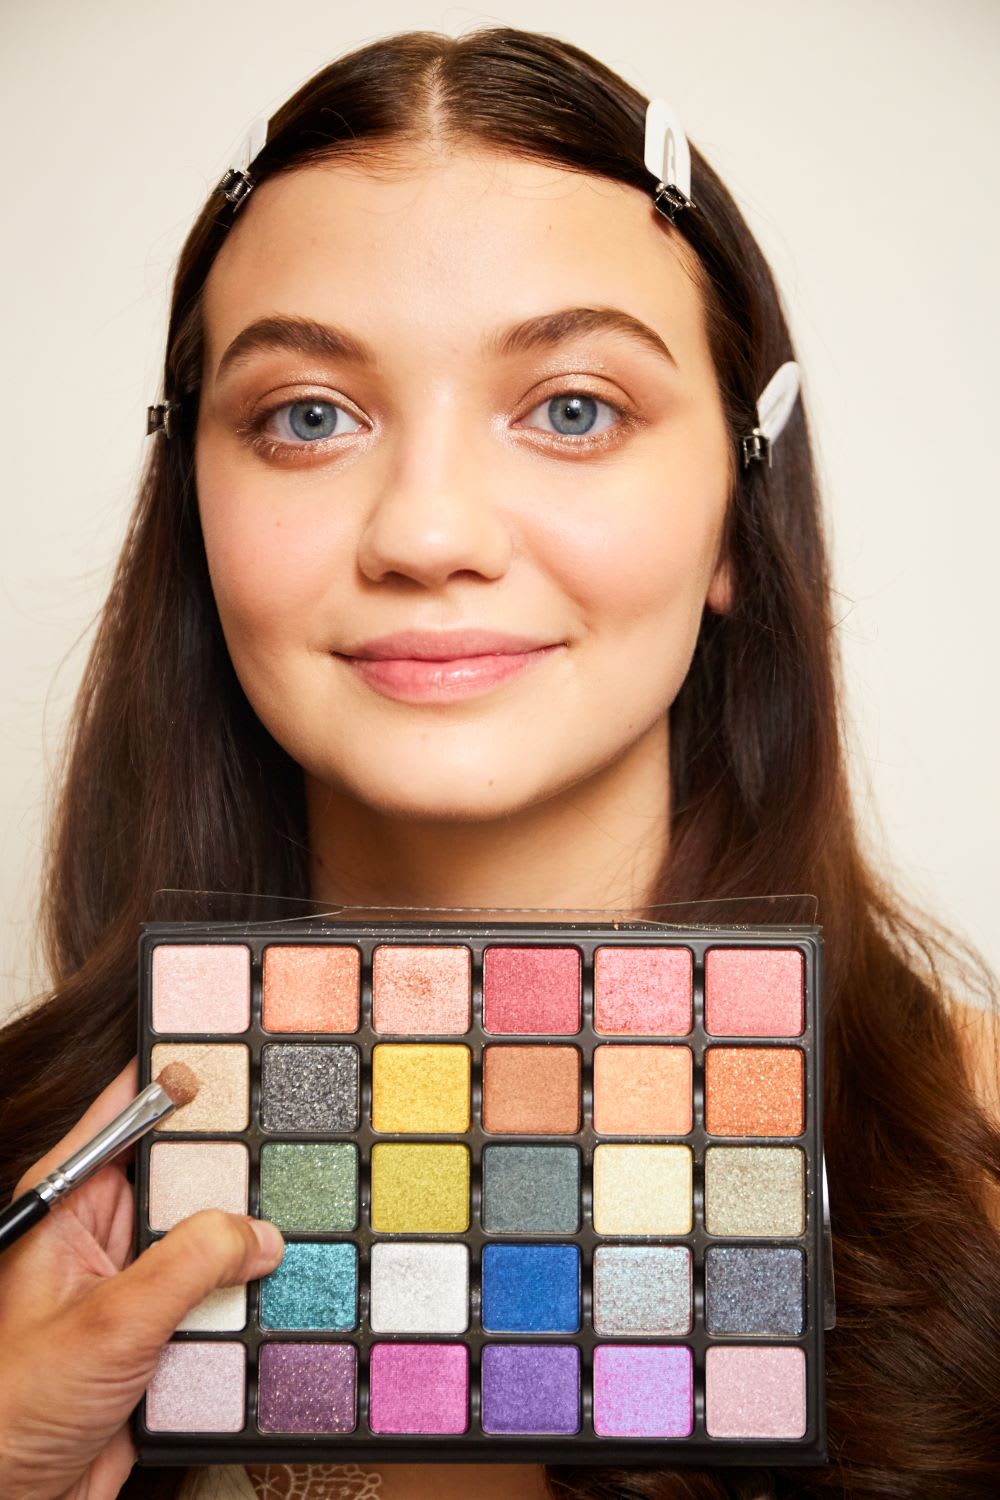
Step 7: Using a similar shade, set the cream eyeshadow with a powder. This ensures longevity. Here, I used Viseart Grande Pro Vol 2 Eyeshadow Palette.
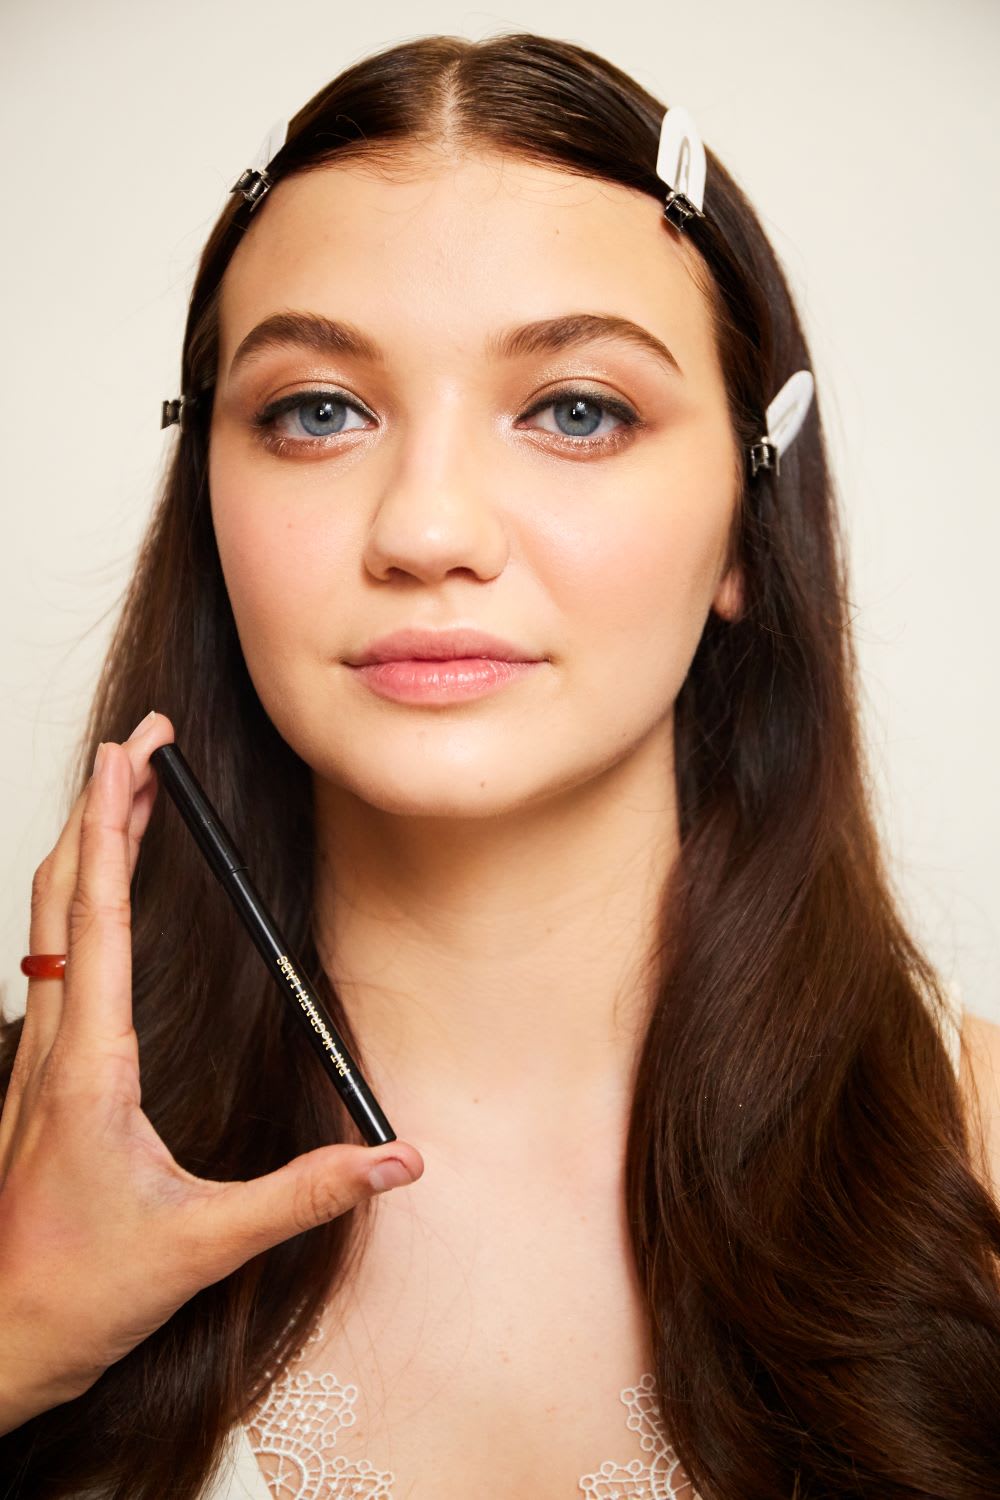
Step 8: Line the eyes with a deep brown or black eyeliner such as the Charlotte Tilbury Rock ‘N’ Kohl Eyeliner Pencil in “Bedroom Black”. This pencil does not smudge and its intensity lasts all through.
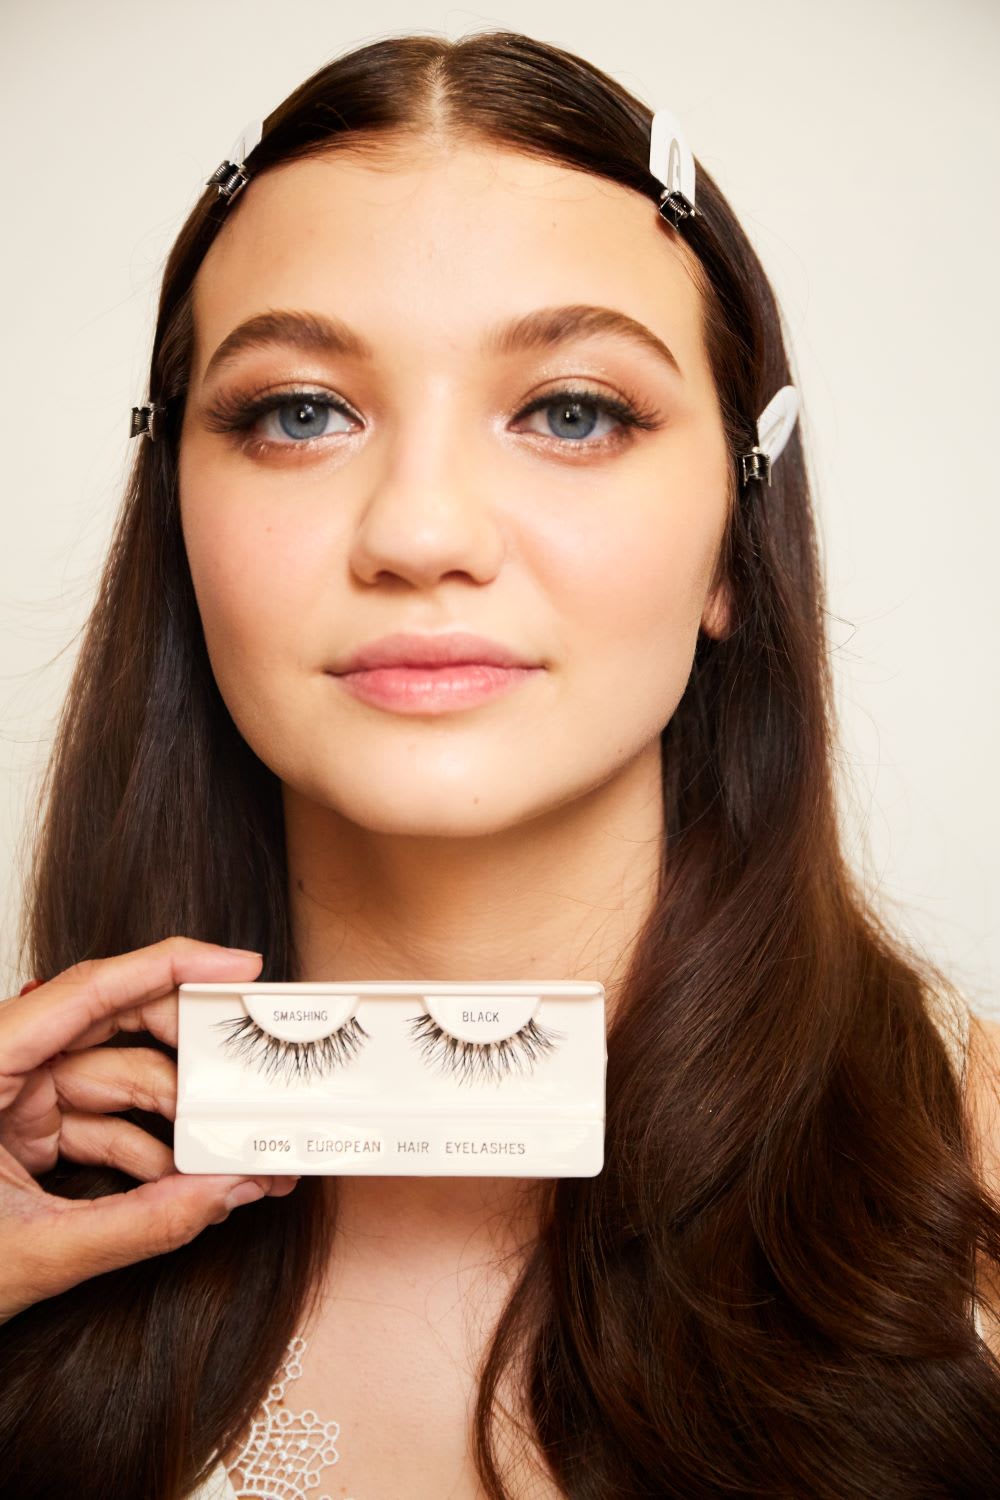
Step 9: Add lashings of your favorite waterproof mascara along with false lashes. Fill in your brows with a powder for a more natural finish and set it in place with a clear brow gel.
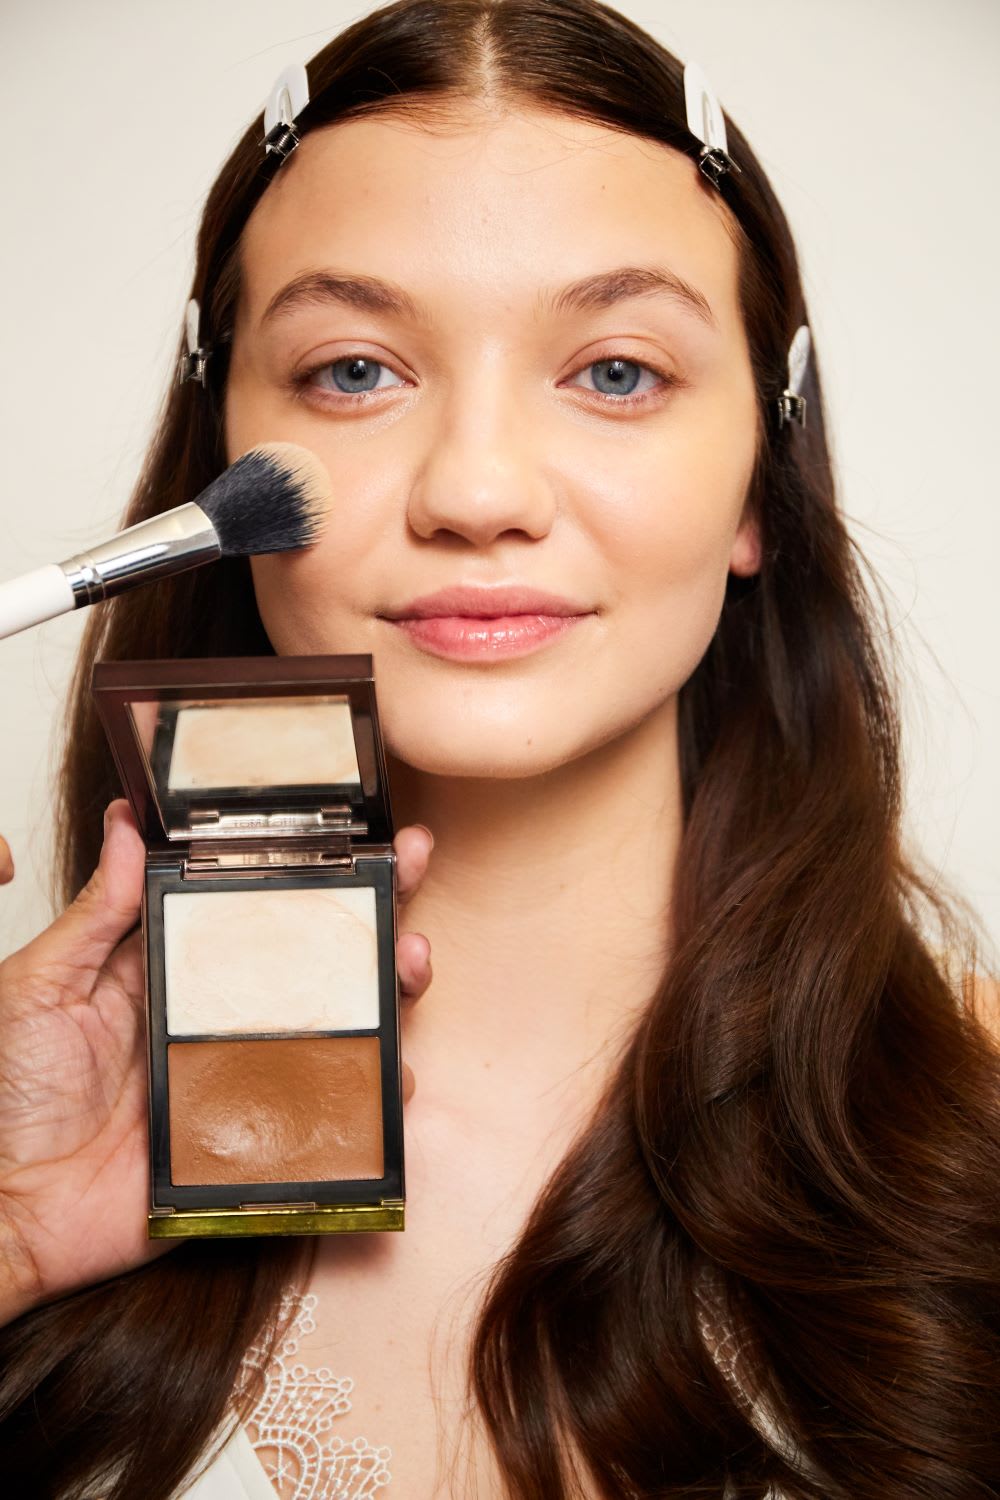
Step 10: Add dimensions to your face by bronzing and sculpting. Here I’ve used my favorite Tom Ford Shade and Illuminate Palette in Intensity 1.
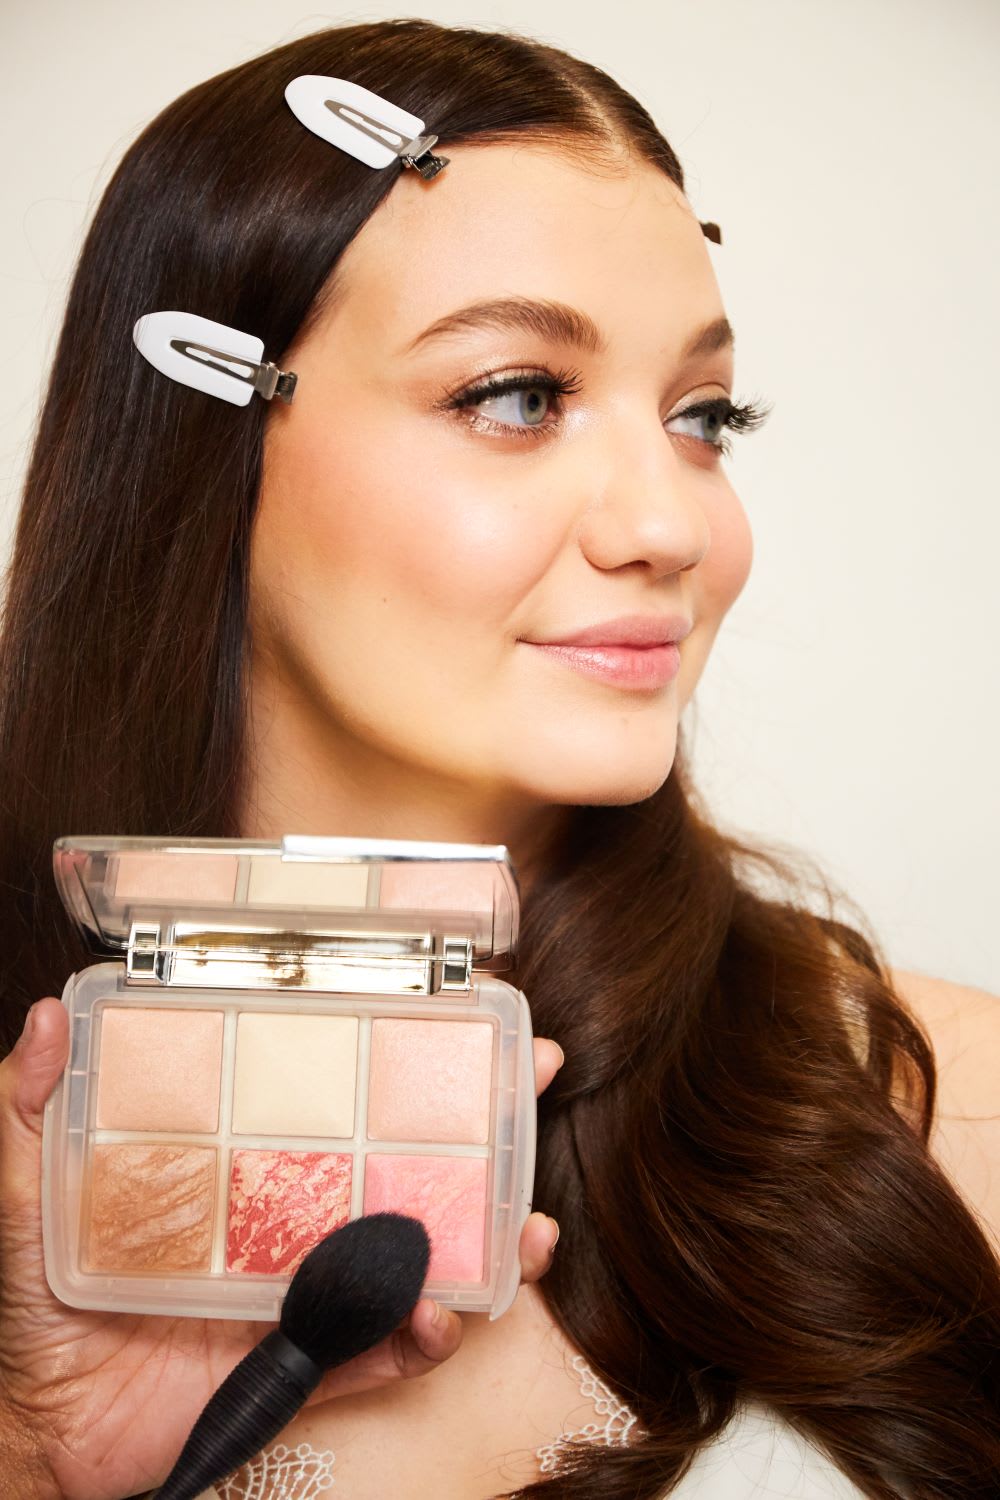
Step 11: Adding a flush of blush is a must. This brings back color and gives you a youthful glow. Pick a shade of pink like the color in the Hourglass Ambient Lighting Edit Ghost.

Step 12: Kissable lips are your natural lip color but a couple of shades deeper. This defines the lip and looks fantastic in pictures. On our model, Lexie, I have used Charlotte Tilbury lip pencil and lipstick in “Pillowtalk” topped with a clear gloss.
See the full wedding makeup tutorial video here!
Sadhvi Babu is a New York City-based professional makeup artist whose work includes editorials, fashion photoshoots, shows, and lookbooks.
(Images and Video via Ramon Martinez; Additional copy by Rachel Aschenbrand-Robinson)
Join The Conversation (0)