Click to shop
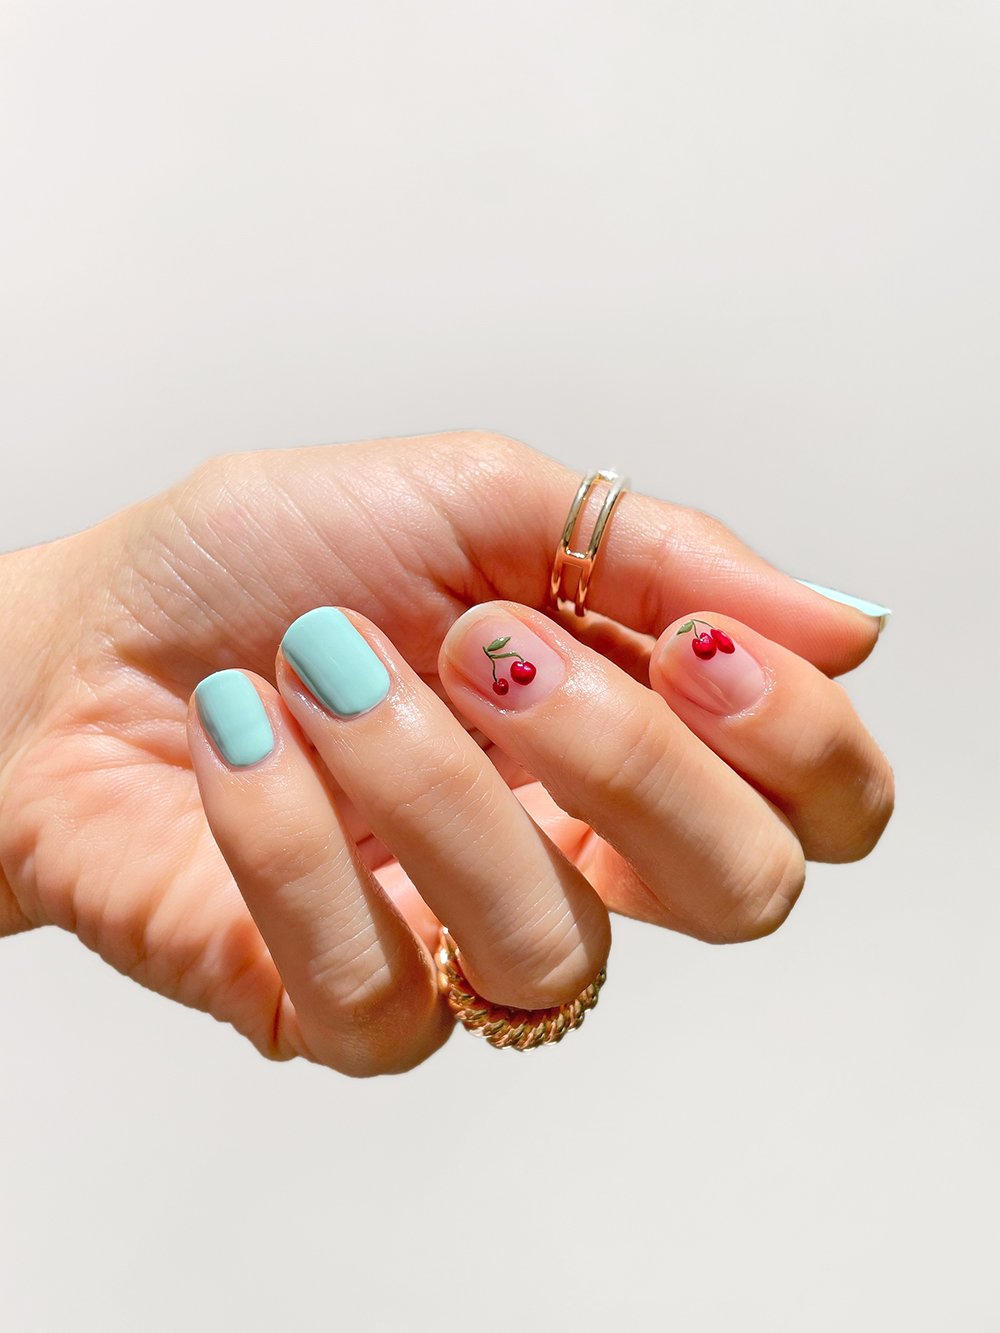
‘Tis the season for fun in the sun! This time of year is all about beach days, barbecues, pool parties, and picnics, and of course, the cute summer outfits that come with them–so why not accessorize with playful cherry nails? There’s nothing like fresh fruit straight from the farmer’s market in summer–and well, this chic, cheeky mani is basically the next best thing. Oh, and you can do it all yourself. Isn’t that just delicious?
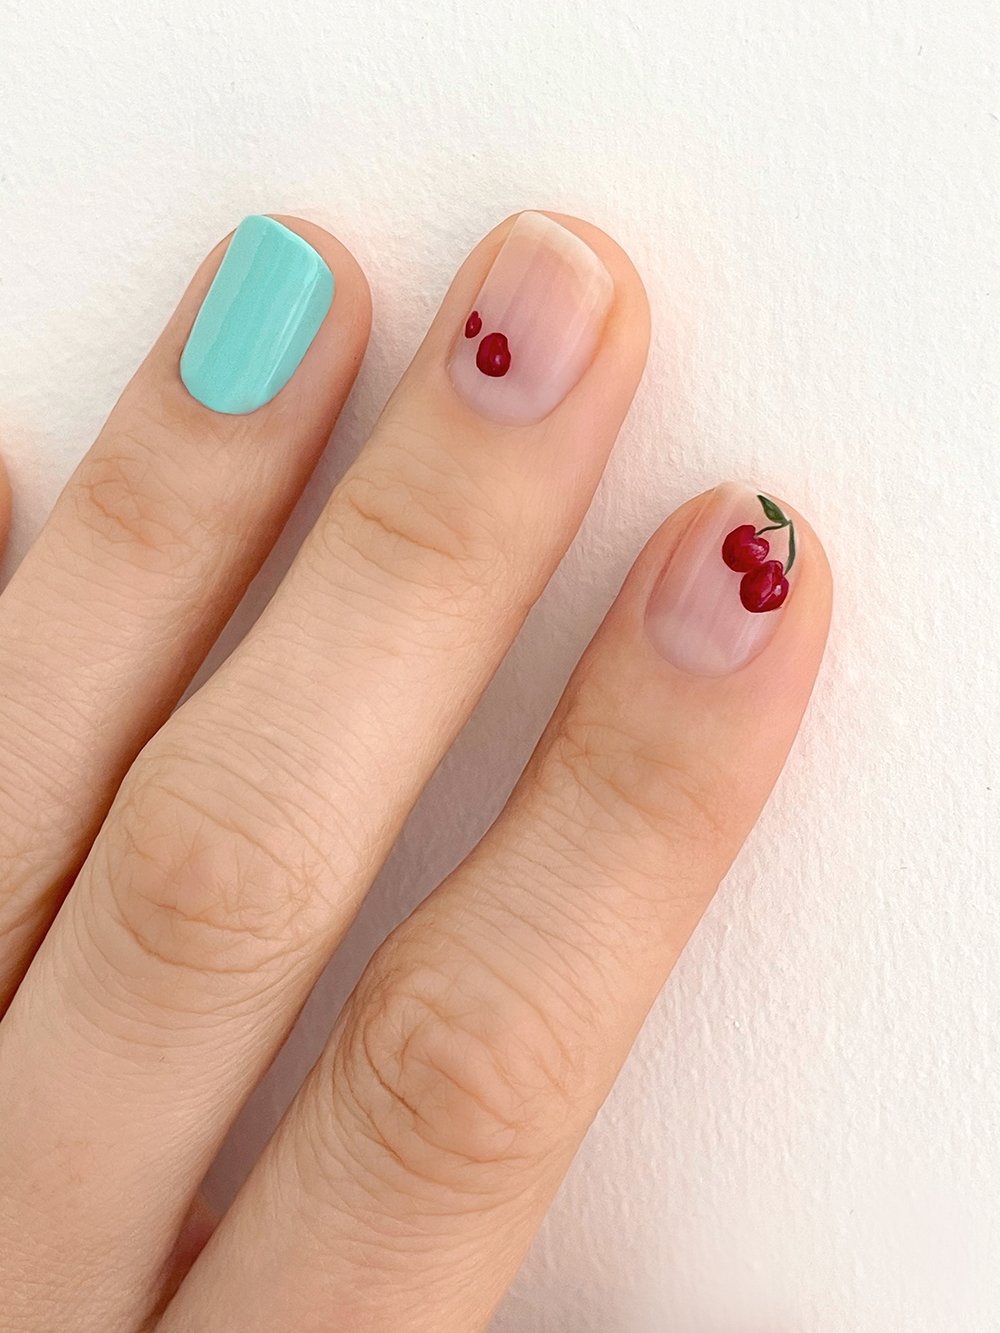
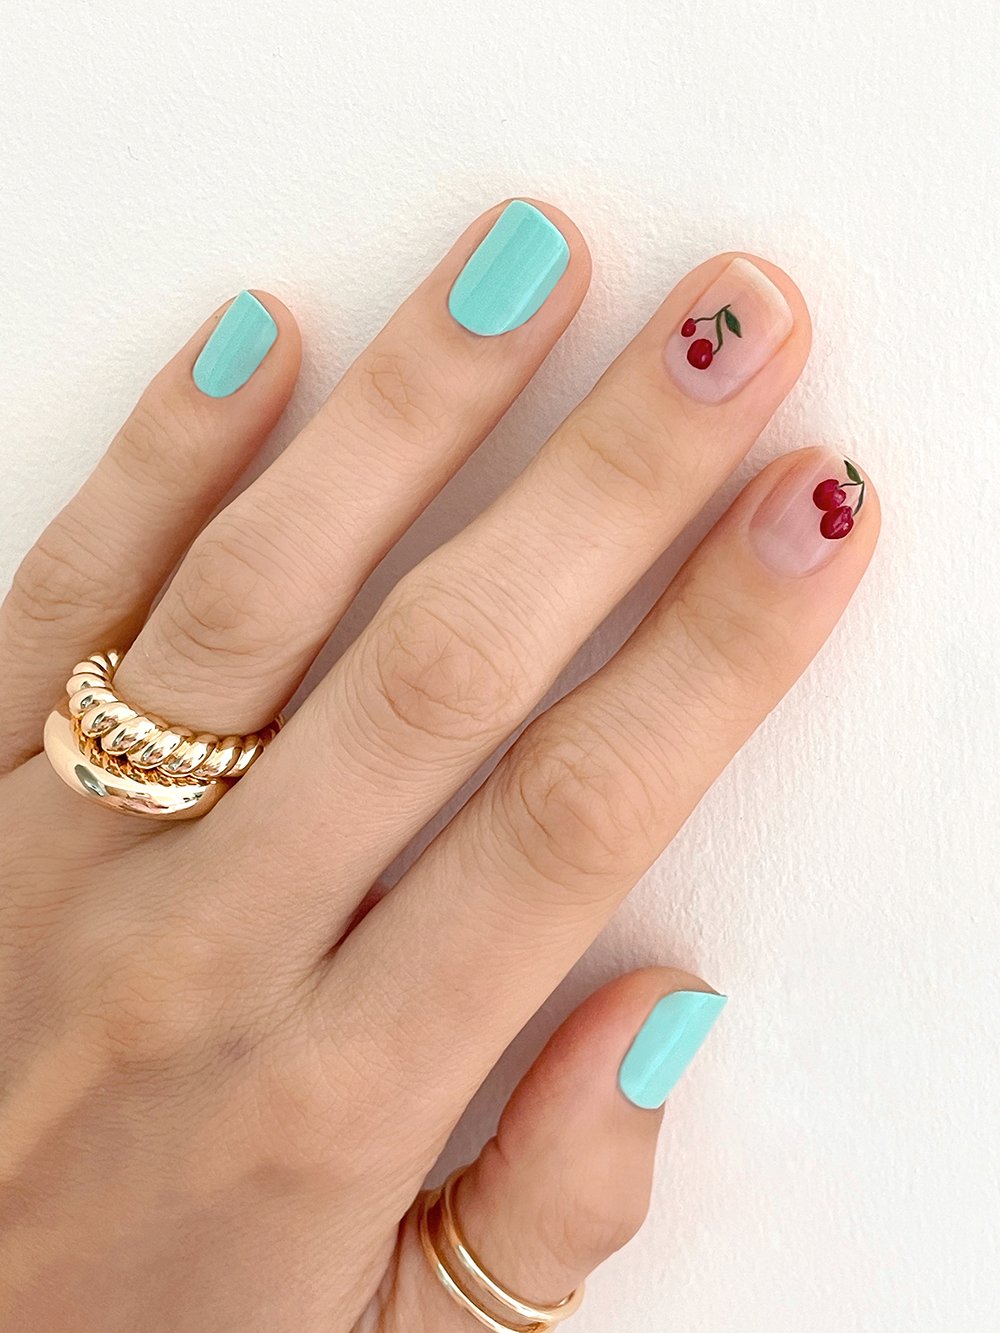
A cherry nail design gives instant sunny-day vibes, even when it’s cloudy out. And since cherries aren’t a super complicated shape to recreate, you can easily DIY this look. For an extra pop, I paired the juicy, red fruit motifs with solid light blue nails, one of the season’s top nail trends. The result: A complementary color combo that’s undeniably summer-ready. To see how to get this sweet look, scroll on for the complete tutorial and get ready to add more fun to any outfit.
How to DIY Cherry Nails:
Supplies:
- Light pink nail polish
- Light blue nail polish
- Red nail polish
- Wine red nail polish
- Ivory nail polish
- Green nail polish
- Top coat
- Detailer brush tool
Instructions:
Click to shop
Step 1: Start with clean, well-prepped nails. Tip: Make sure your nails are cleansed of any oils prior to starting to paint, this will ensure your polish lasts longer.
Click to shop
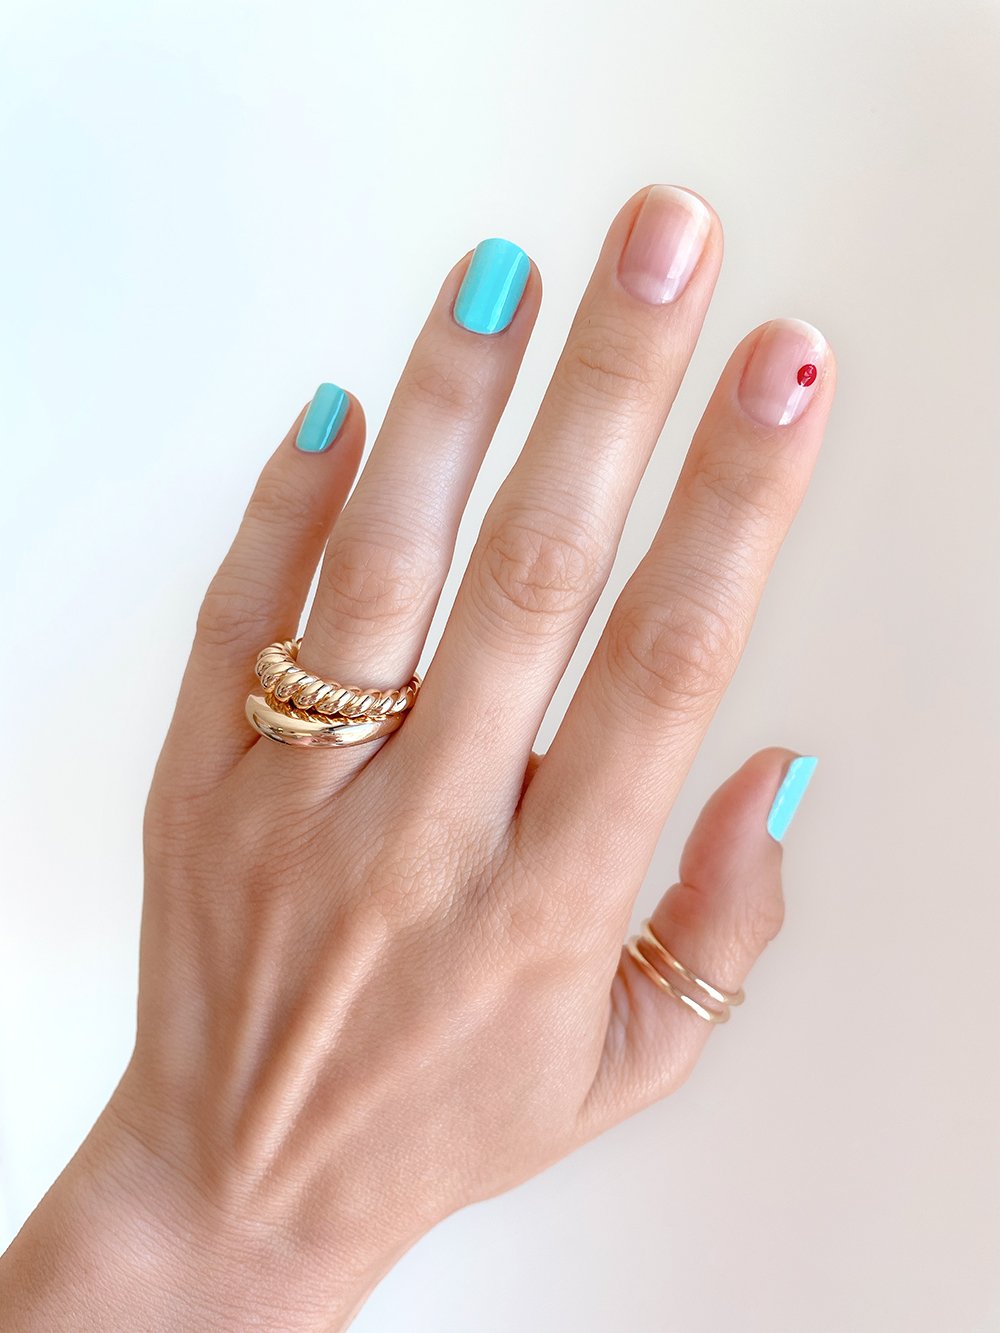
Step 2: Apply one coat of Essie ‘Sugar Daddy’ on your index nail and middle nail.
Click to shop
Step 3: Apply 2 coats of Essie ‘Bikini So Teeny’ on the rest of the nails. Tip: Pushing back your cuticles and buffing them will help you apply a smooth, clean finish at the base of your nails.
Click to shop
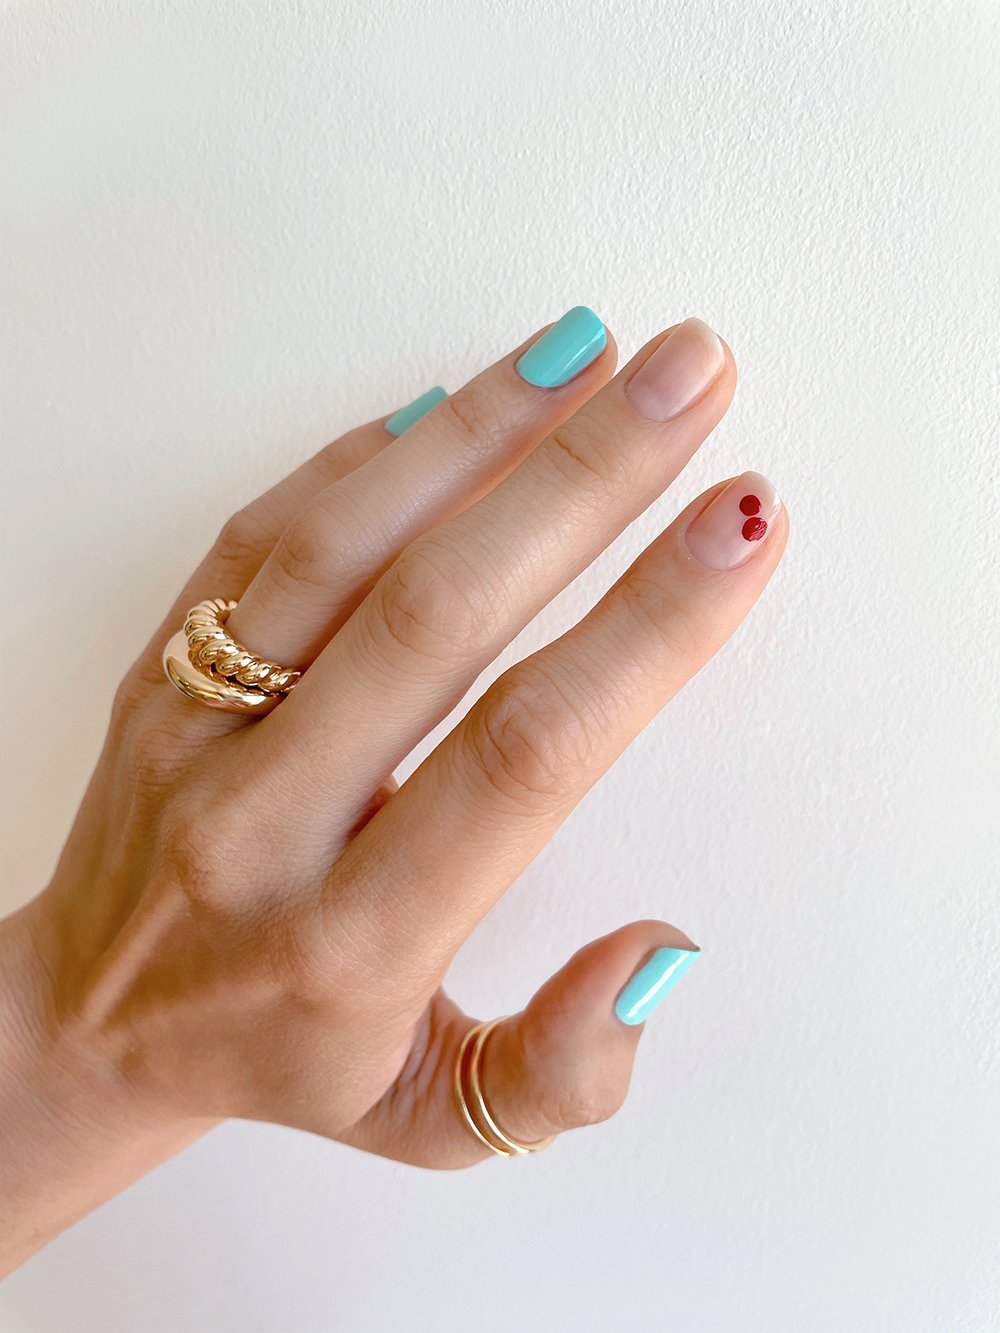
Step 4: Using a thin brush tool and Essie ‘Forever Yummy’ create a medium-sized circle at the top right corner of your index finger. Tip: Don’t worry about it being too perfect as cherries are all unique.
Click to shop
Step 5: Repeat by adding another circle, this time making it a bit smaller than your previous one.
Click to shop
Step 6: Now Repeat steps 4 and 5 on your middle finger, this time placing the cherries at the bottom left of your nail.
Click to shop
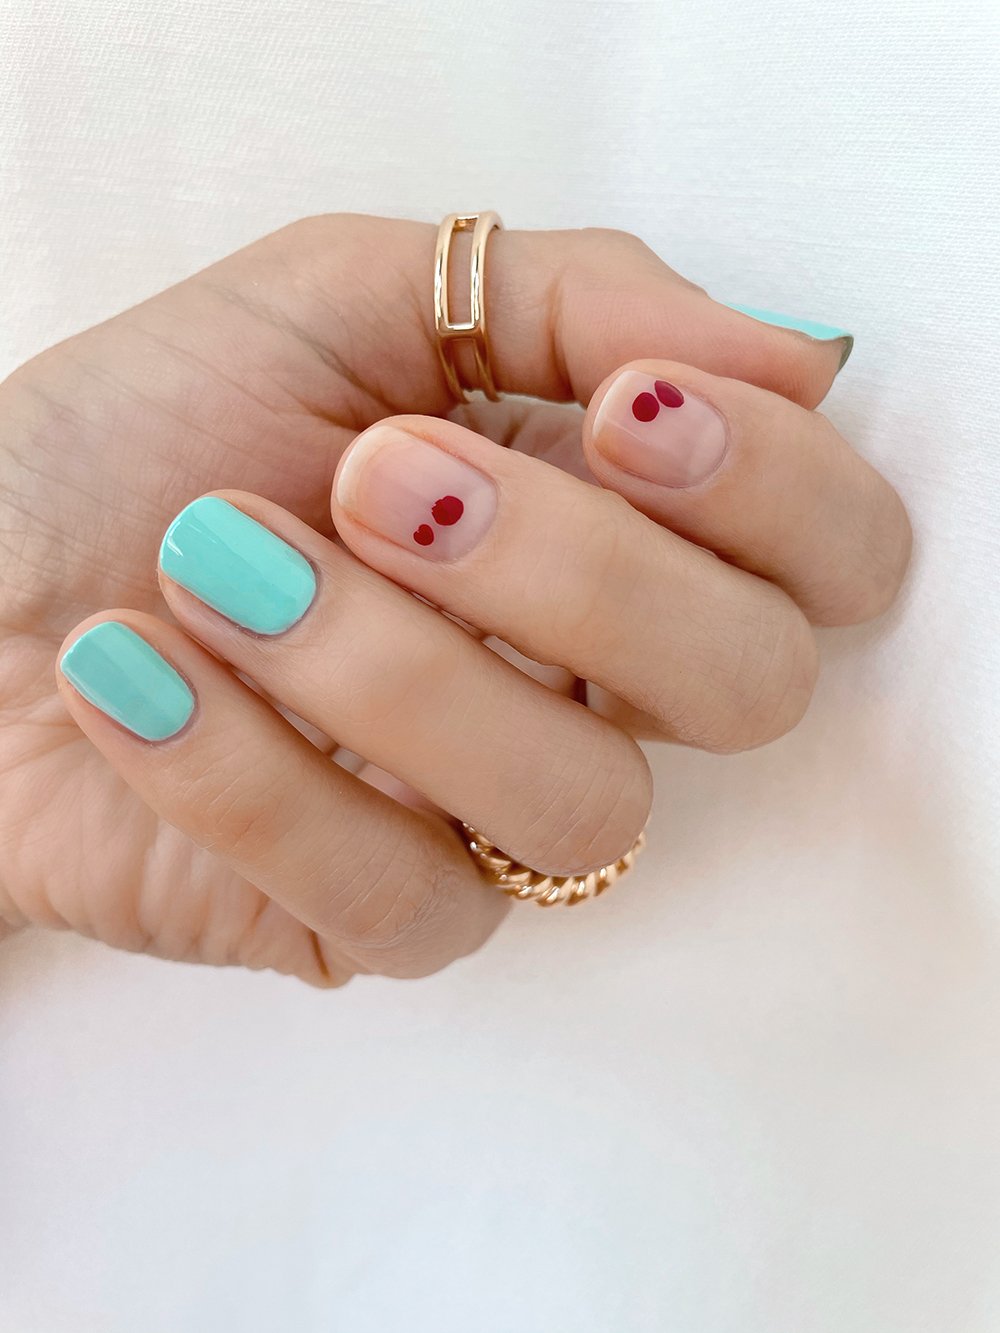
Step 7: Time to add more shape and definition: Using a thin brush tool and Essie ‘Bordeaux’ add two “humps” at the top of your circle and shade in around your cherries. Tip: To blend the shading, add a bit of base coat or top coat (like Essie ‘Gel Couture’ top coat) using a thin brush tool.

Click to shop
Step 8: Using a short detailer brush and Essie ‘Pre-Show Jitters‘ apply one or two brush strokes to the top right corners of your cherries. This will add a bit of highlight to your cherries.Tip: You can reuse the blending technique with the base/top coat. Make sure you don’t over blend.

Click to shop
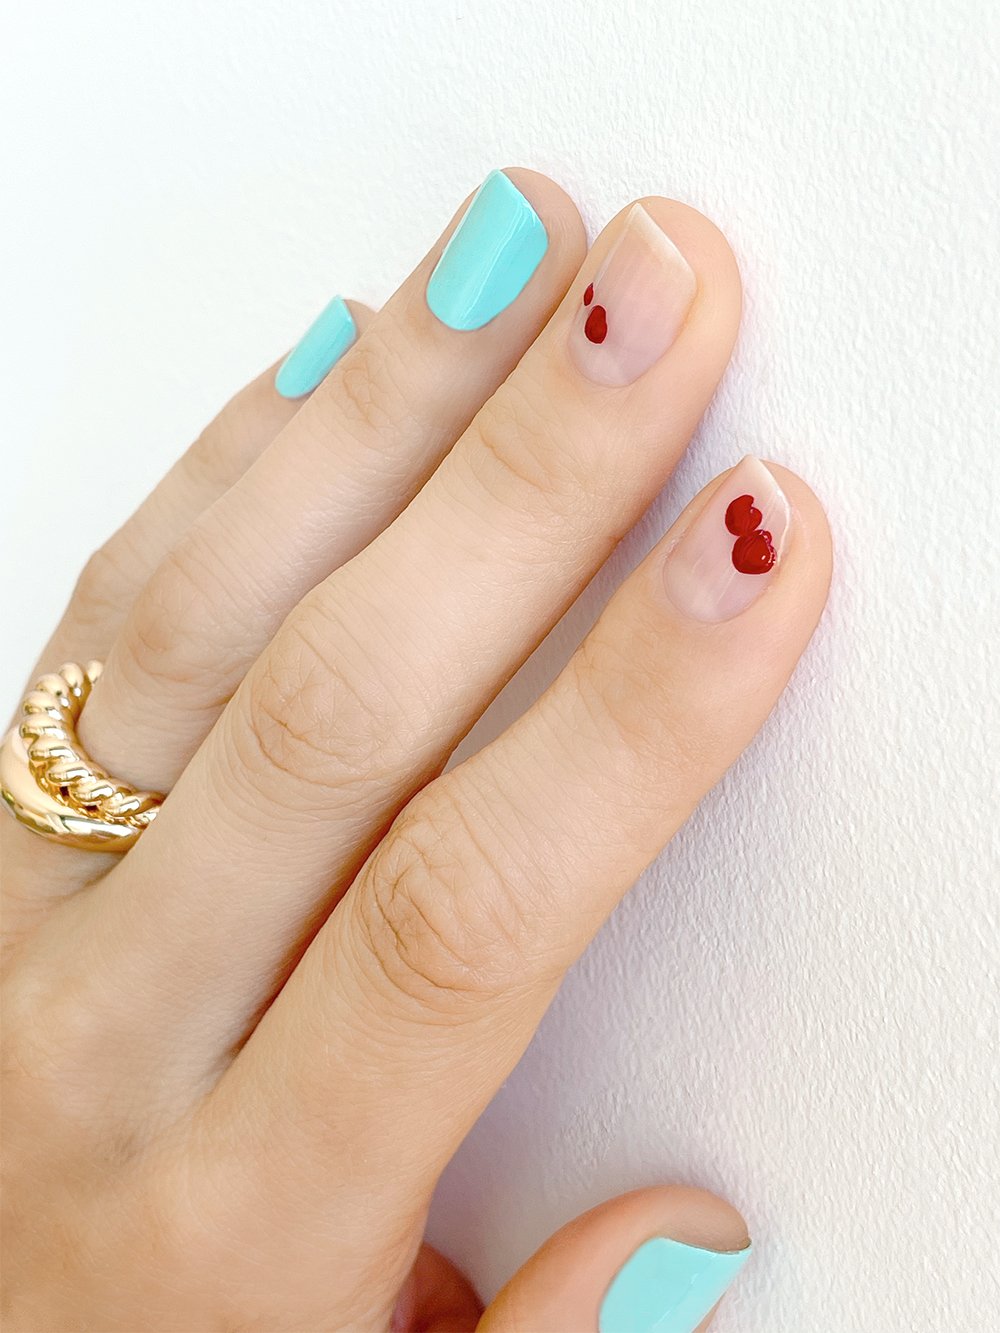
Step 9: Using a long detailer brush and Essie ‘Heart Of The Jungle’ add the stems to your cherries. Tip: Think of them as abnormal triangles.
Click to shop
Step 10: Time for some greenery: Create a little leaf coming out from the top left corner of your stems.
Click to shop
Step 11: Now repeat steps 7-10 on your middle nail.
Step 12: Apply top coat! Tip: When applying top coat on nail art I like to use a thicker top coat like Essie ‘Gel Setter’ this way the polish doesn’t bleed and mess up your crisp lines. If you are too scared to ruin your design with top coat you can opt out of this step!
Did you try this tutorial? Show us your sweet cherry nails on Instagram @lulus using #lovelulus and shop more fun summer outfit essentials in our Summer Fashion edit!
Additional copy by Rachel Aschenbrand-Robinson
Join The Conversation (0)