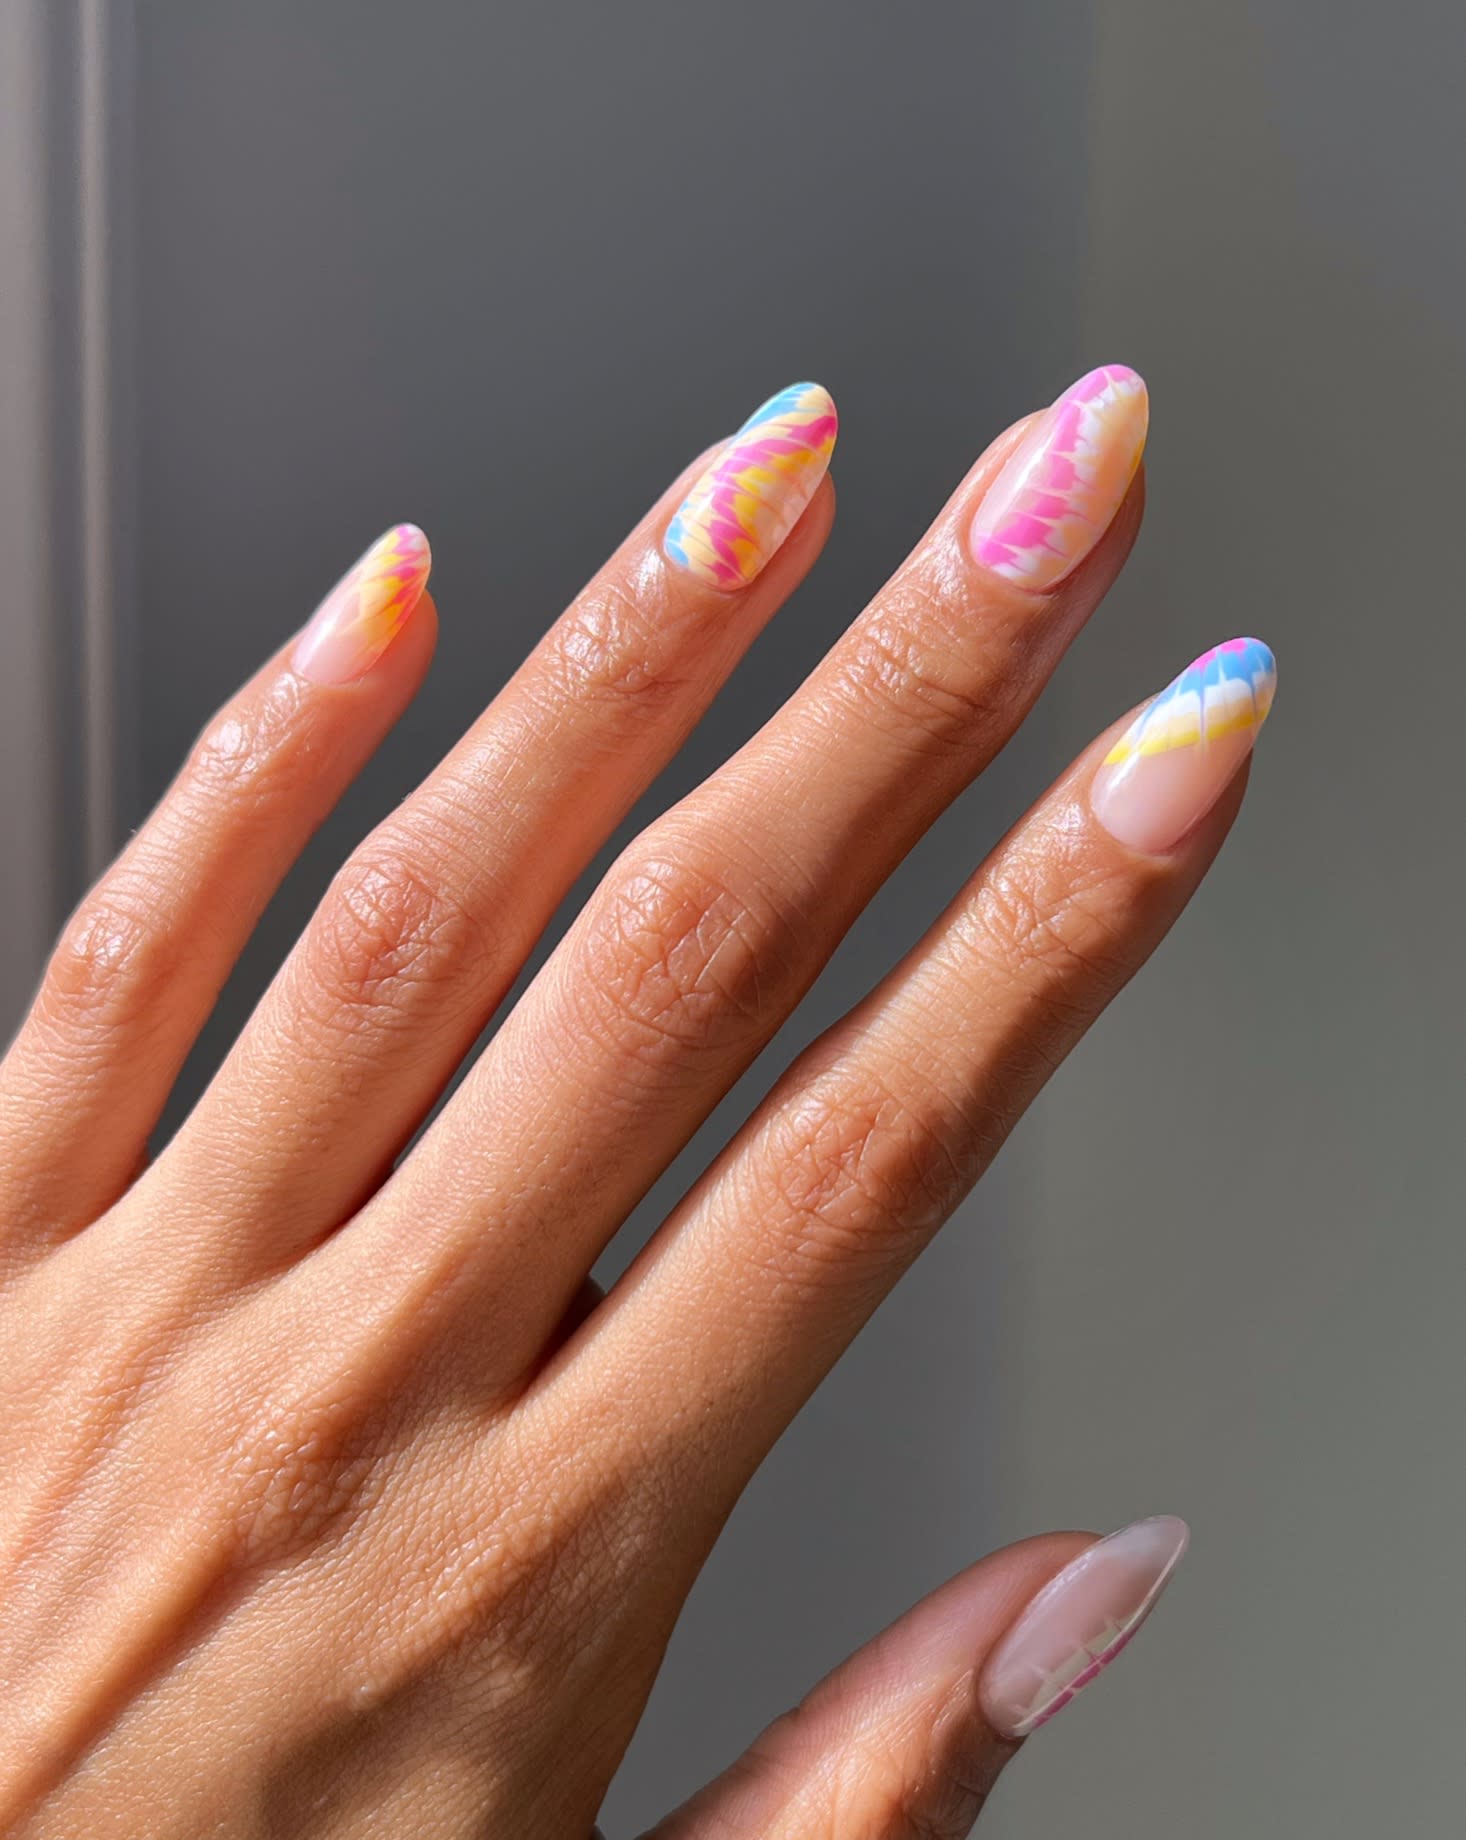
When I think about summer, I immediately think of music festivals, all-day pool parties, bright colors, and tie-dye everything. Tie-dye is a print that evokes sunshine and sandy beaches, and you can recreate this fun, colorful print on your nails with just a few tools.
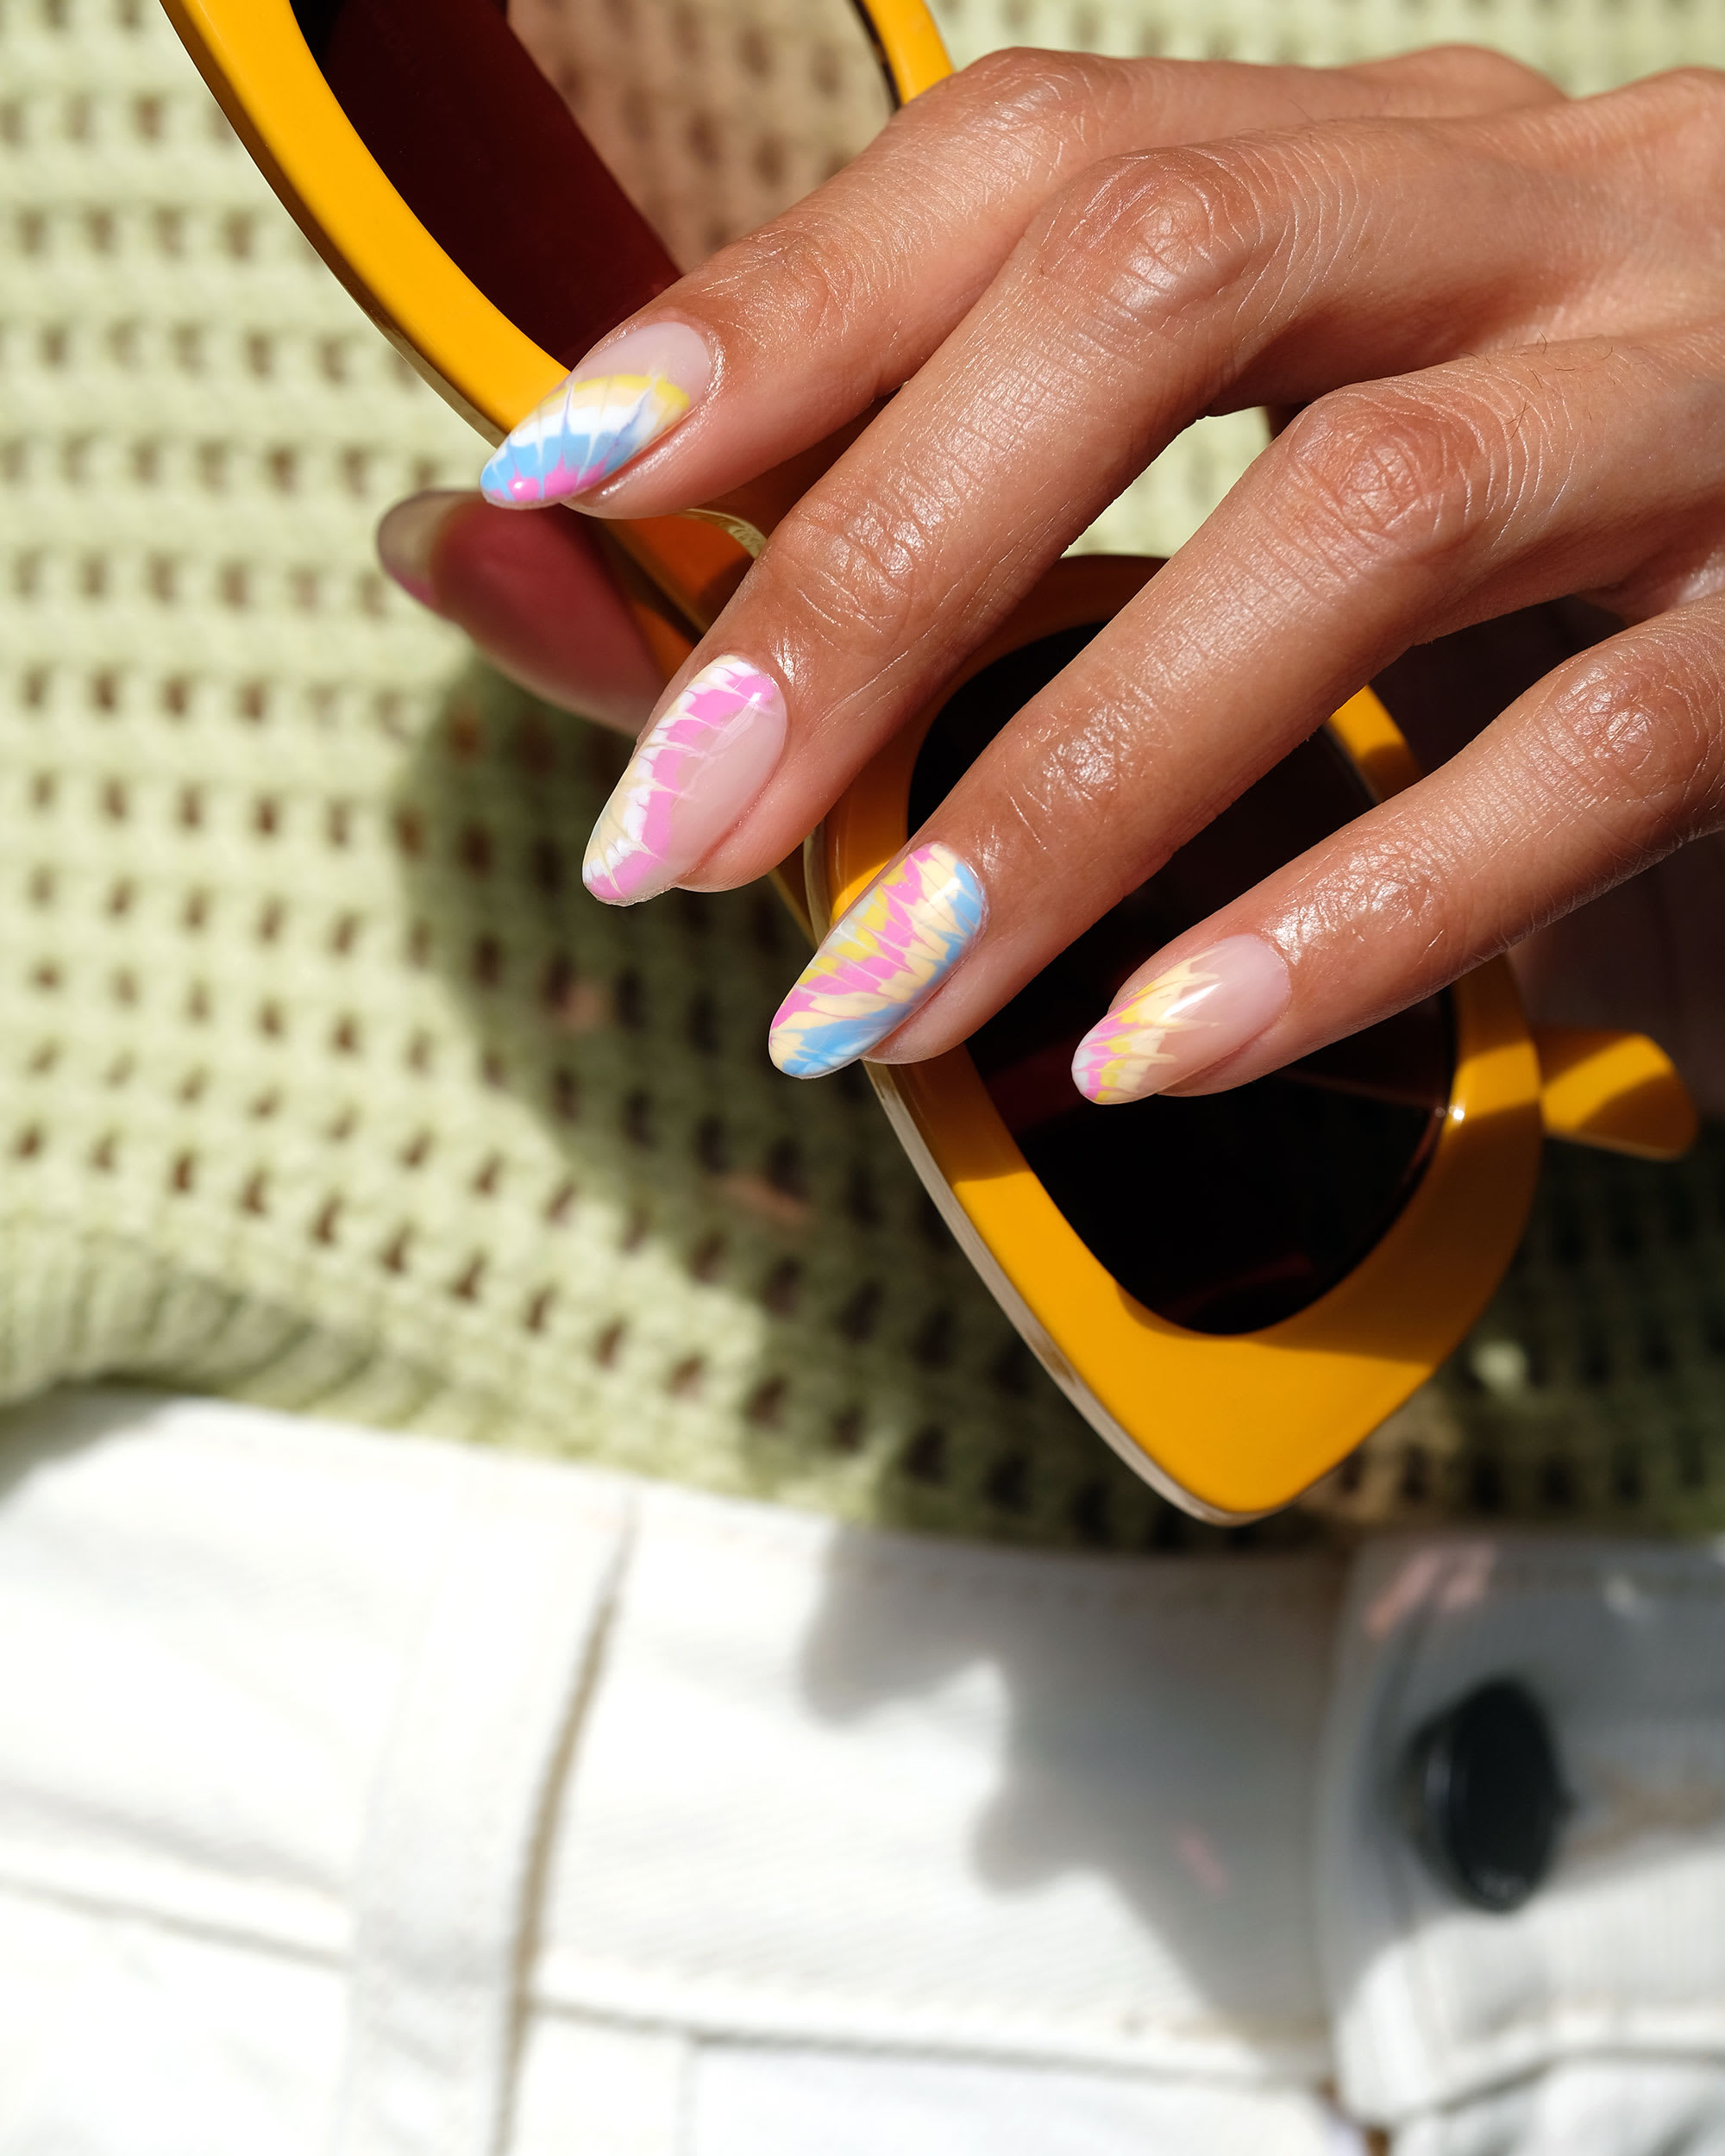
Mix and match colors to personalize your own look: You can go with really any color palette from pretty pastels to neutrals to bold neons. Whatever palette you decide on, this design is easy to personalize for your unique style. Scroll on to see what you’ll need to create this summer nail art design at home.
Tie-Dye Nail Design
Supplies:
- Base coat
- Sheer neutral nail polish
- Striping nail art brush
- Assortment of gel shades (here I used pink, white, peach, yellow, blue and mint)
- Glossy top coat
Instructions:
Step 1: To achieve this look we’ll be using gel polishes, and nail prep is essential for a long-lasting manicure. Make sure to clean up your cuticles and gently wipe each nail to get rid of any oils
so the gel polishes will adhere well.
Step 2: Apply 1 layer of base coat and cure.
Step 3: Next, apply 2-3 layers of sheer neutral polish; this will be your base color for the look. Make sure to cure each layer.
Step 4: Put a dot of each color of gel polish you plan to use on your palette, and grab your striping nail art brush. I find longer nail art brushes easier to use when creating long lines and swirls.
Step 5: Dip your nail art brush into your first color and create an organic swirling line – you can start with a simple curve, or half circle shape. You want the line to be slightly thicker so it still looks defined at the end of the design.
Step 6: Continue the same steps with different colors, following the same shape as your first line so it creates a rainbow effect.
Step 7: Next, with a clean brush you’ll drag your brush from the inside of your shape outwards, dragging it slightly past your first line. This will create the tie-dye effect. Repeat this step
several times, leaving space between each one.
Step 8: After cleaning your brush again, drag a line from the first line of the shape inwards so it’s going in the opposite direction.
Step 9: Cure your design. Then, repeat steps 5-9 on each nail, changing up the shape for each nail for some variation. Cure each nail once you finish the design.
Step 10: Top your manicure with a top coat and cure. Finish with cuticle oil.
Did you try this bright summer nail art? Show us your tie-dye nails on Instagram or TikTok @lulus using #lovelulus––and shop more in our Summer Fashion Shop!
Melanie Graves is a self-taught nail art enthusiast who loves to create colorful, easy DIY designs for the fellow home manicurist.
Join The Conversation (0)