
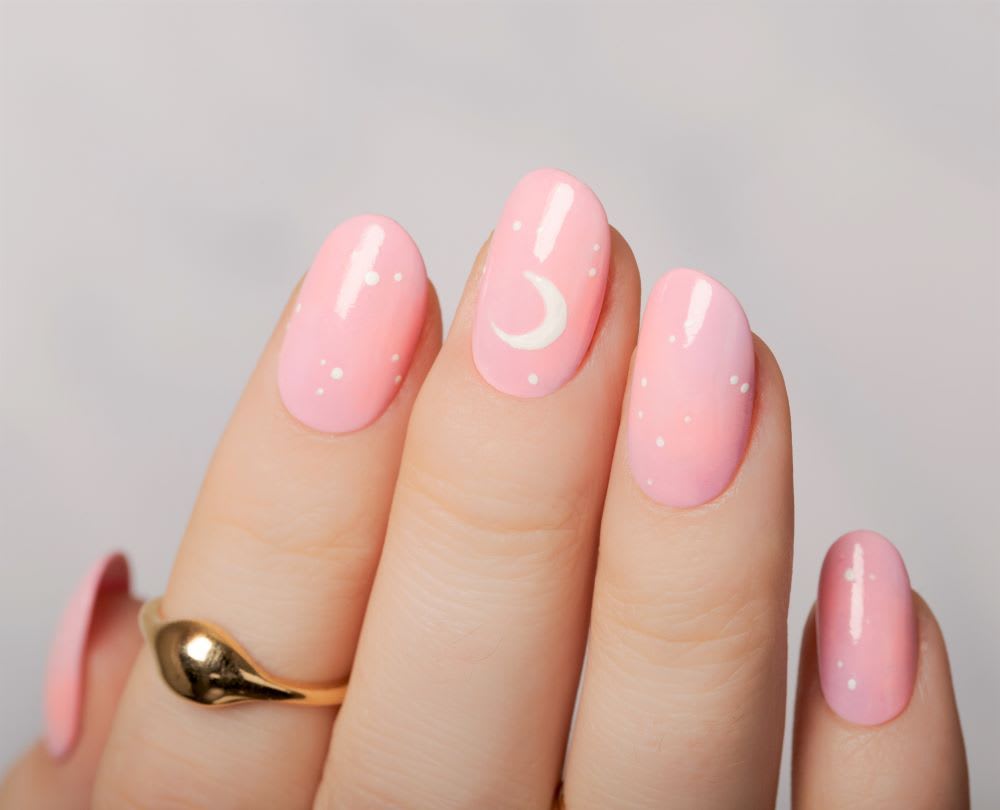
This super cute adaptation of an animated twilight sky has a fun mix of neons, pastels, and lunar designs. Shades of pink and purple make for a dreamy, springy background for the celestial design of these aesthetic nails, and the perfect way to welcome the season!

Who couldn’t use something cheerfully pretty to look at these days? Take a page out of the book of cutesy aesthetic style and try this mani for yourself. Here’s how to do it!
Night Sky Aesthetic Nails
Supplies:
- Wedge makeup sponges
- Neon pink nail polish (I used KB Shimmer “Pink or Swim” for this tutorial)
- Purple pastel nail polish (I used ButterLondon “English Lavender”)
- Pink pastel nail polish (I used OPI “Indefinitely Baby” )
- White nail polish or white acrylic paint
- Clear glossy top coat (I used OPI Top Coat for this tutorial)
Instructions:
Step 1: Clean and file nails to your desired shape. If desired, you can apply one coat of basecoat to each nail and let it dry for about three minutes.
Step 2: Using scotch tape, place about 2-3 pieces over the skin right next to your nail to create a shield made of tape around the nail. This creates a protective barrier over your skin that makes nail polish clean up super easy and fast.
Step 3: Take your makeup sponge and directly paint big blobs of random color all over the surface using your three chosen pastel and neon shades. (You can also use a pastel blue instead of pinks for a different ‘starry sky’ aesthetic look.)
Step 4: Once the surface of your makeup sponge is saturated with a mix of colors, press down gently on each nail to start creating your gradient color base.
Step 5: After stamping each finger with your makeup sponge once or twice, the color will be gone from the sponge and you will need to add more polish. Add your blobs of nail polish to the sponge in the same pattern as before, to help build up the layers of color in a consistent manner. It’s also a good idea to let your nails dry for about three minutes in between each layer of color you add from your makeup sponge.
Step 6: Repeat steps 3-4 about four times, or however long it takes to get to your desired level of color intensity. For the manicure as shown in the photos, I applied the sponge to each nail for about five rounds.
Step 7: Immediately peel off the tape to clean off any polish outside the nail. You may also need to use a q-tip dipped in polish remover to clean up any mistakes. At this time, you can seal your gradient design with a very thin coat of top coat.
Step 8: Let your nails dry for about five minutes and prepare a thin paintbrush and white paint. White acrylic paint is much more useful for this design, as any mistakes can be wiped up with alcohol, leaving your pretty gradient base intact. White acrylic paint also takes much longer to dry, which will allow you more time to paint fine details.
Step 9: Using a thin paintbrush, paint a crescent moon on the middle finger as shown. You can trace the outline or use dots to create the outline of the crescent shape before filling it in.
Step 10: With a dotting tool, place dots of various sizes in clusters on each nail.
Step 11: Let your nail art dry for about five minutes, and cover with top coat to seal the design!
Did you try this celestial design? Show us your aesthetic nails on Instagram @Lulus using #lovelulus and shop more pretty picks in our Spring Fashion shop!
Cassandre Banel is a Seattle-based nail artist.
Join The Conversation (0)