Looking for an elegant yet practical hairstyle that can effortlessly transition from casual days to special occasions? Of course, you are! Well, a braid bun might just be your answer. This timeless and versatile updo is the perfect choice for everything from a romantic dinner date to special occasions like weddings, prom, homecoming–you name it. And while it might look complicated, with the help of a bun former and some bobby pins, you can easily create this hairstyle yourself with our braided bun how-to.
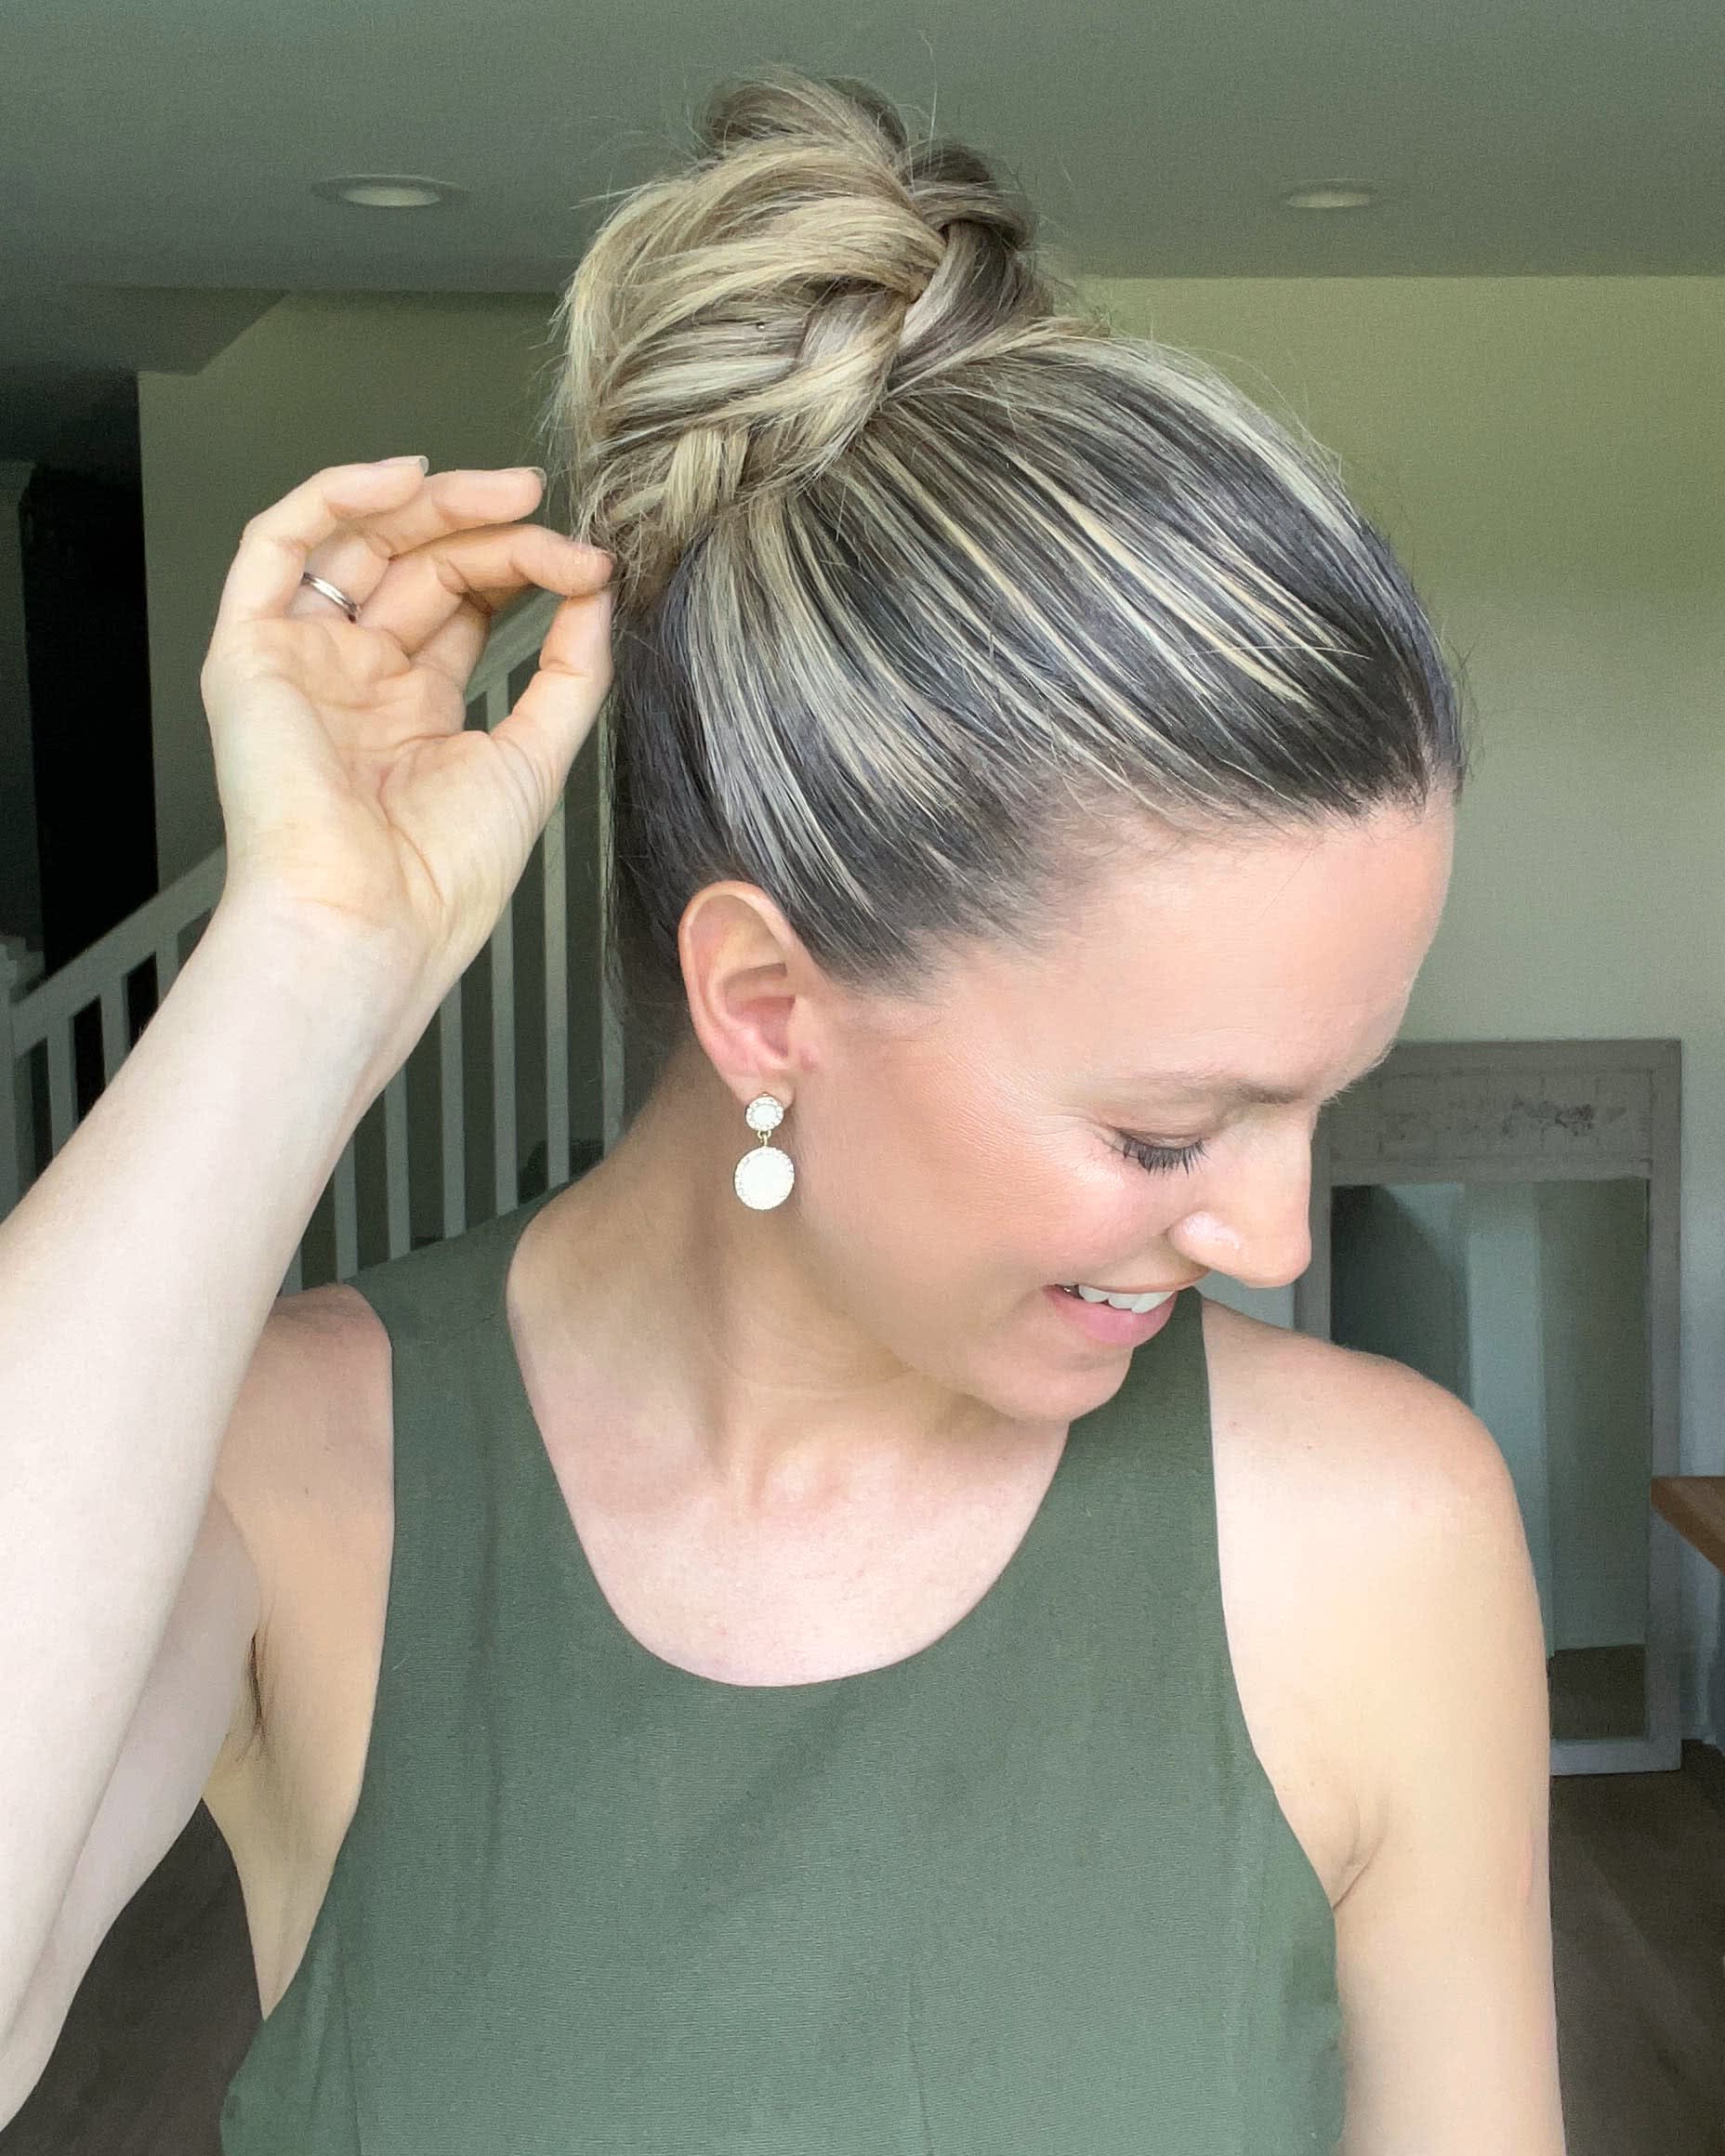
There are a few tricks to getting this hairstyle to look totally flawless. The first is to get the top of your hair really sleek and even. Spend extra time making sure there are no lumps or bumps. But don’t pull too tight–you don’t want it to be uncomfortable. Just smooth!
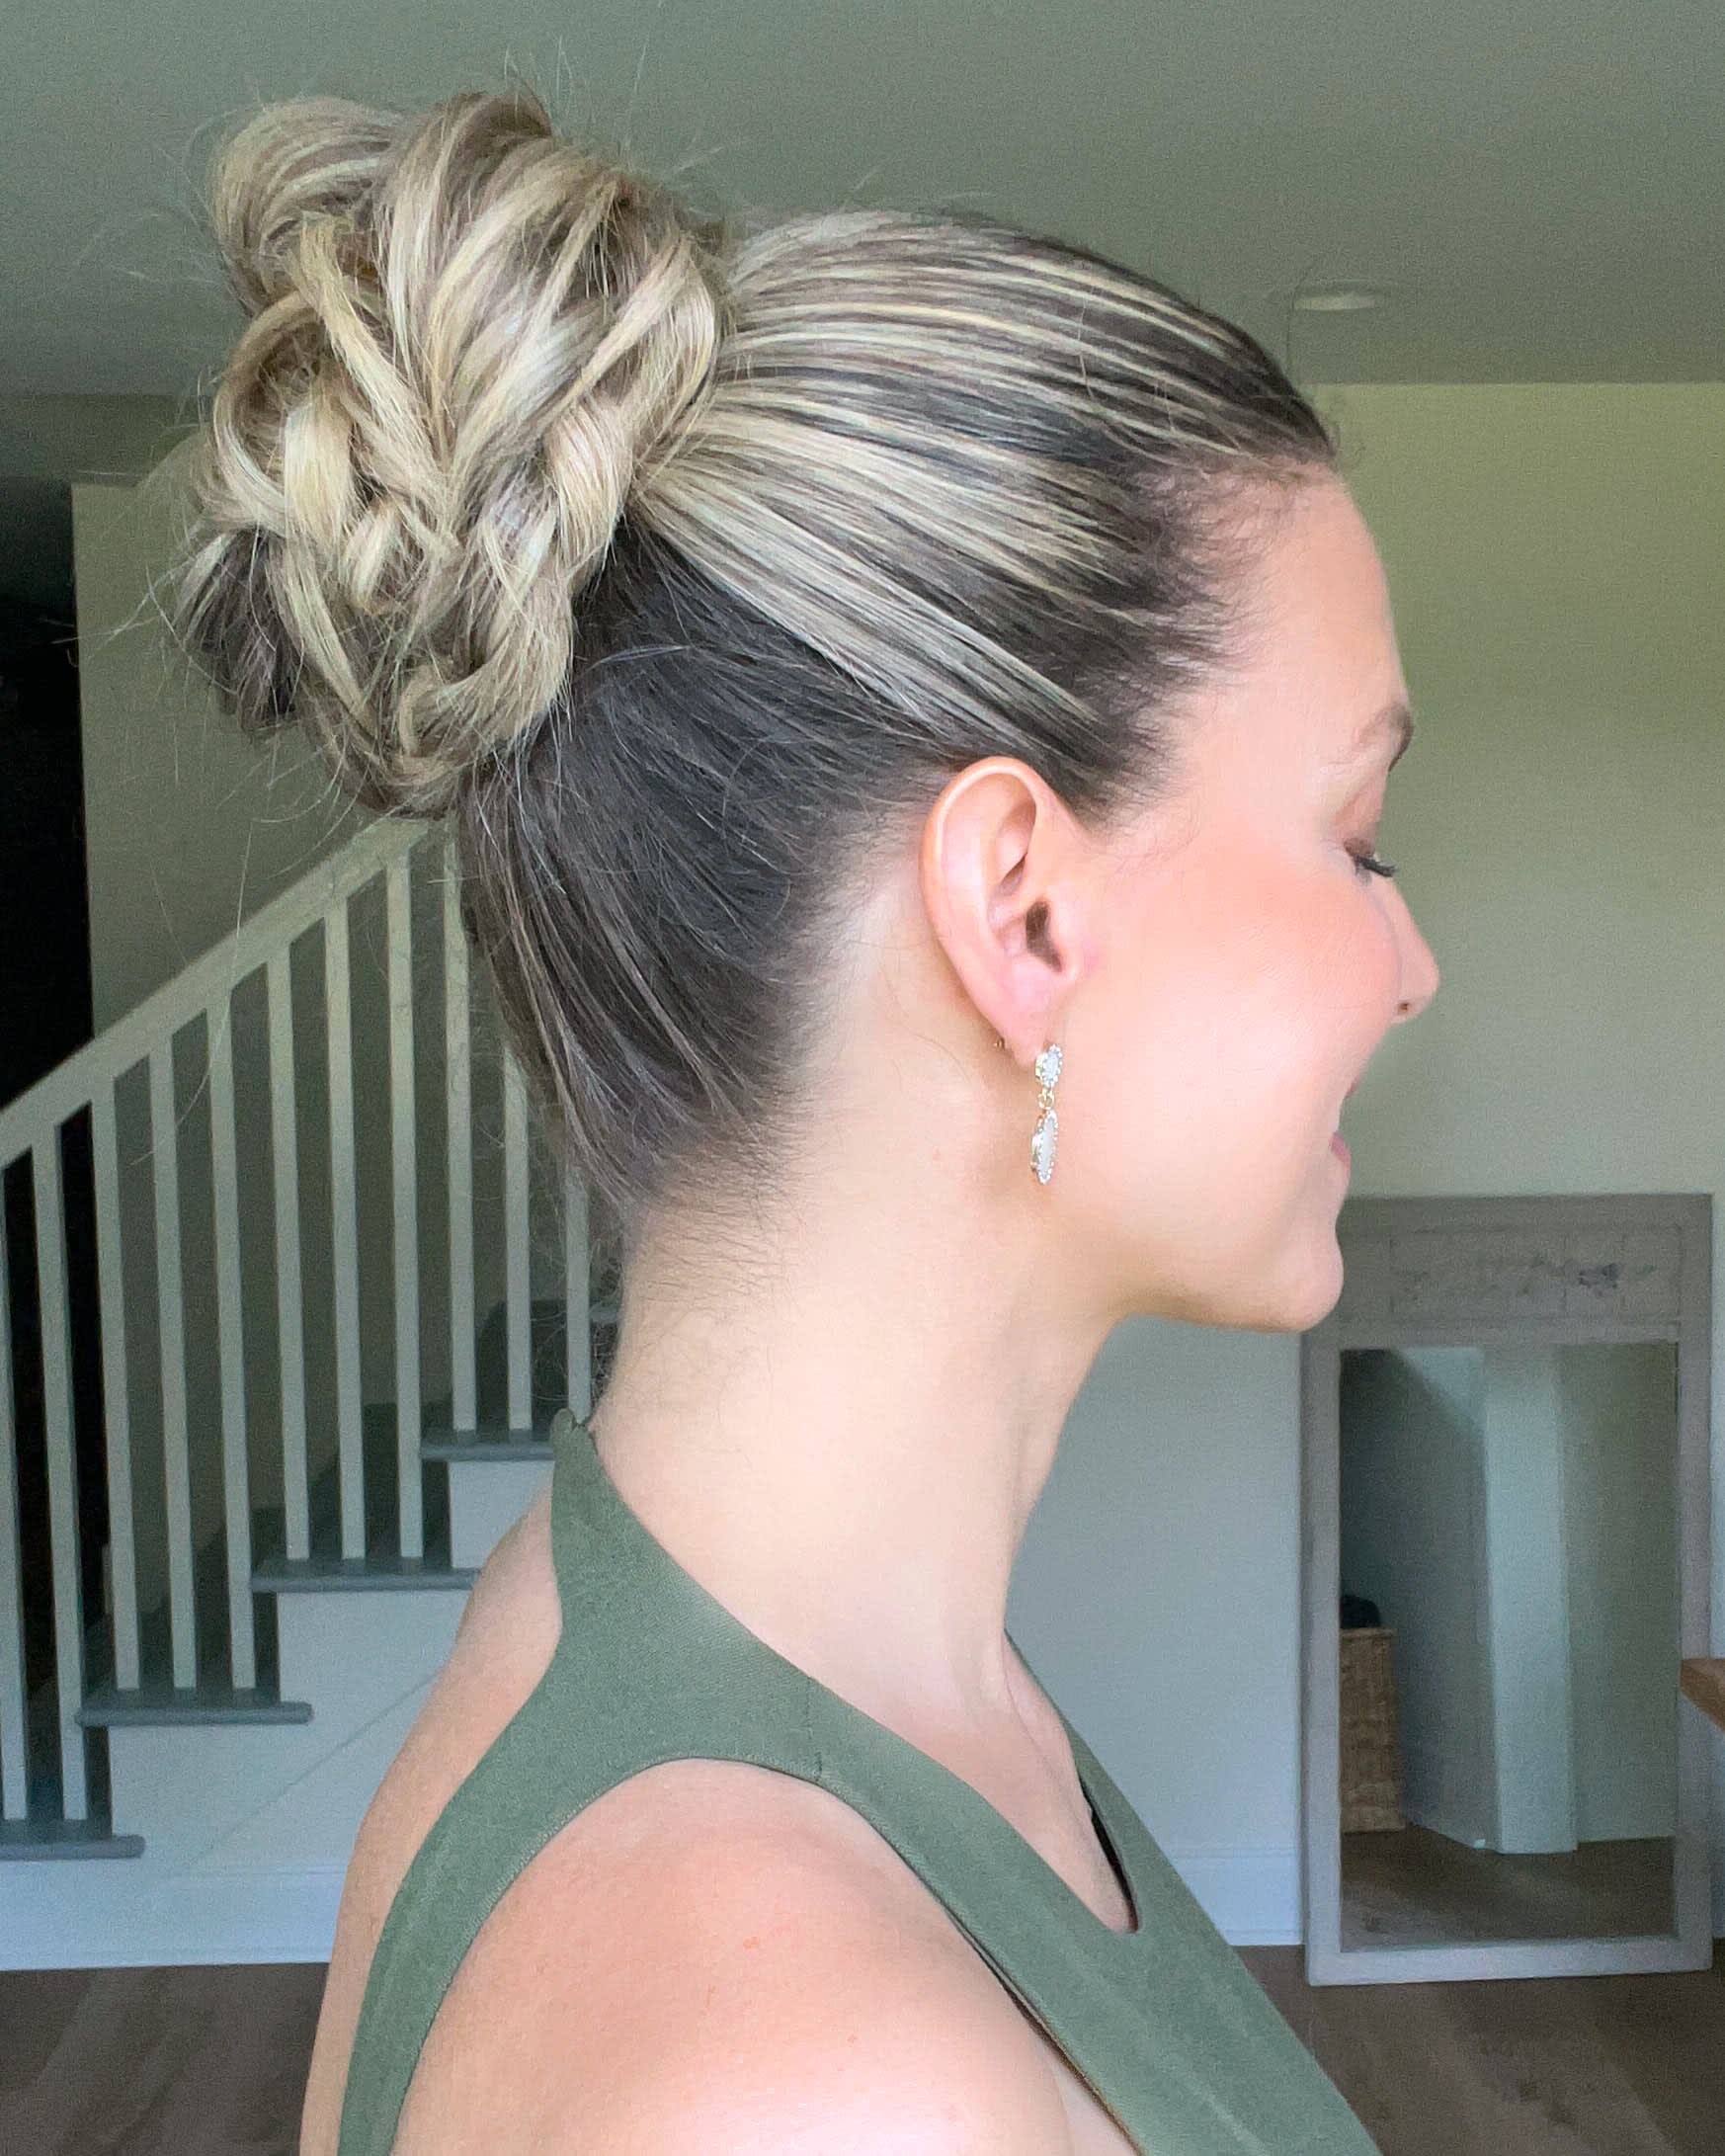
The second trick is to fluff the braids before pulling them through the bun former. You’ll be working with fairly narrow sections of hair, since each braid is only half of a ponytail. To add the volume and texture you need, once each braid is done, gently separate the fibers in the sections. Don’t pull them out of the braid, but let the braided segments feel nice and loose. If little sections do come out, don’t worry; you’ll simply tuck them in at the end.
Ready to give this braided bun a try? Here’s how to do a braided bun, just in time for your next special occasion.
Braided Bun Tutorial
Supplies
- Three hair elastics
- Paddle brush
- Holding product, if desired
- Bobby pins or hair pins
- Bun former (also called a bun donut or hair donut)
Instructions
- Pull the hair into a high, sleek ponytail. Make sure the top is smooth, using a brush and/or product if you need to.
- Split the ponytail in half and create two braids from it. Secure the ends.
- “Pancake” or pull on the braid sections for fullness.
- Pull the two fluffed-out braids through a bun former.
- Wrap the braids around the bun former, securing them with pins as you go.
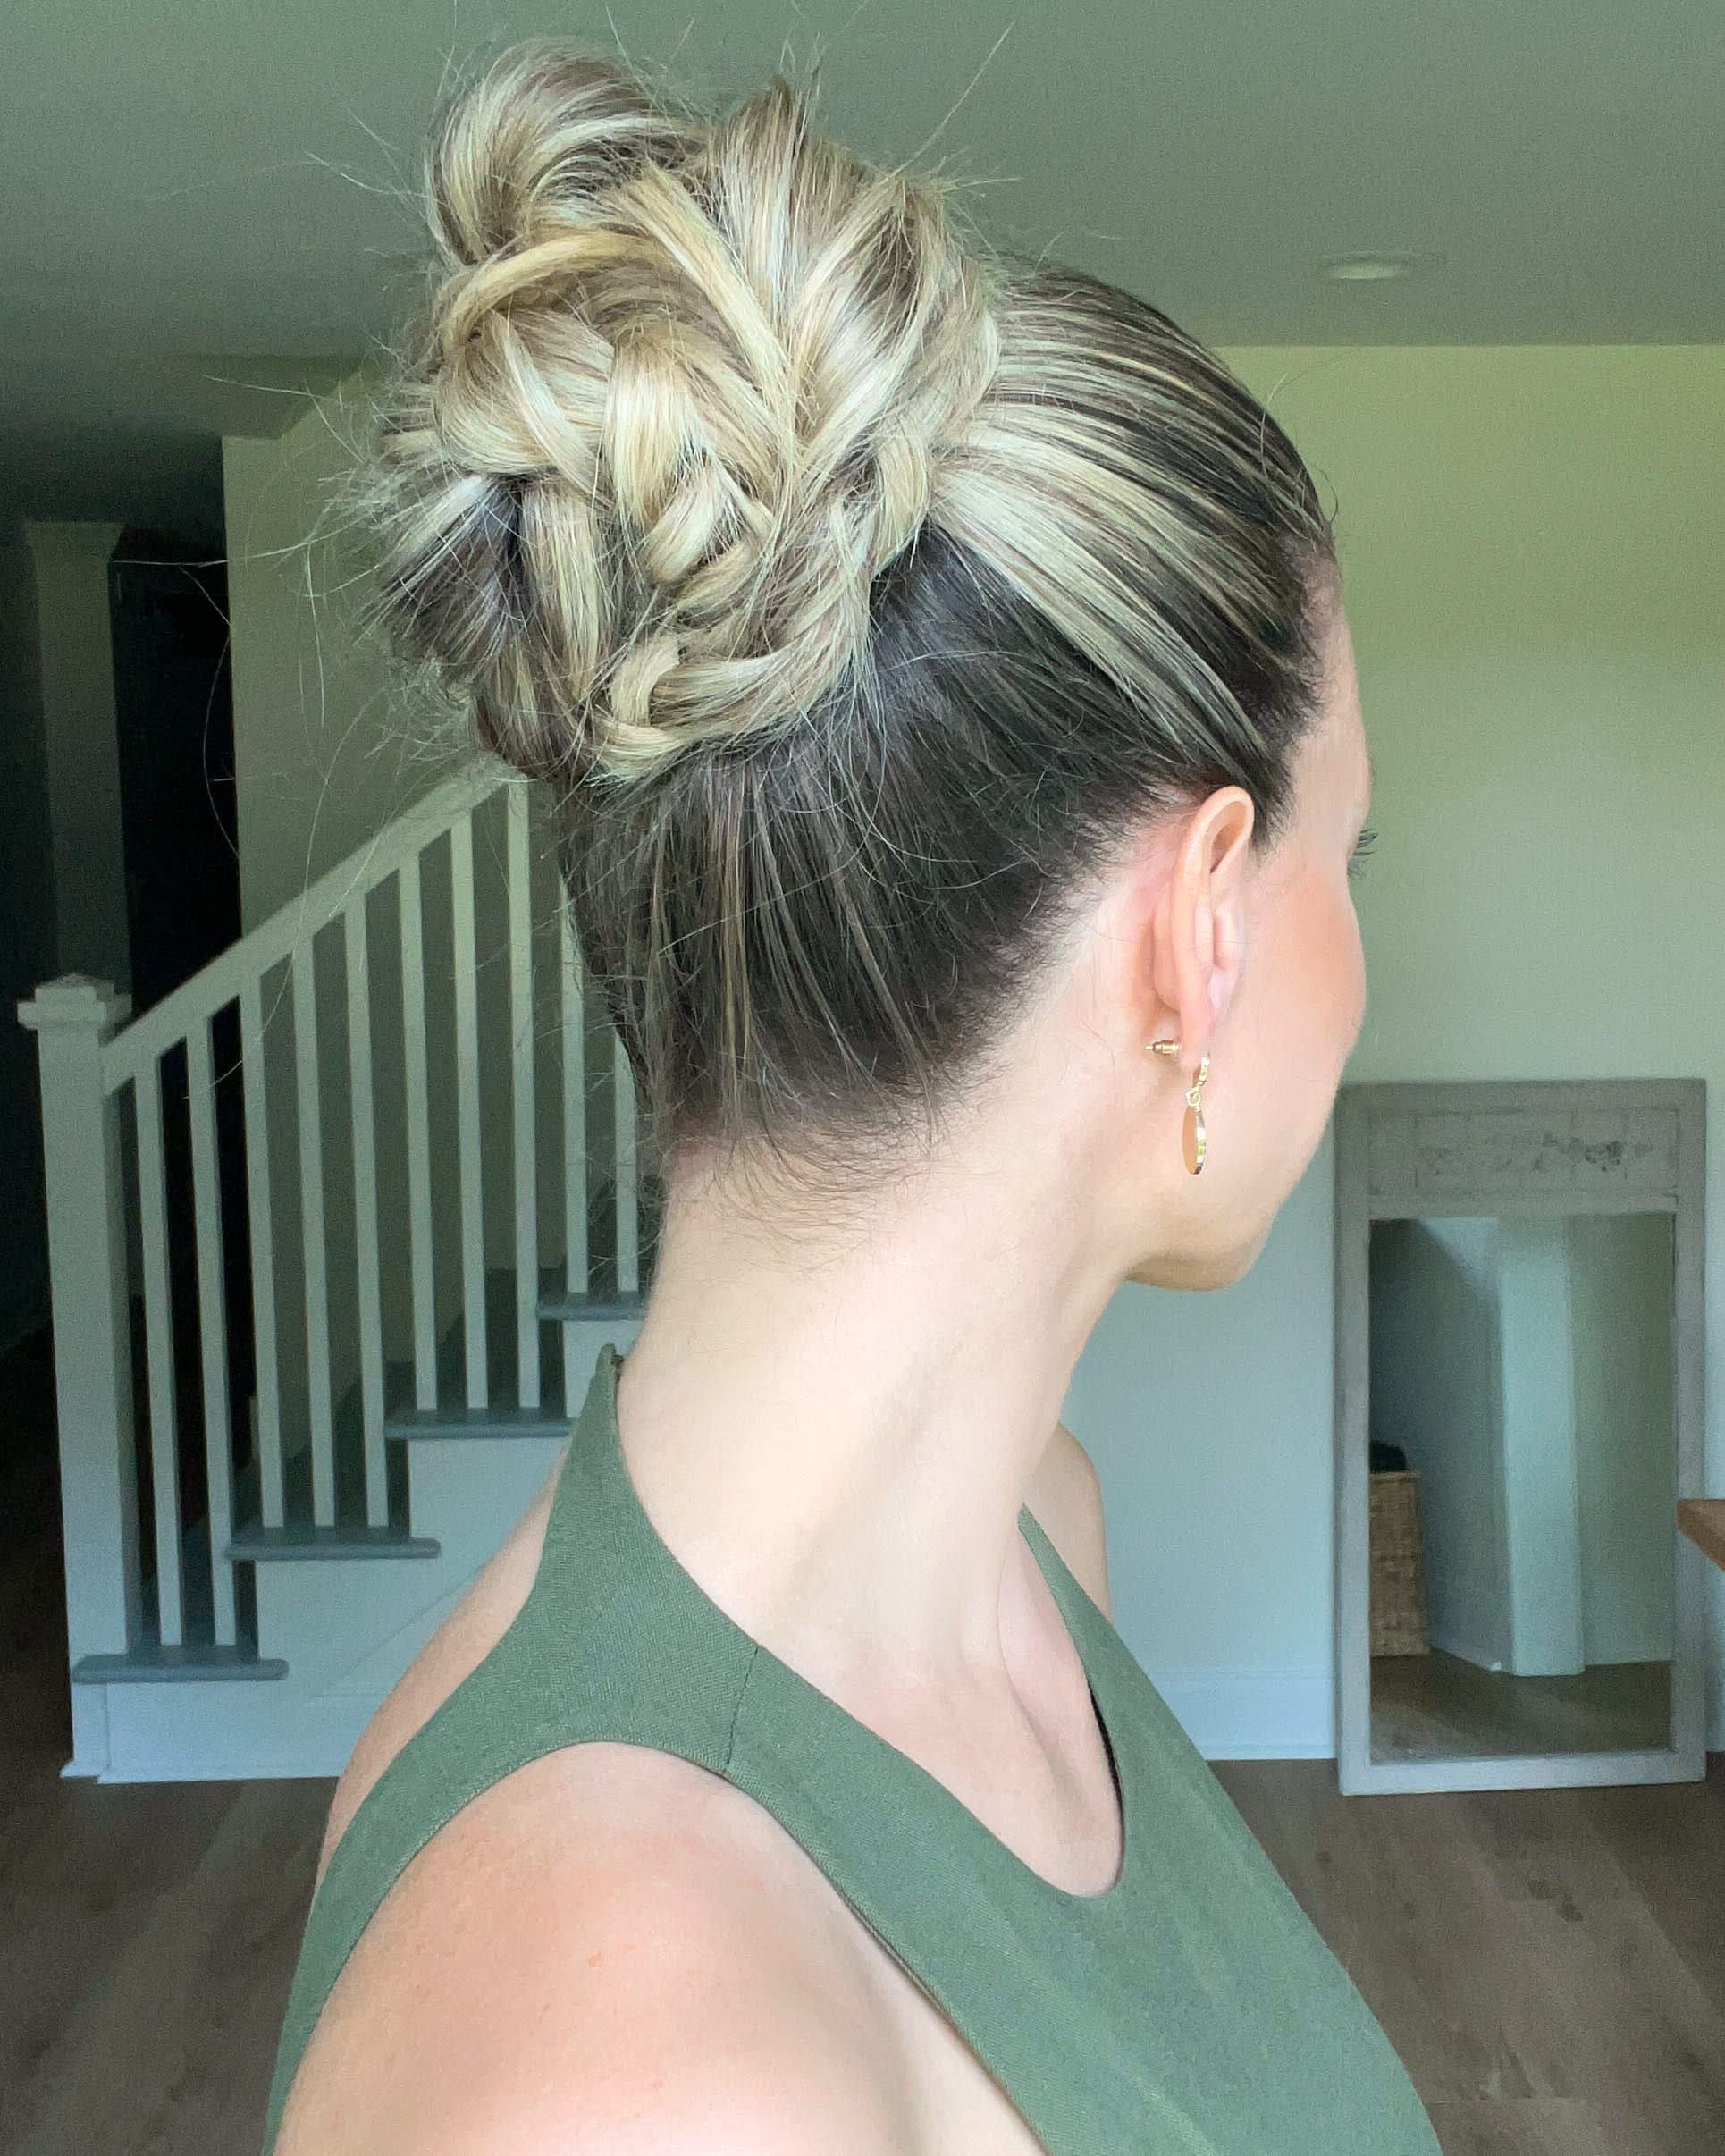
- Tuck in any loose ends.
Did you try this braided bun hairstyle? Show us your beautiful braid bun on Instagram and TikTok @lulus using #lovelulus–and find the perfect homecoming outfit, wedding guest look, or other special-O style to wear with it in our Dress Shop!
This post was originally published in January 2013 and has been updated with new content.
Join The Conversation (8)