Click to shop
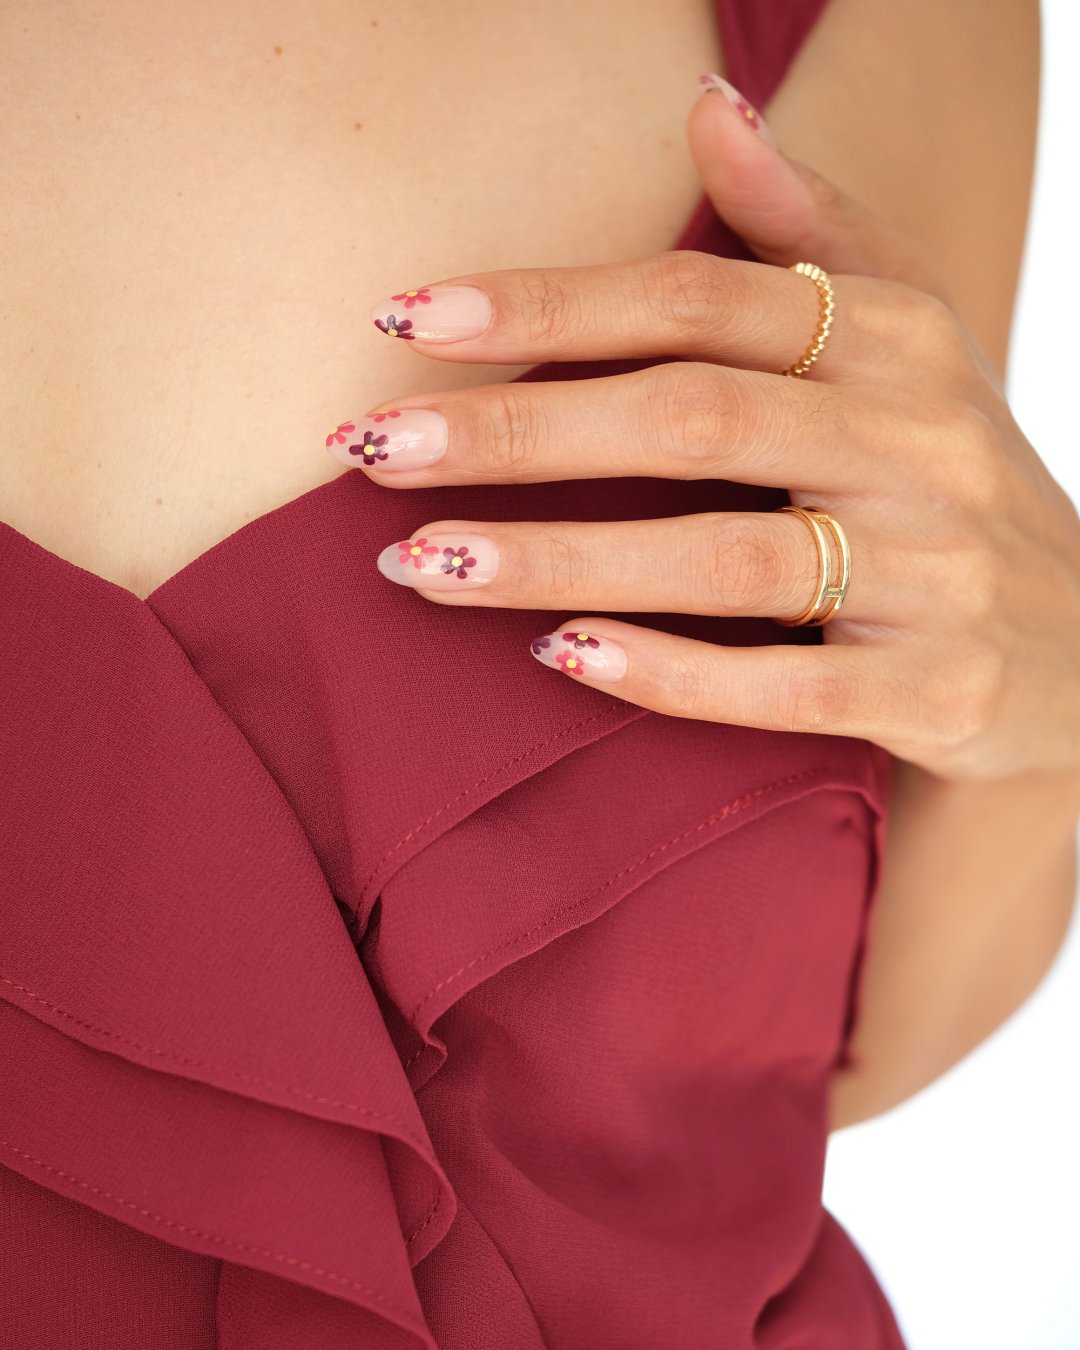
When it comes to planning bridal party looks, most of the attention tends to focus on the dresses–and rightfully so. But as we all know, all the details matter–from accessories to beauty–and nails for bridesmaids should never be overlooked! There’s no rule saying your maids’ manis have to be solid or soft neutral colors, either. So if you’re looking for a fun, unexpected design to go with your bridesmaid dresses that’s not your typical french manicure, then this floral look is the perfect idea for you.
Click to shop
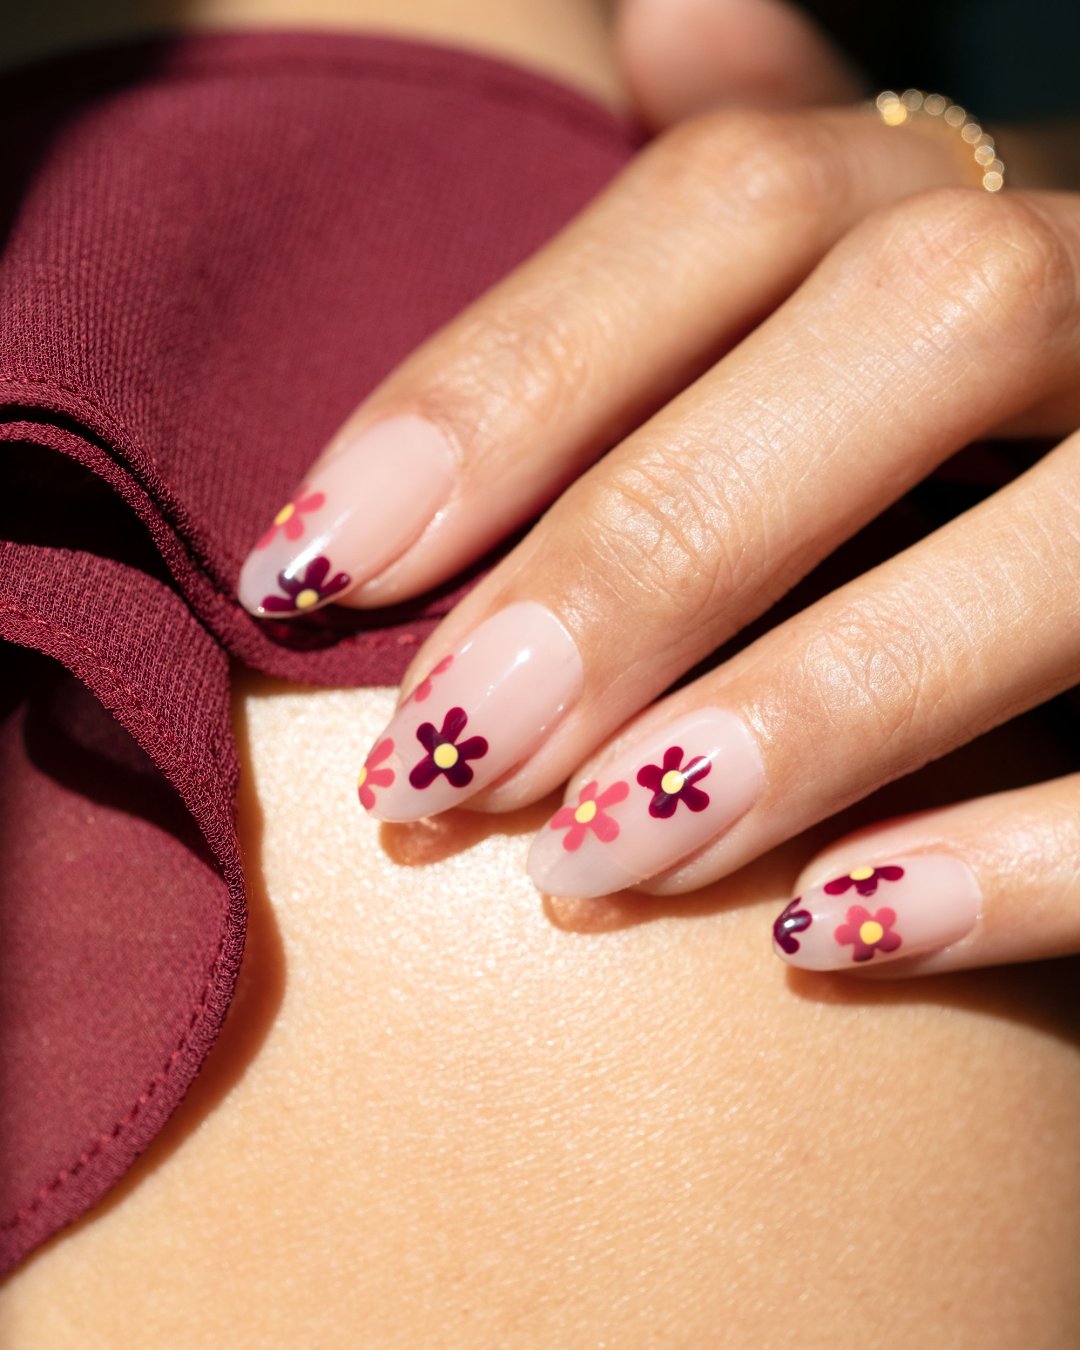
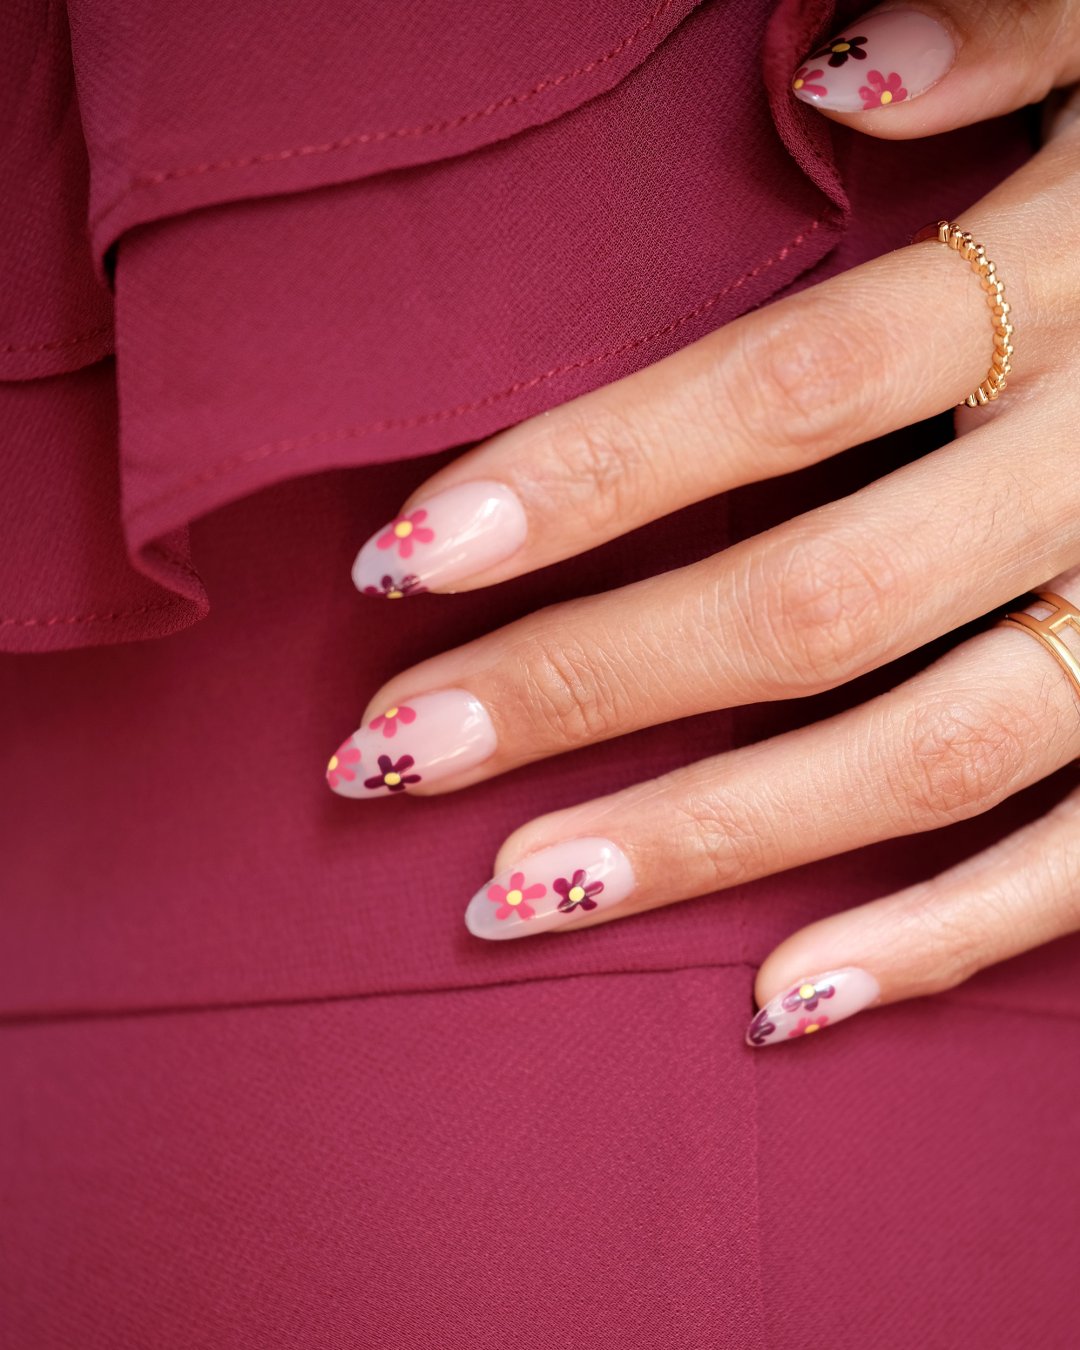
Including sweet floral nails in fall hues will not only add a bit of personality to your bridesmaids’ looks, but it will also make for amazing detail photos. It’s also a great way to further incorporate your wedding color palette. Bonus: This design is easy to do yourself! You can switch up the colors depending on your dress, play around with the placement of the flowers, and even add solid nails into the mix to give each bridesmaid a unique manicure. Here’s what you’ll need to (ahem) nail the fall floral look:
Fall Floral Nails for Bridesmaids:
Click to shop
Supplies:
- Base coat
- Sheer neutral nail polish (I used Essie Sugar Daddy)
- Burgundy nail polish (I used Essie Bahama Mama)
- Mauve nail polish (I used Essie Mrs. Always-Right)
- Yellow Nail Polish (I used Essie Check Your Baggage)
- Medium-size dotting tool
- Acetone
- A small bowl (for the acetone)
- Glossy top coat (I used Essie Top Coat)
Instructions:
Step 1: Prep and file your nails to your desired shape.
Step 2: Apply a thin layer of base coat.
Step 3: Apply 2-3 coats of sheer pink nail polish as your base shade. (This is three coats of Essie’s Sugar Daddy.)
Step 4: Start by dotting a small amount of the mauve or burgundy nail polish on your palette (a piece of foil or plastic works fine). Dip your medium size dotting tool into the polish and choose where you want your first flower to go; for this design, you’ll stay mostly towards the upper part of your nail. You can also place them on the edges of the nail for more interest!
Step 5: Once you choose a spot for your first flower, we’ll create the petals. Gently place your dotting tool and then drag inwards to create the first petal! Repeat in a circle until you have five petals that all meet in the middle.
Step 6: You’ll want to place about 2-3 flowers per nail, alternating between your mauve polish and the burgundy. Change up the placement of the flowers, but try to keep them closer to the top half of the nail. Also, be sure to dip your dotting tool in the acetone and periodically wipe it off so your colors don’t mix & you get a clean petal application!
Step 7: Next, dot the yellow polish on your palette (this shade is Essie’s Check Your Baggage), and dip your dotting tool into the color. Place a small yellow dot in the center of every flower. Be sure to periodically clean off your dotting tool during the design process so you get an even application and the polish doesn’t clump up.
Step 8: Let the design dry and then apply a glossy top coat.
Step 9: Cap the edge and finish with cuticle oil!
Did you try this bridesmaids nail design? Show us on Instagram @lulus using #lovelulus! If you’re still looking for bridesmaid dresses, head to our Weddings shop!
Melanie Graves is a self-taught nail art enthusiast who loves to create colorful, easy DIY designs for the fellow home manicurist.
Join The Conversation (0)