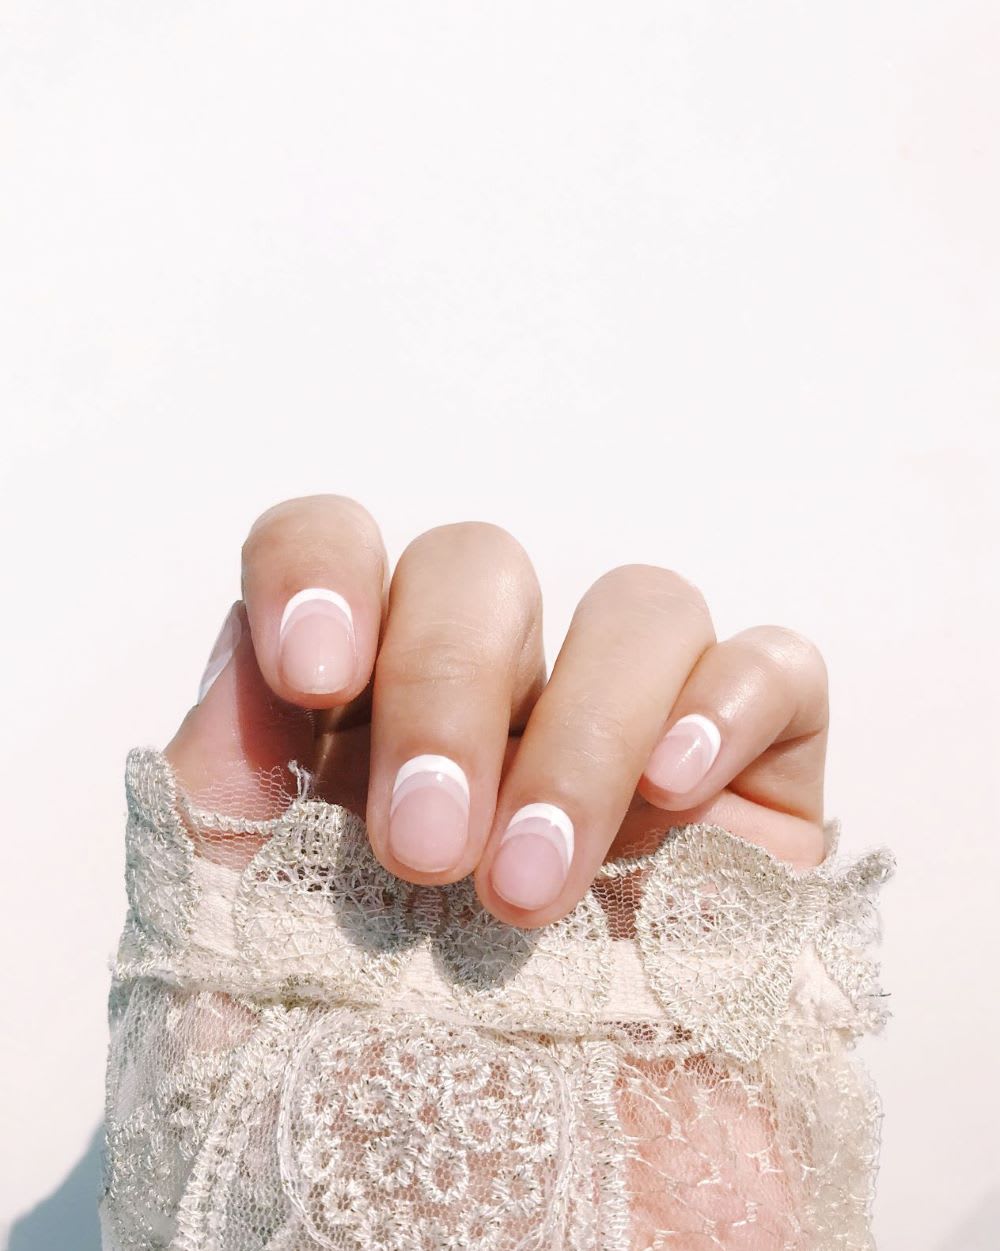
By now, you’ve likely noticed that the French mani has made a triumphant, if not unexpected return–with some updates, of course. This season, I’m spying tons of brilliant modern takes on the classic, like lavender tints and bejeweled details–and getting inspo for everything from everyday manicures to wedding nails. The minimalist reverse French manicure ahead is perfect for either occasion.
Elegant and impactful, this reverse French is also very easy to DIY. Read on for the simple mani tutorial steps below!
Reverse French Manicure
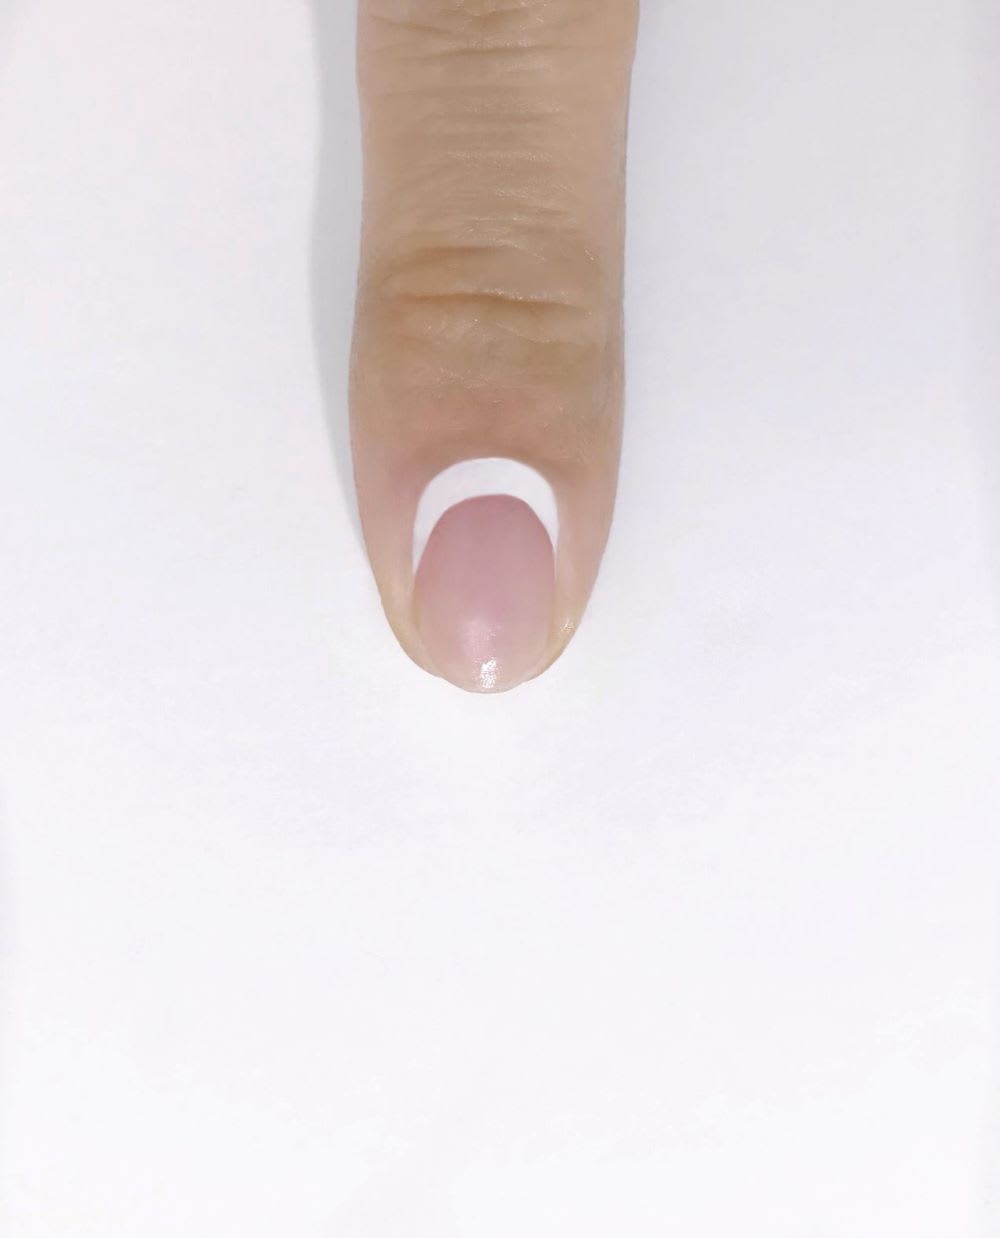
Step 1: Paint on the first reverse white French layer with a liner brush. (Don’t worry if it gets messy.)
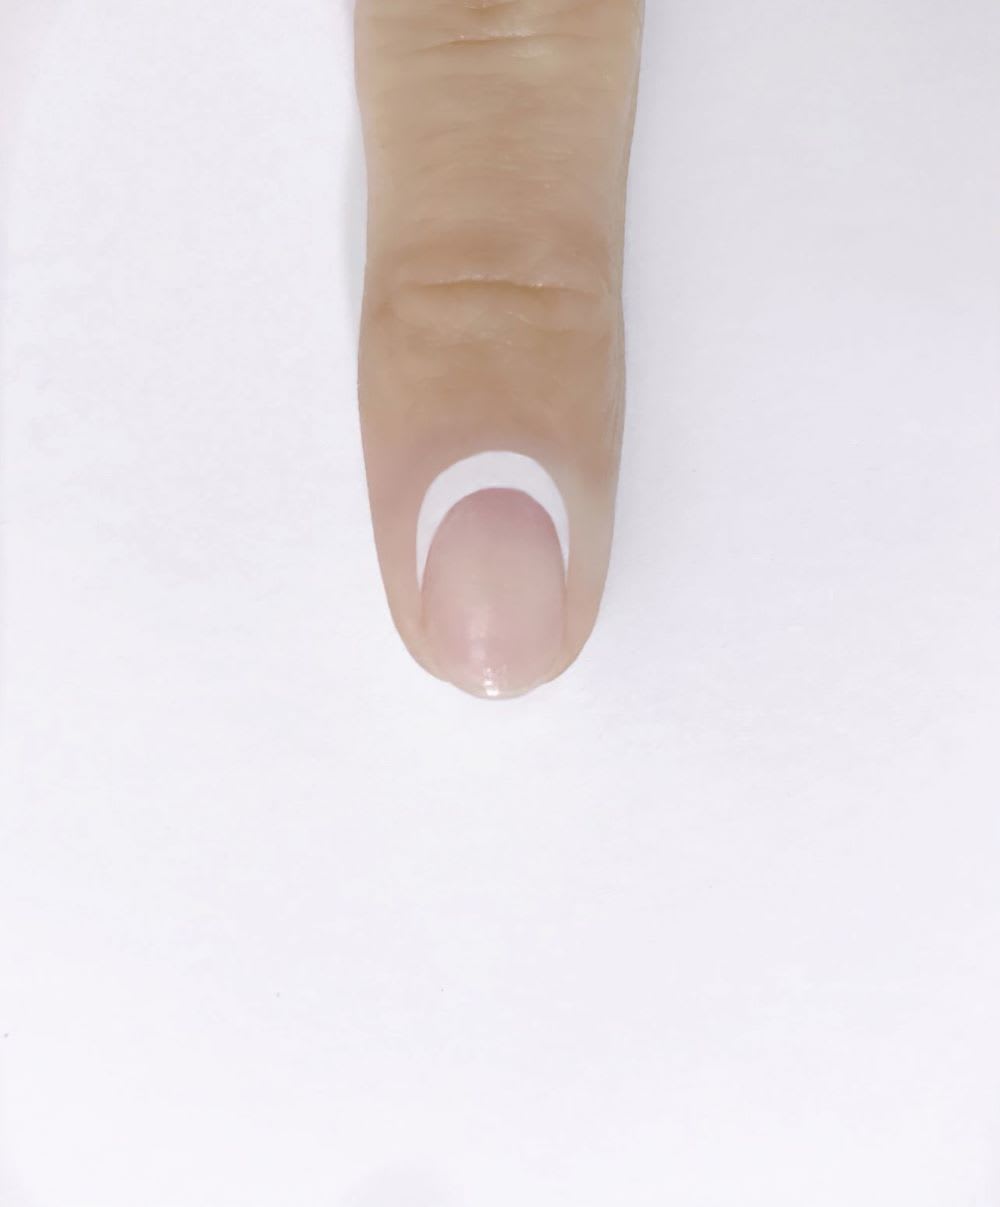
Step 2: Next, with an angled flat brush, clean the mess if you got any polish on your skin to make the reverse French look cleaner and more precise.
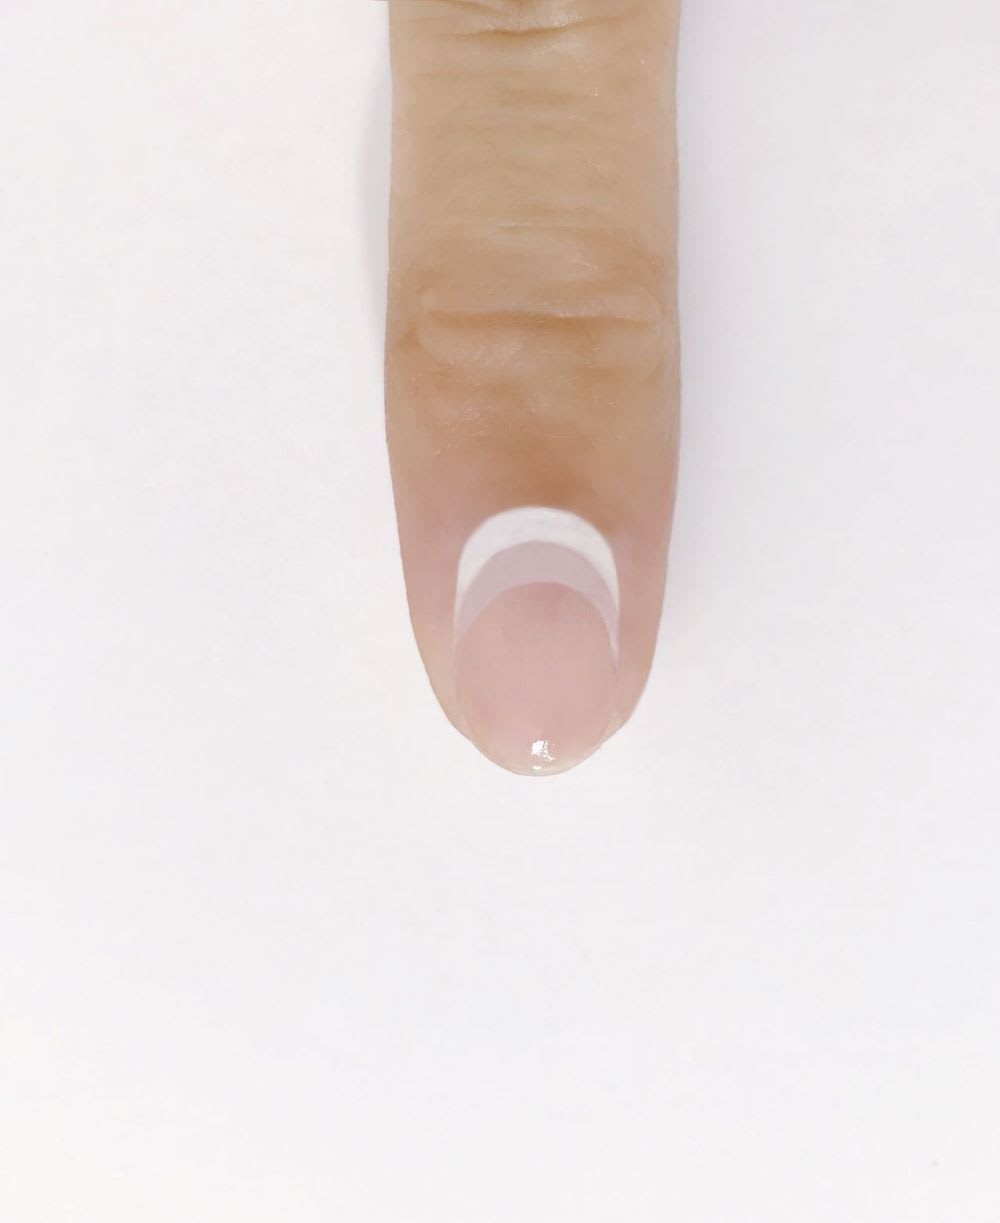
Step 3: Paint on the second reverse French with a softer, more translucent polish. Remember, it doesn’t have to look perfect at first. You can fix anything with an angled brush!
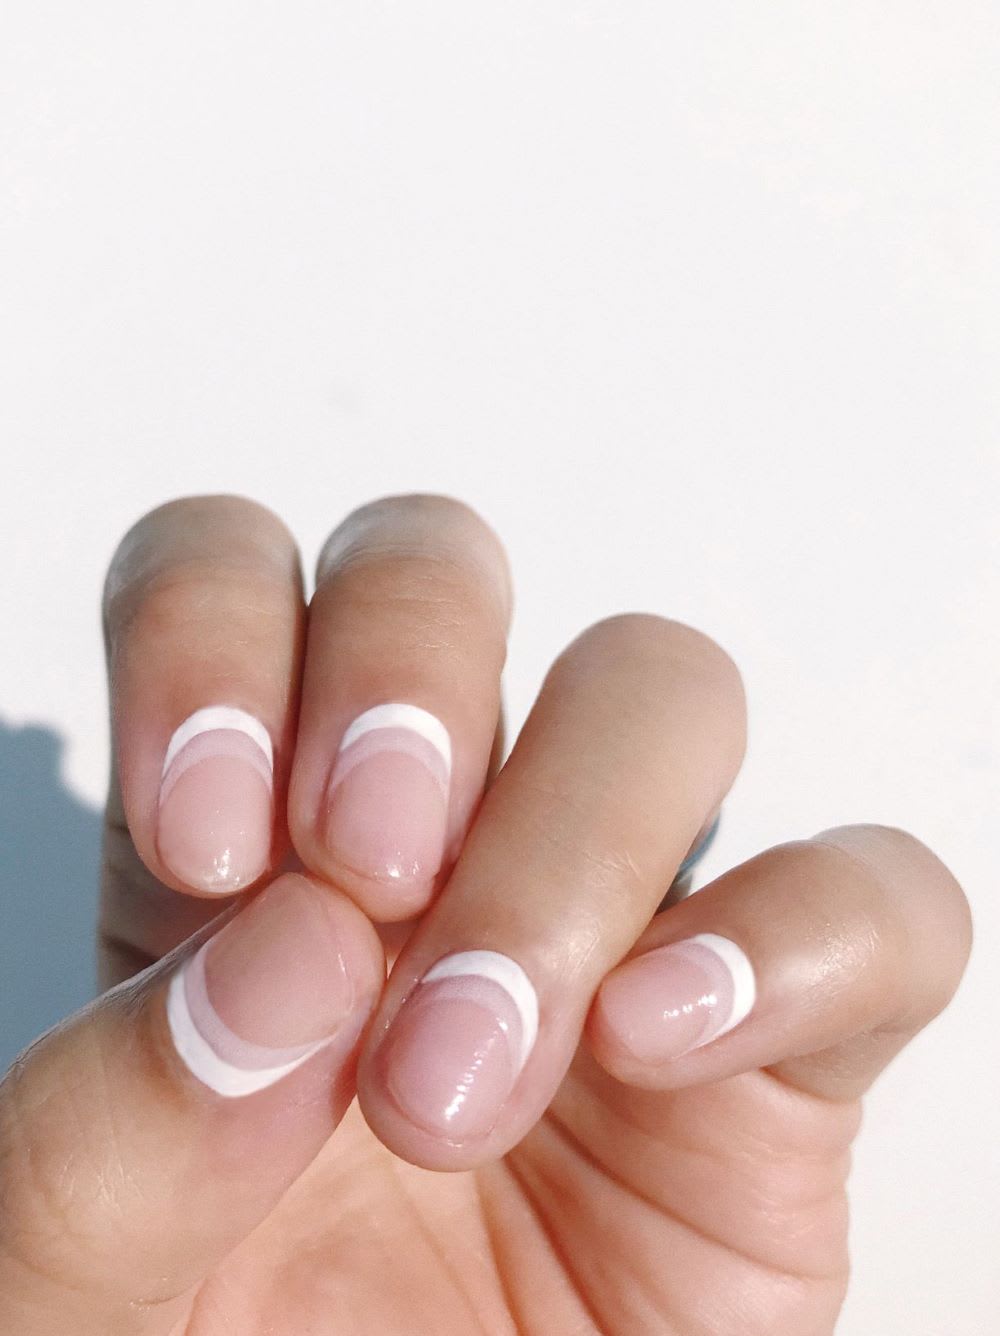
Step 4: Finish it all off with top coat once it’s dried for around two minutes or so.
Did you try this reverse french manicure? Show us on Instagram @Lulus using #lovelulus!
Hang Nguyen is a celebrity nail artist known for delicate, intricate, and often unexpected designs.
(Images via Hang Nguyen)
Join The Conversation (0)
French manicure is the perfect choice for a wedding.