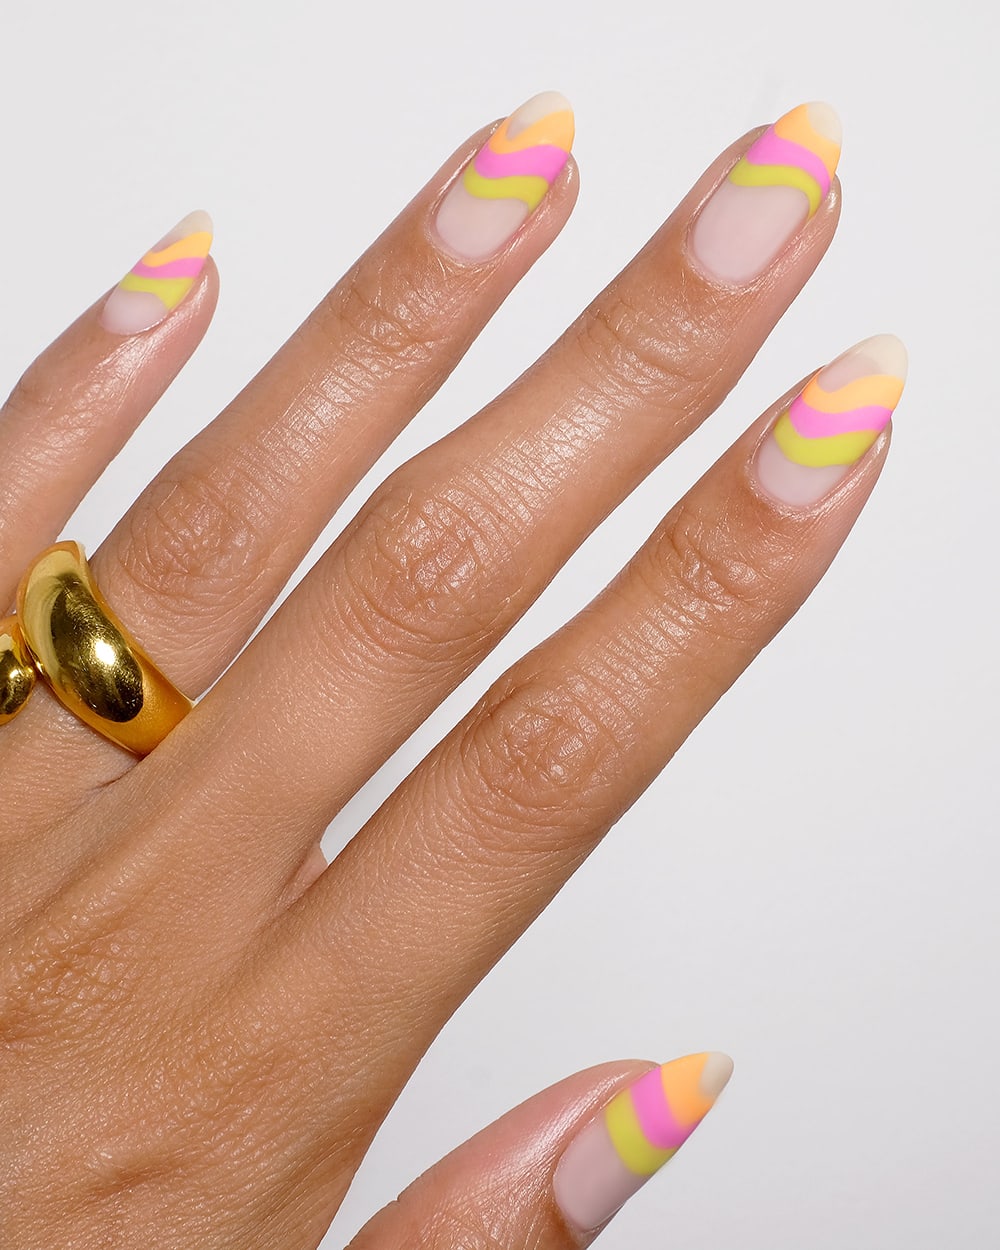
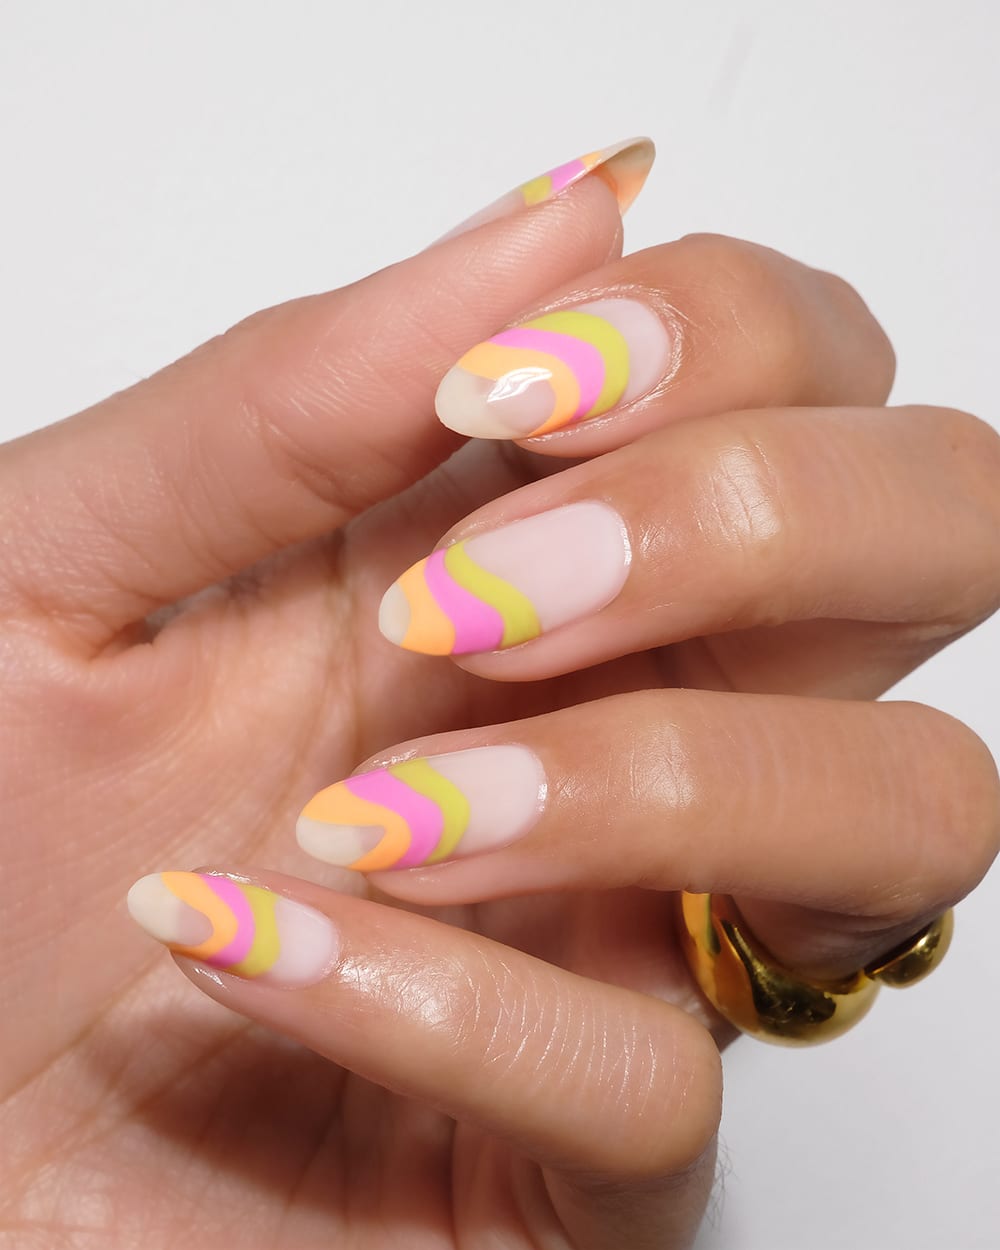
When bright colors and retro designs collide, you end up with this negative space abstract nail art that’s super fun and ready for all the outdoor picnics this spring and summer. Aside from being totally warm-weather ready, the organic shape of the wavy design makes this look easy to customize. Plus, you don’t have to be precise: Just have fun with it and play with the swirl shape!
What’s more: This colorful design is easy to update every season. To change it up, just swap out the color combinations or even add some small nail stickers! There’s really no ‘wrong’ way to do it, which is one of the main reasons we love the abstract nail art trend. If you’re ready to give this swirly style a go, here’s what you’ll need:
Abstract Retro Nails:
Supplies:
- Base coat
- Sheer neutral nail polish
- Long striping nail art brush
- Peach nail polish
- Pink nail polish
- Green nail polish
- Acetone
- A small bowl (for the acetone)
- Glossy top coat
Instructions:
Step 1: Prep and file your nails to your desired shape.
Step 2: Apply a thin layer of base coat.
Step 3: Apply 2-3 coats of a sheer neutral nail polish as your base shade and let dry.
Step 4: Dot a small puddle of peach nail polish on a piece of plastic or foil, then dip your striping brush into the color. To evenly coat the brush, slightly twist the bristles in the color and drag out of the puddle so there aren’t large globs of polish.
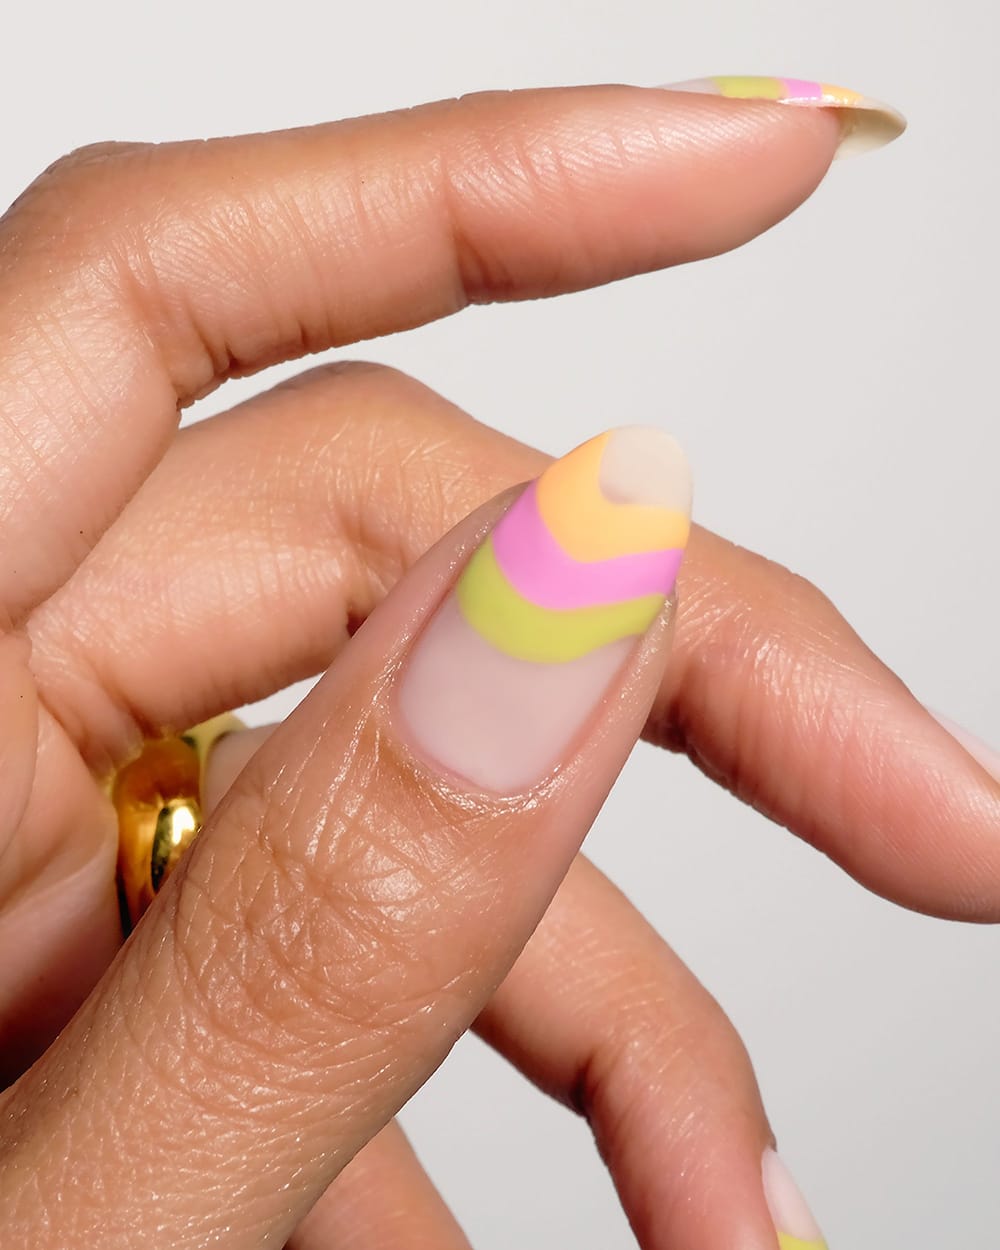
Step 5: To create your wavy shape, start on the left side of your nail, then swoop upwards and then downwards. (This will vary depending on your nail shape). As you build the size of your wave, you can vary the shape by adding more weight to one side. To ensure a clean shape, make sure to periodically clean off the brush by dipping it in acetone to remove the old polish & lightly wipe on a towel. You can then dip back into your polish and repeat until you reach your desired wave/squiggle shape!
Step 6: You will repeat the same process with the pink & green polishes, following the shape of your first wave to guide the next two beneath it. For variety, alternate the waves on each nail, starting the squiggle downwards or at different points on the nail.
Step 7: Let the design dry and then apply a glossy top coat.
Step 8: Cap the edge and finish with cuticle oil!
Did you try this abstract nail art tutorial? Show us your wavy retro nails on Instagram @lulus using #lovelulus and shop our Summer Fashion Shop for more bright, fun finds!
Melanie Graves is a self-taught nail art enthusiast who loves to create colorful and easy DIY designs for the fellow home manicurist.
Join The Conversation (0)