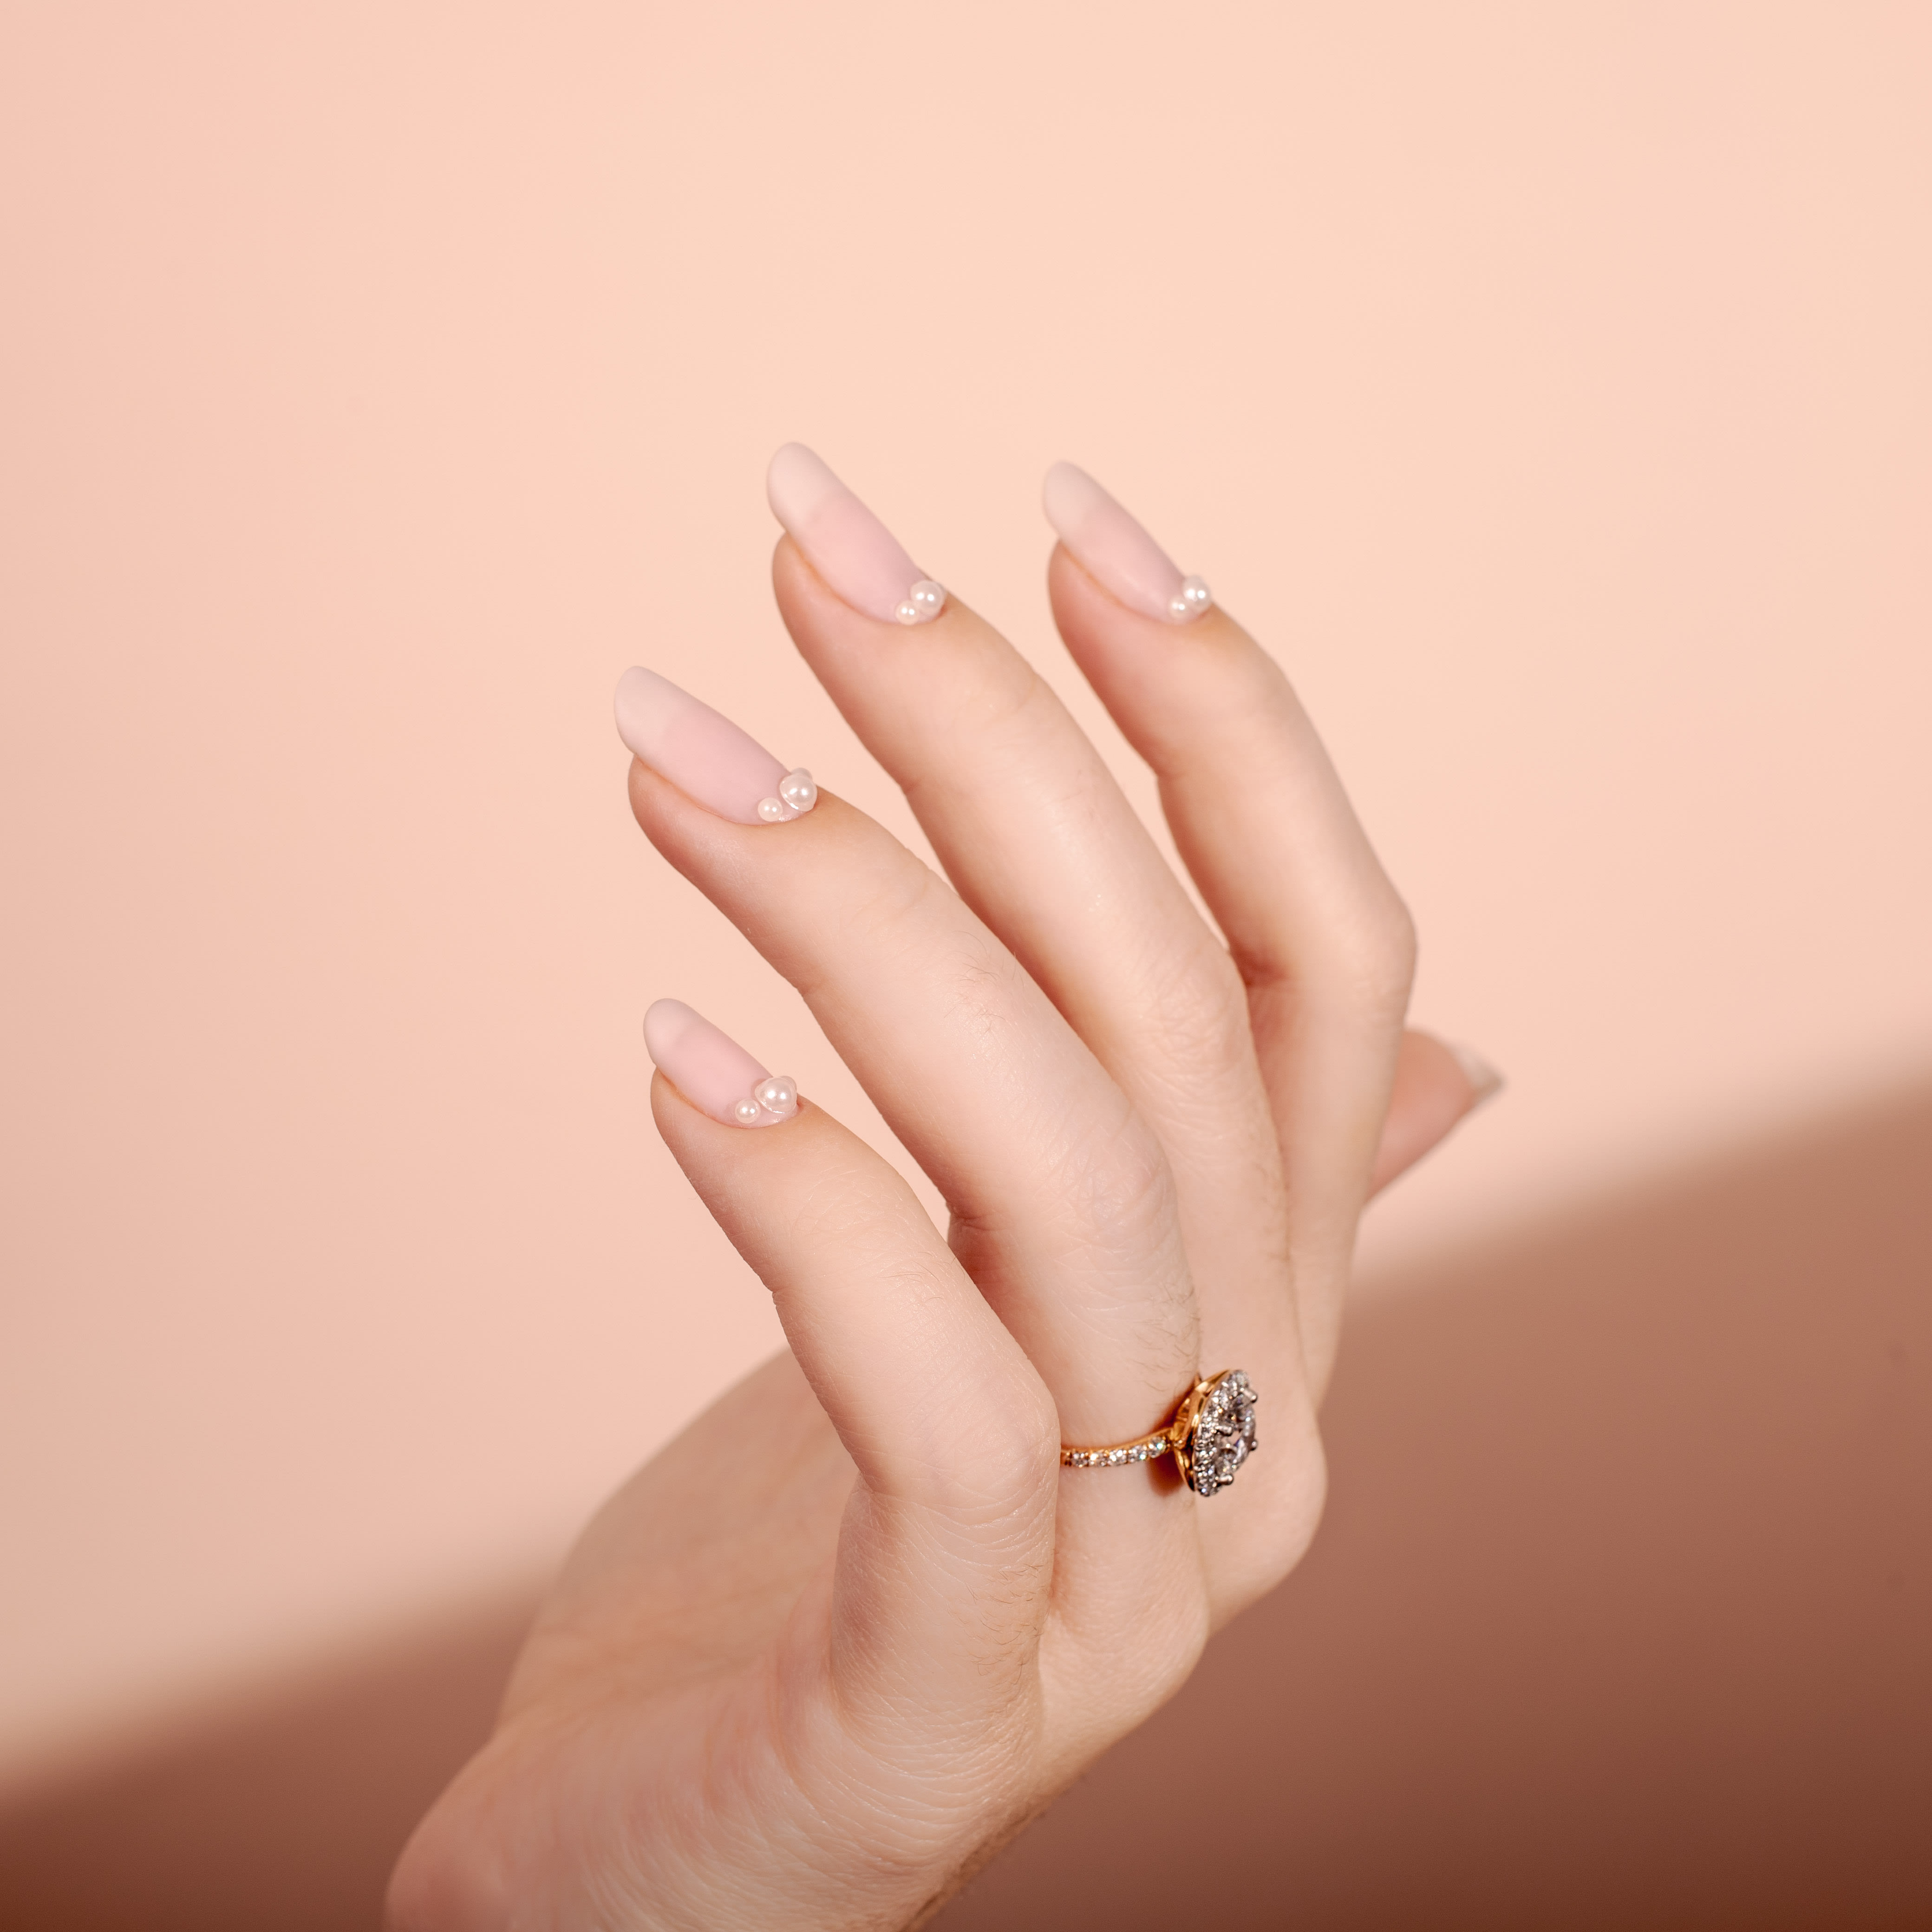
Some pairs just go together, like you and your beloved–or pearls and brides. Pearls have an elegant, timeless look that works with both modern and vintage-inspired wedding themes, which makes them perfect for incorporating into wedding nail ideas.
If you are wearing pearl jewelry or any pearl accents on your bridal look, try coordinating your manicure with one of these looks. If you’re a minimalist bride with a simple, sleek wedding look, my pearl nail ideas offer delicate, unexpected accents. Basically, you can’t really go wrong here.
The options are all stunning: You can choose to create a pearly twist on French tips or wear them like jewelry on the base of each nail. Here, I’m showing three pearl wedding nail ideas and how to achieve them–just scroll on.
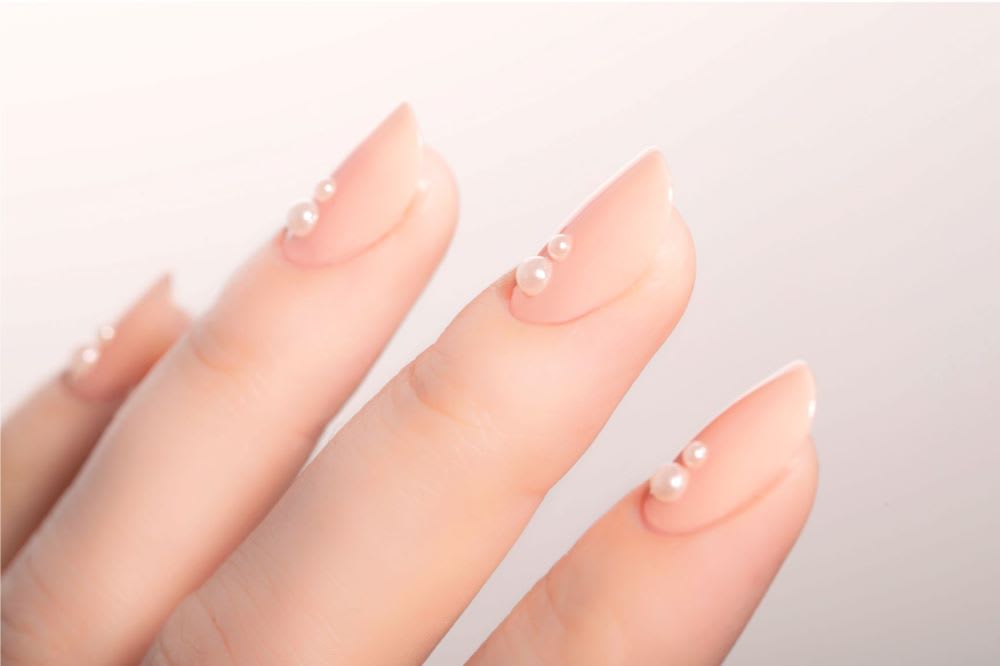
Pearl Accent Nails:
Supplies:
- Sheer base coat (I used Butter London Nail Foundation)
- Nail art pearls (small pearls cut in half: I used Ciaté nail art pearls)
- Tweezers and nail art glue (or any type of bond/craft glue)
Instructions:
Step 1: Paint clean, filed nails, with one coat of your favorite sheer base coat.
Step 2: Let dry for 2 minutes and paint another coat if you want to add opacity.
Step 3: After your base is thoroughly dry (wait about 15 minutes), use tweezers and a dot of nail art glue on the base of each pearl to place it on the border of your nail, either on top or at the base as shown in the example photos.
Step 4: If you have pearls of multiple sizes, start with 2-3 larger pearls in the center, and work outwards toward each of the edges, filling in the remaining space with smaller pearls.
Step 5: Once the glue is set, your pearly nail art look is complete!
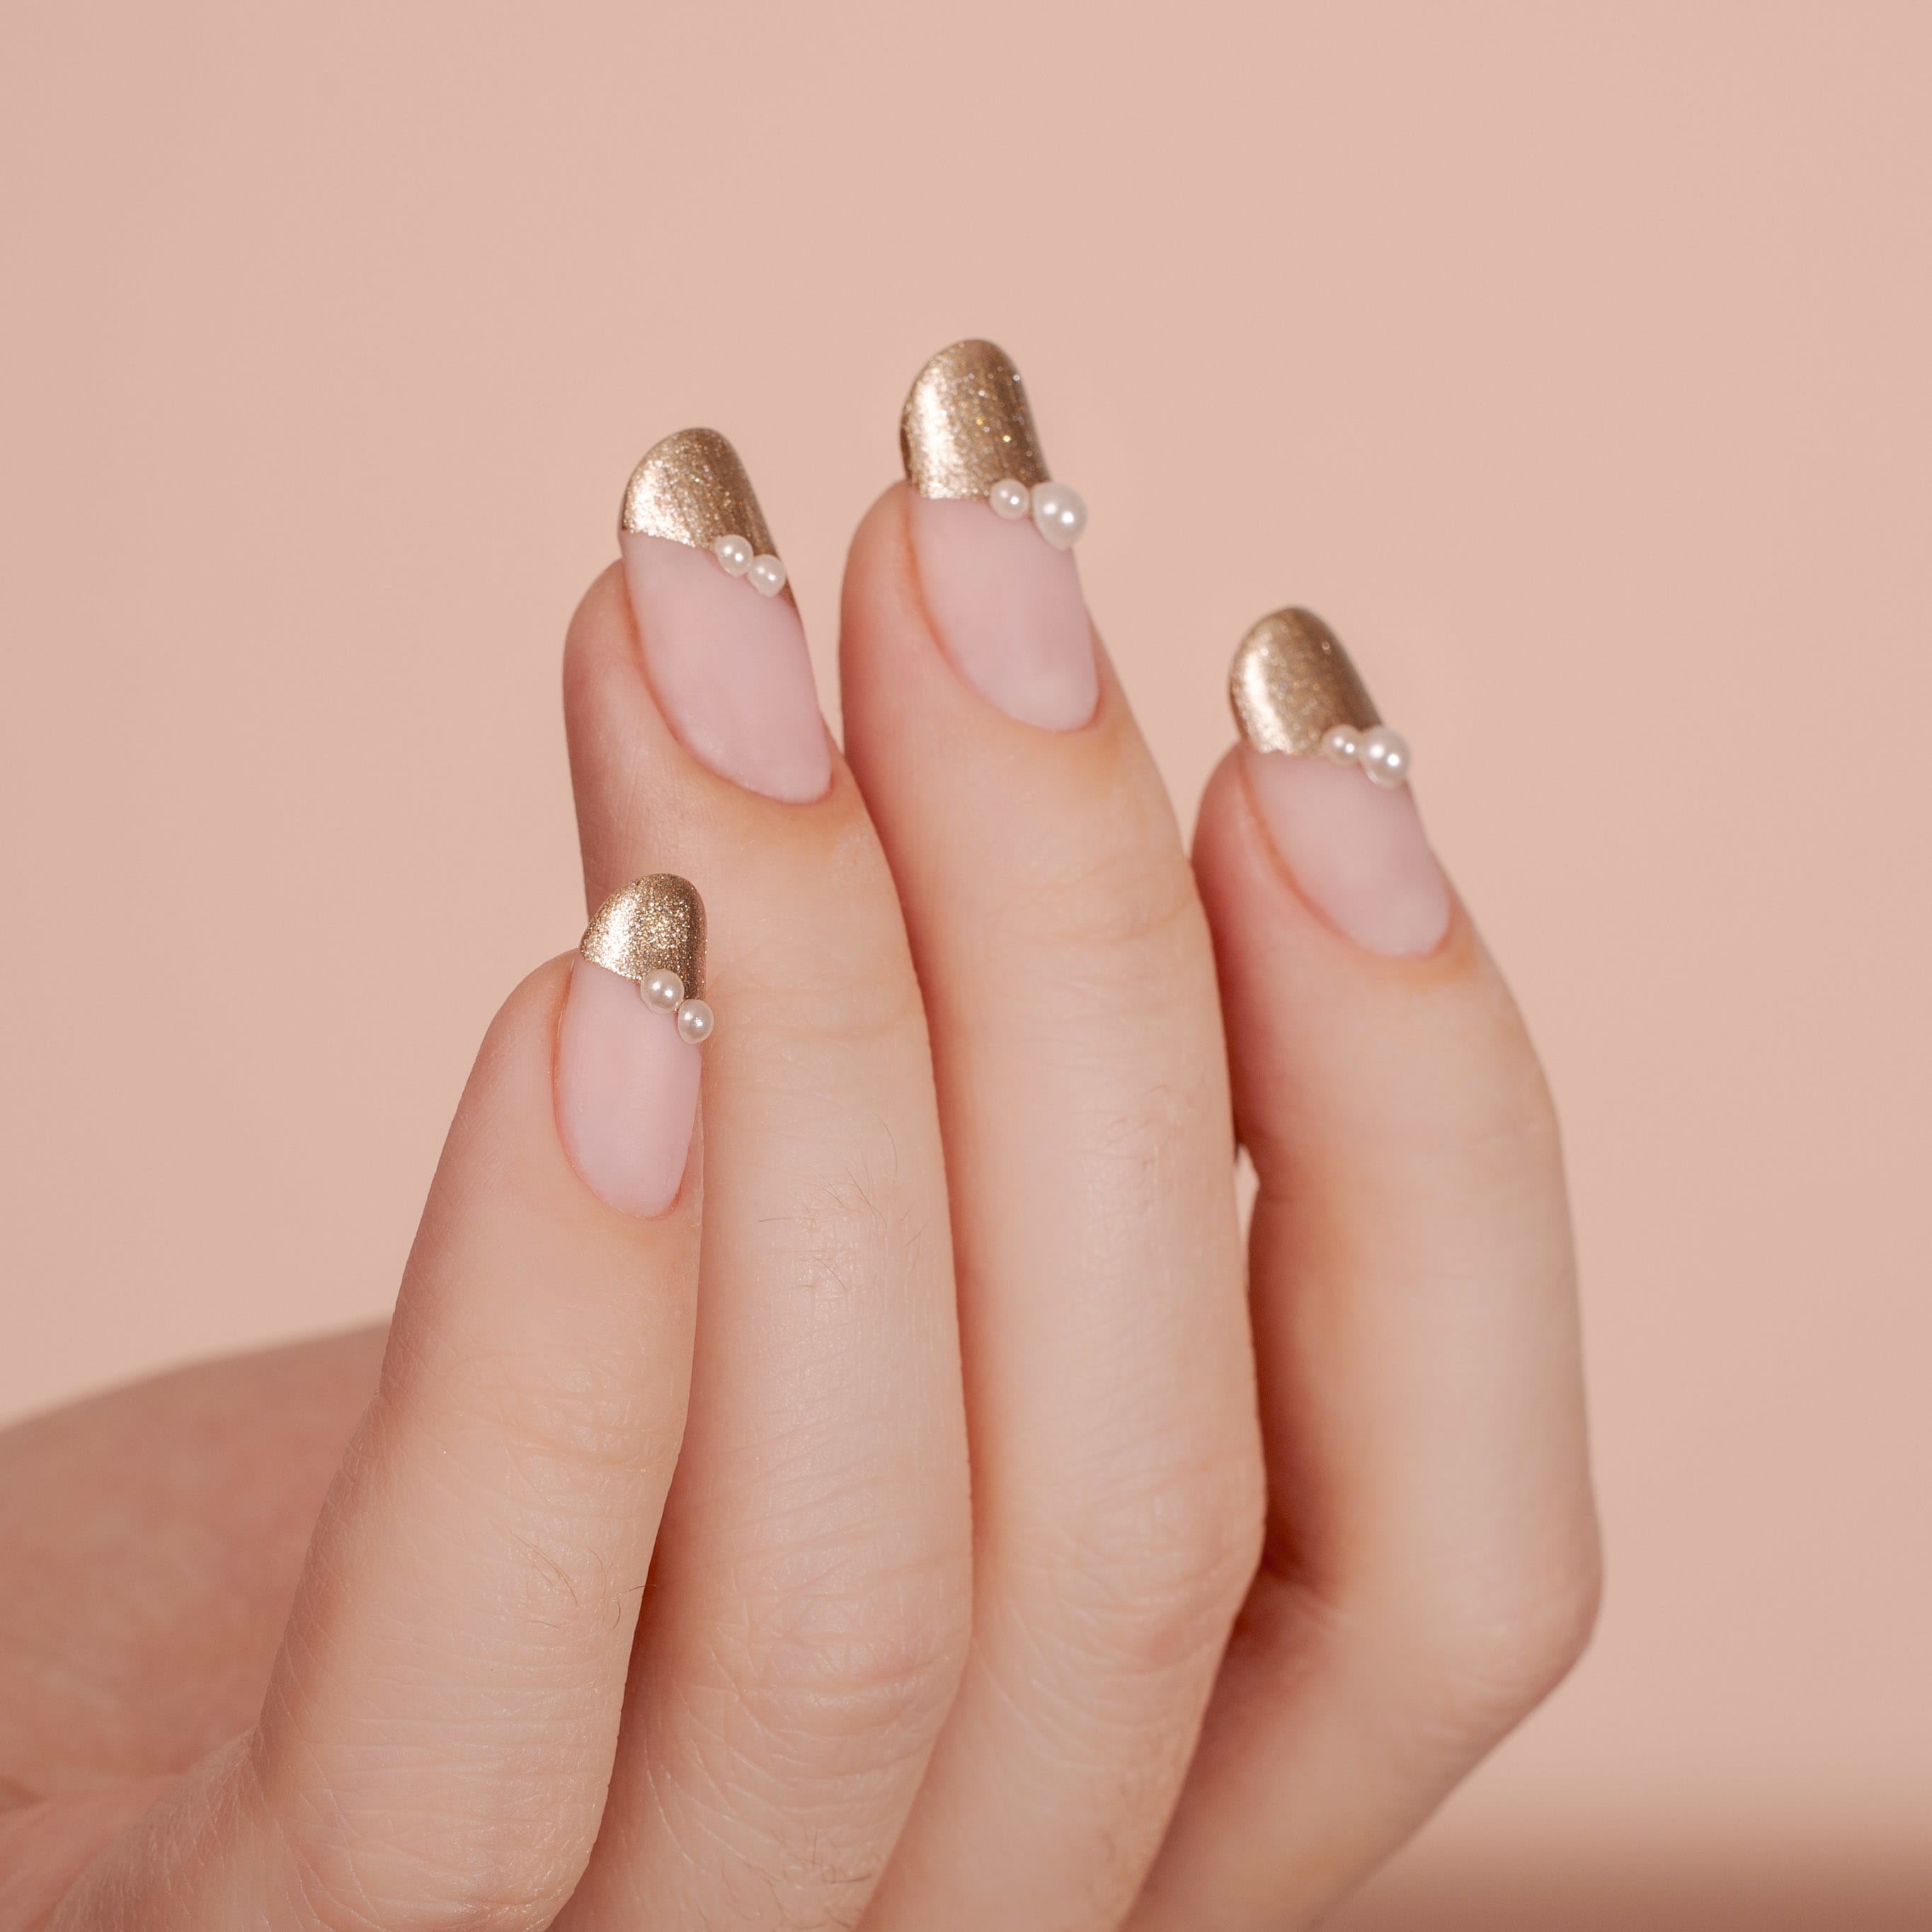
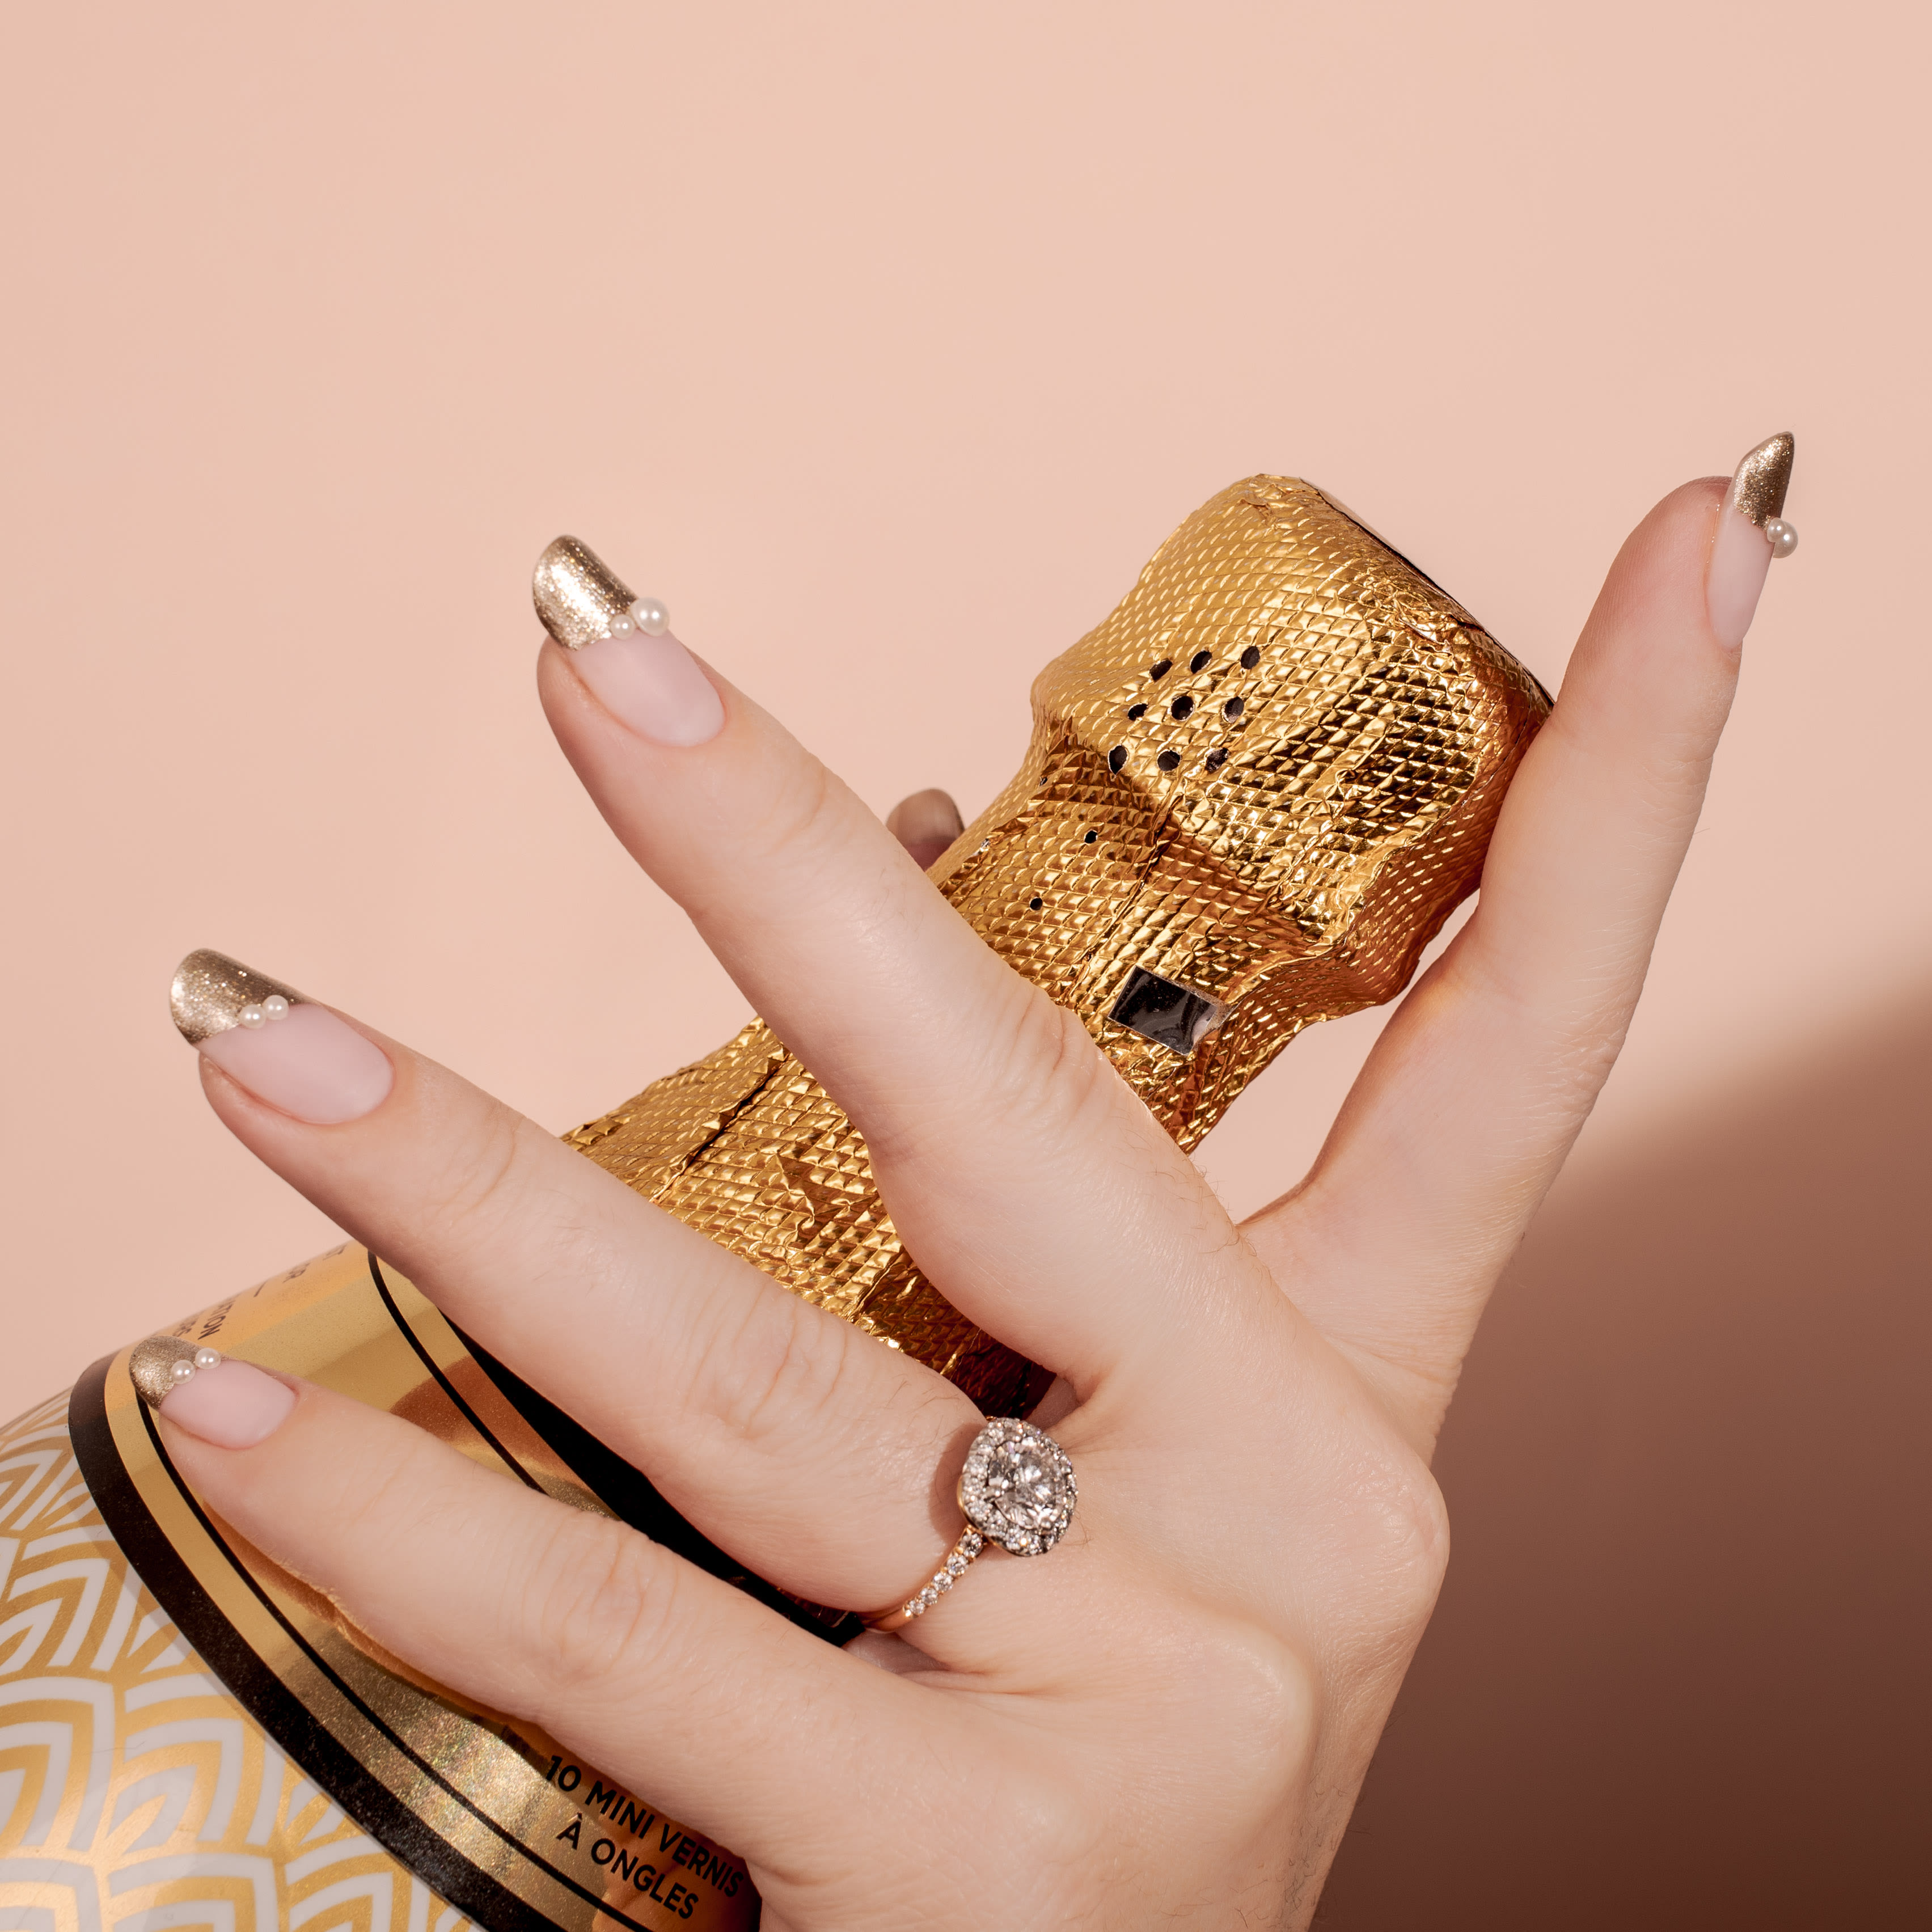
Pearl and Gold Geometric Nails:
Supplies:
- Sheer base coat (I used Butter London Nail Foundation)
- Nail art pearls (small pearls cut in half: I used Ciaté nail art pearls)
- Tweezers and nail art glue (or any type of bond/craft glue)
- Gold glitter polish (I used Cote No. 96)
- Cellophane tape or clear tape that is moderate to very adhesive
- Clear glossy top coat (I used OPI Top Coat for this tutorial)
Instructions:
Step 1: Clean and file nails to your desired shape. Be sure to wipe with alcohol (or acetone polish remover) to remove any oil or dust from the nail surface. This will help when stenciling off space with tape.
Step 2: Using 1 piece of tape, press it down firmly on the nail at an angle, to create a stencil so you can paint the tip of your nail (at the angle as shown in photos).
Step 3: Paint a coat of gold polish over the stenciled space, and immediately peel off the tape, carefully so that a clean, straight line is created.
Step 4: Repeat 2 and 3 for each nail, until you have the gold tips design as shown in the photos.
Step 5: Once the gold polish is dry, after about 10 minutes, use tweezers and a dot of nail art glue on the base of each pearl to place it on the border of the gold polish, as shown.
Step 6: Let your nail art dry for about 5 minutes, and cover with your favorite top coat to seal your design – you can paint right up to the edge of the pearls to strengthen their bond to the nail. If you want an extra clean look, use top coat before gluing the pearls on the nail. After each pearl is glued on, a top coat won’t be necessary.
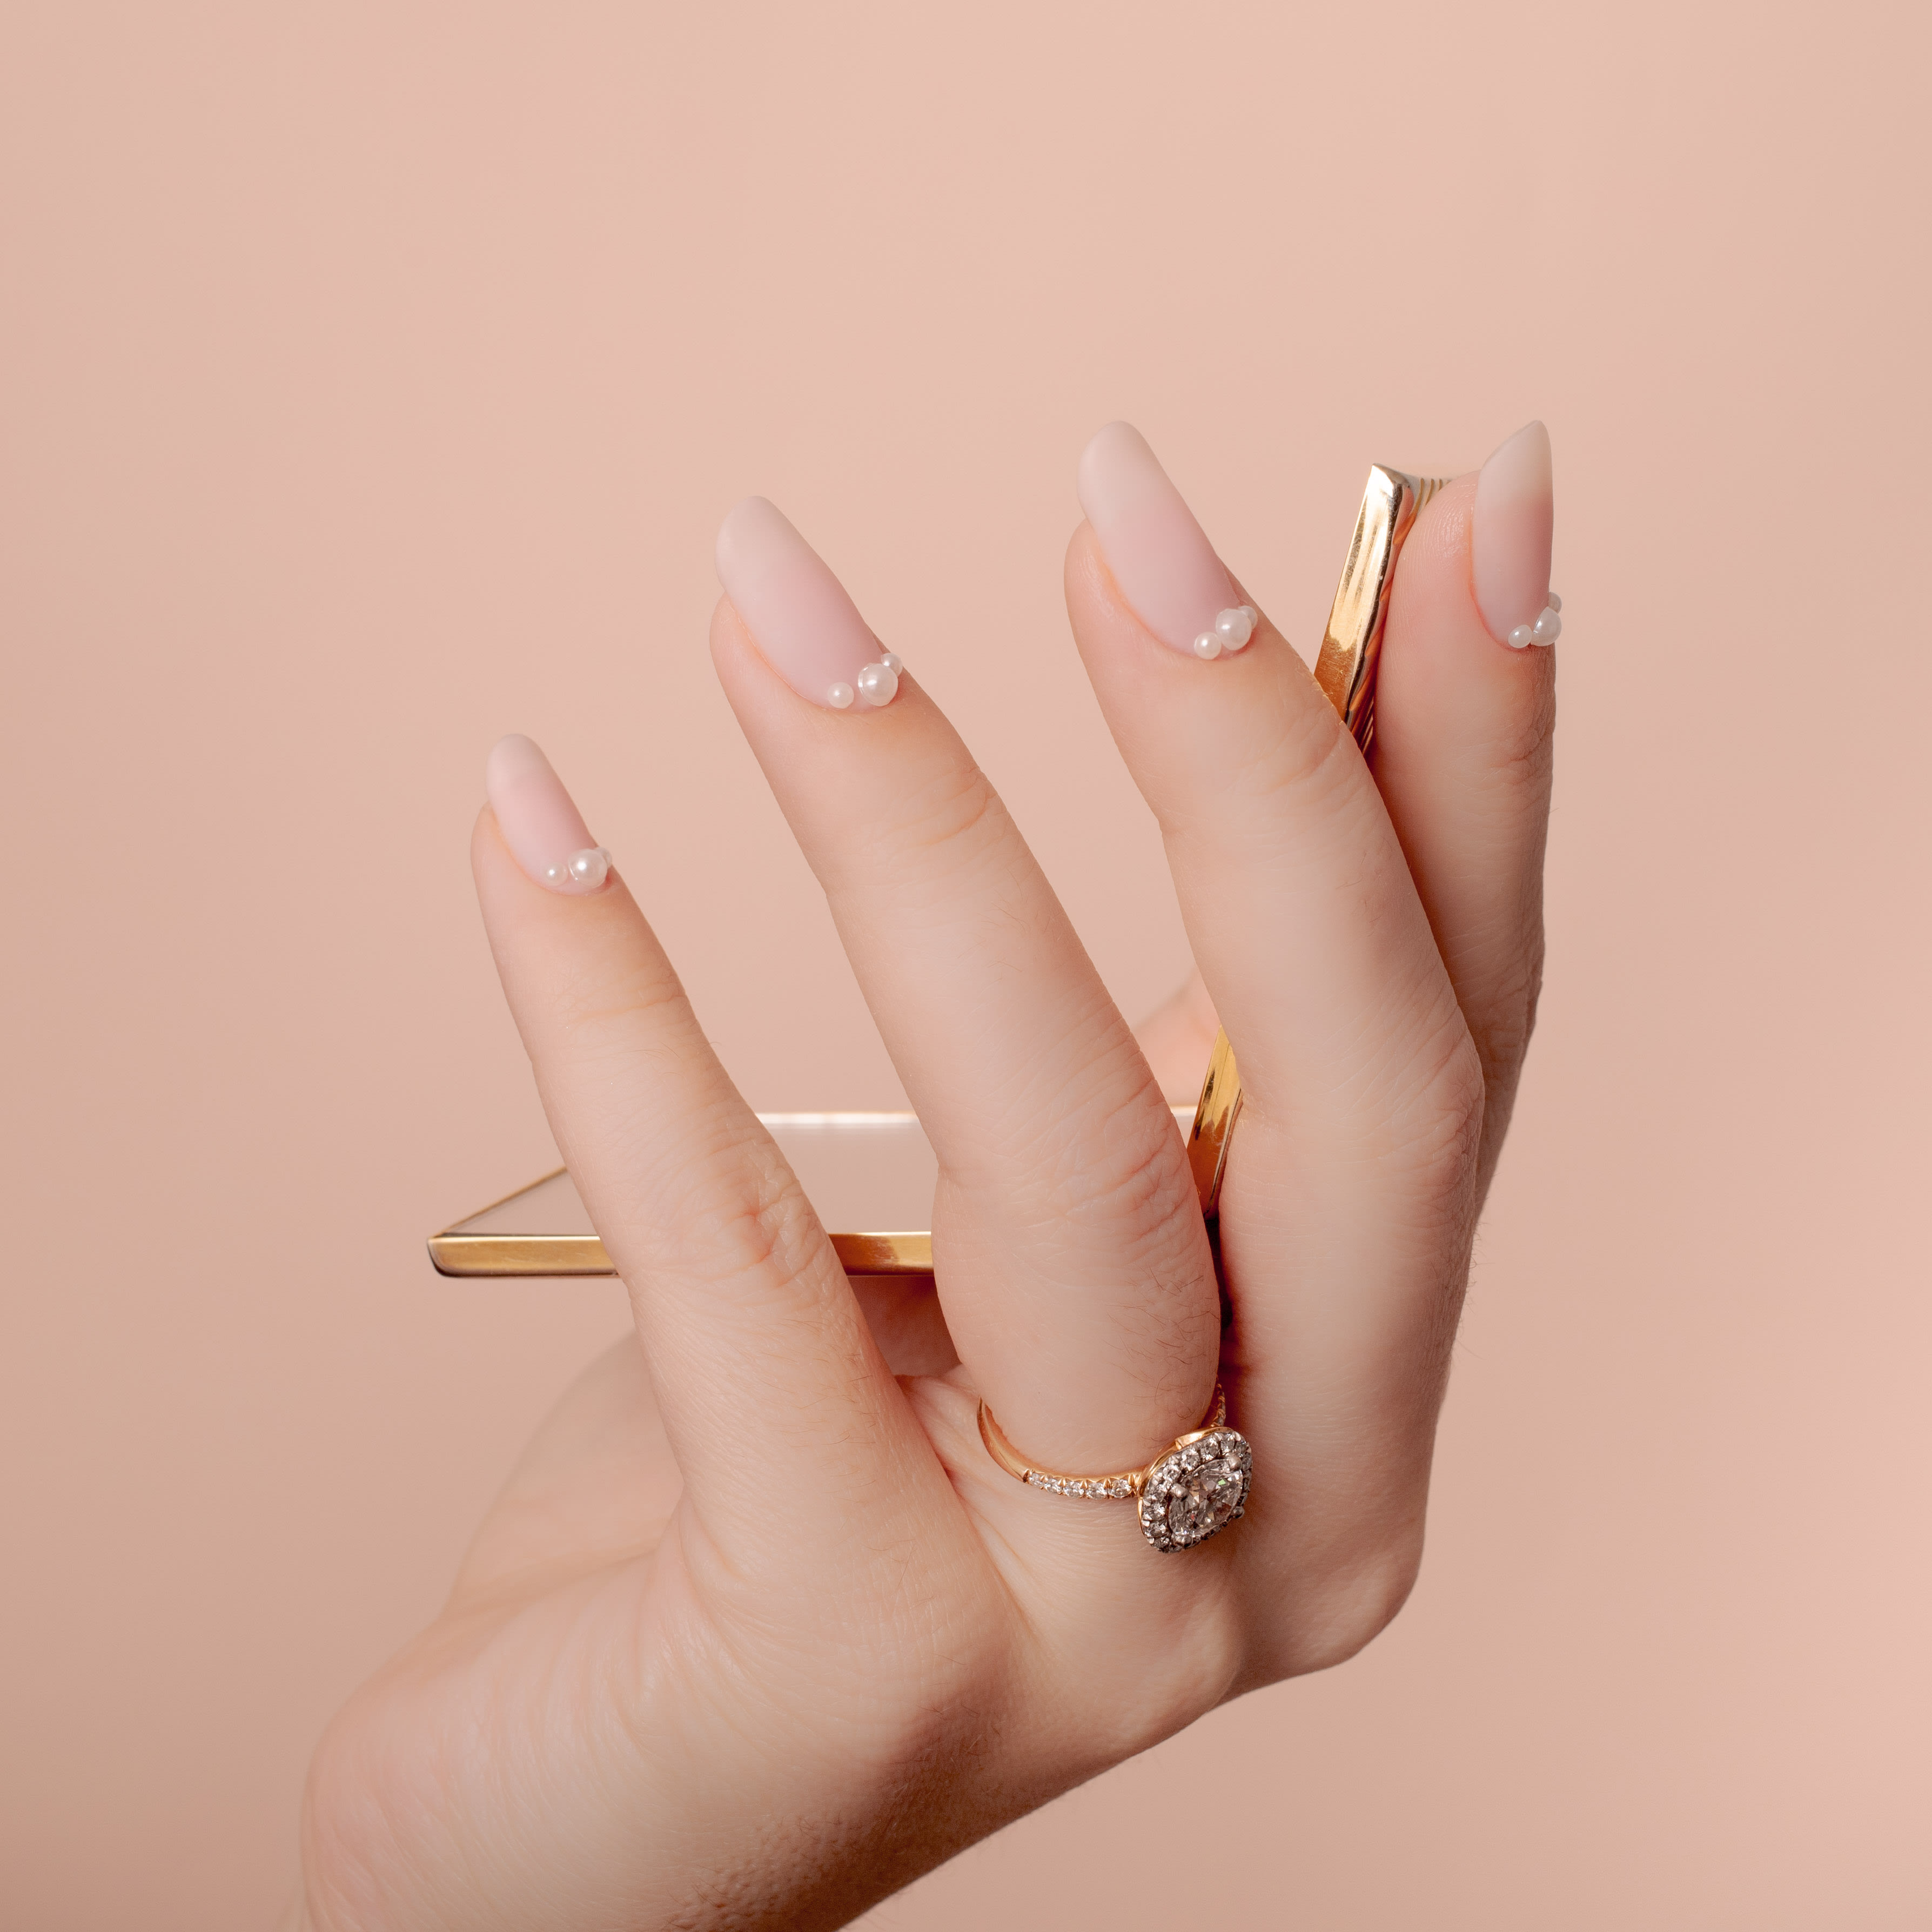
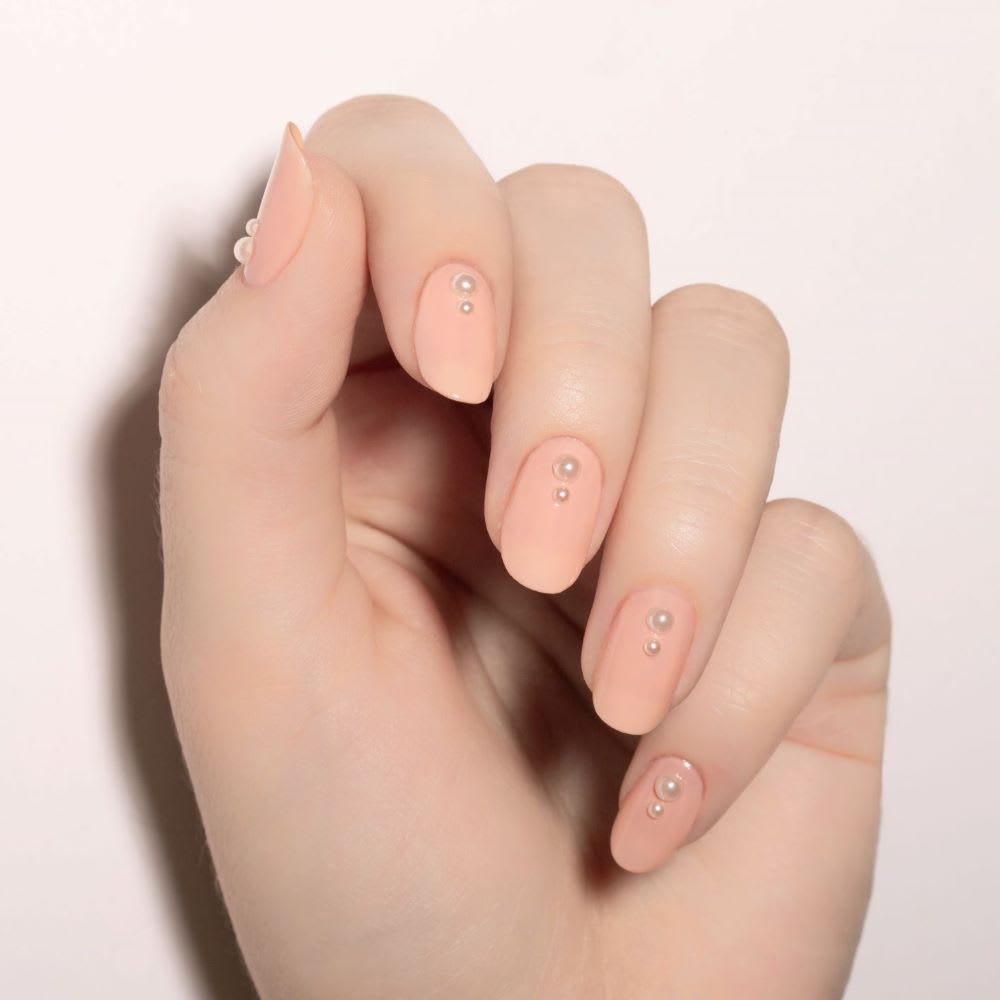
Simple Pearl Nail Designs
Supplies:
- Blush nail polish (I used OPI Bubble Bath)
- Pearl nail art decorations (in 2 sizes)
- Tweezers
- Glue
Instructions:
Did you try either of these pearl wedding nail ideas? Show us on Instagram @Lulus using #lovelulus–and score more wedding essentials from our Bridal shop!
Cassandre Banel is a Seattle-based nail artist.
Join The Conversation (0)