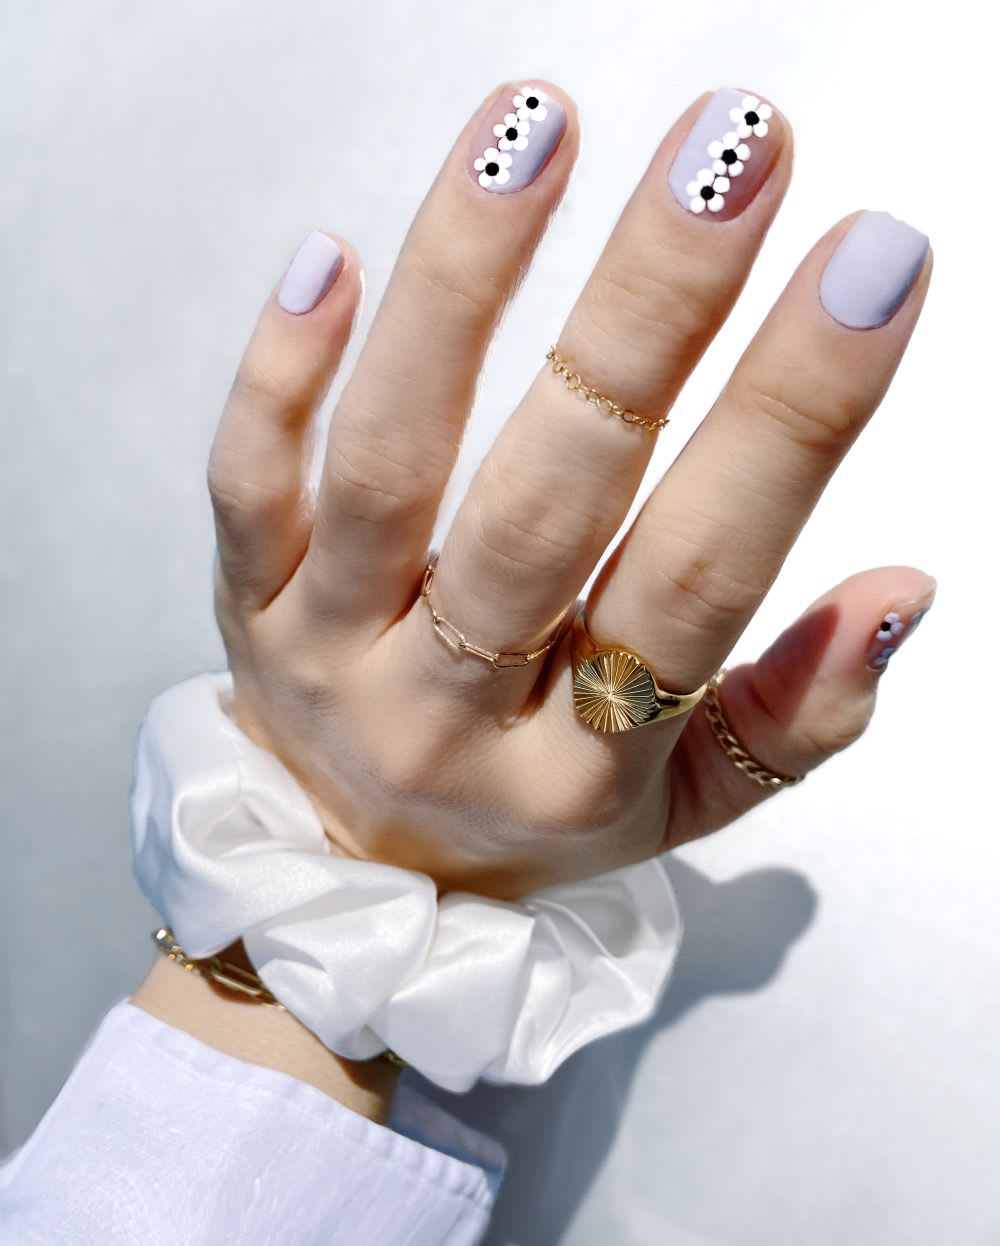
With the warmer weather finally here and flowers in full bloom, it seems more apropos than ever to try the latest daisy nails design trend. A pretty bouquet just makes everyone happy–and who couldn’t use more happy right now? Spoiler alert: No one.
Thanks to a subtle color palette of light blue, black, and white, and negative space accents, this daisy nails design is equal parts cheerful and chic. Think the modern-day flower child–but more badass. And if you’re thinking daisy-adorned digits are beyond your skillset, I beg to differ. Ahead, I’ll show you exactly how easy it is to DIY this floral mani at home, no gardening required!
Daisy Nail Art
Supplies:
- Light blue nail polish
- Black nail polish
- White nail polish
- Dotting tool
- Clear topcoat
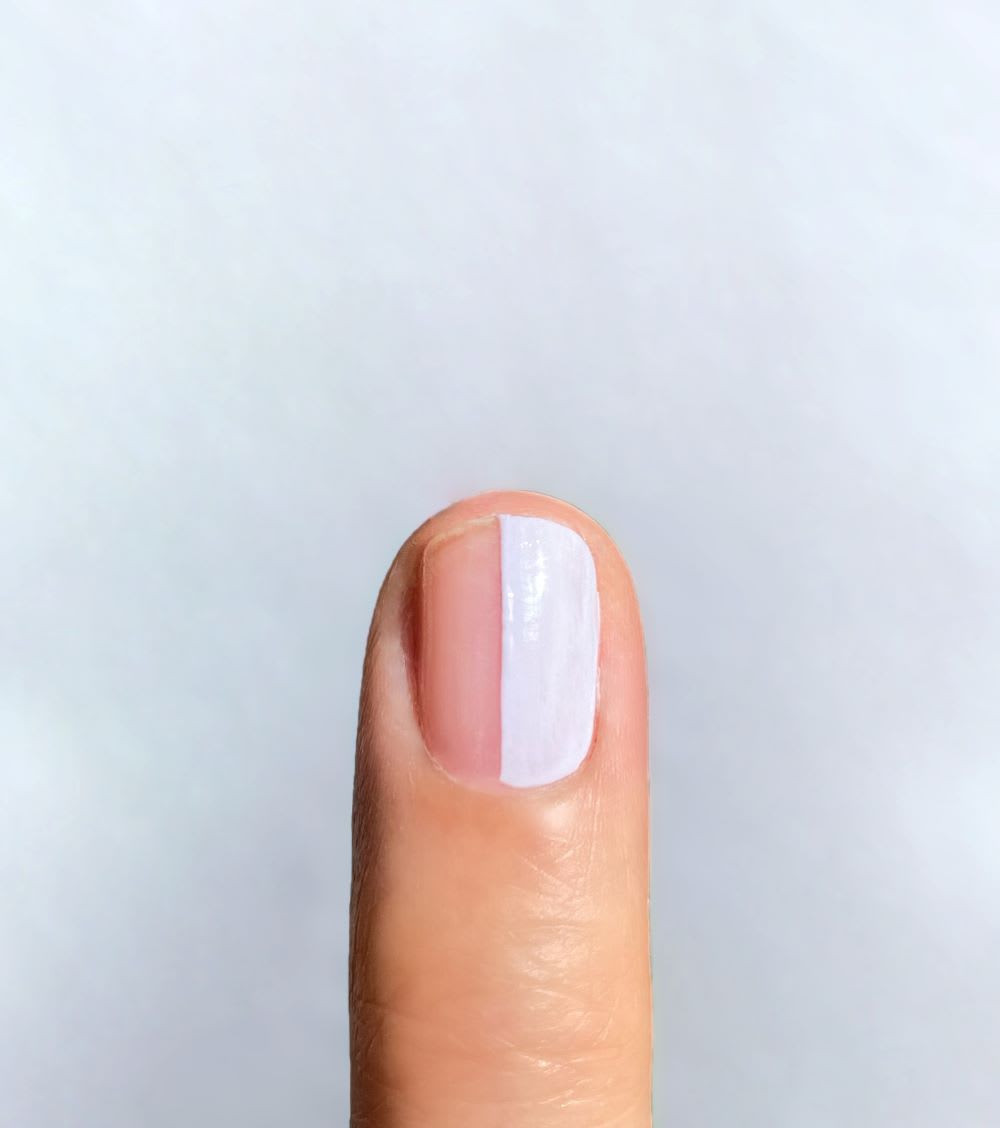
Step 1: With a light blue polish, paint half the nail bed from top to bottom. Apply two coats and clean up if it’s not straight (It doesn’t have to be perfectly straight, as flowers will be covering it). Repeat this on another nail right beside it.
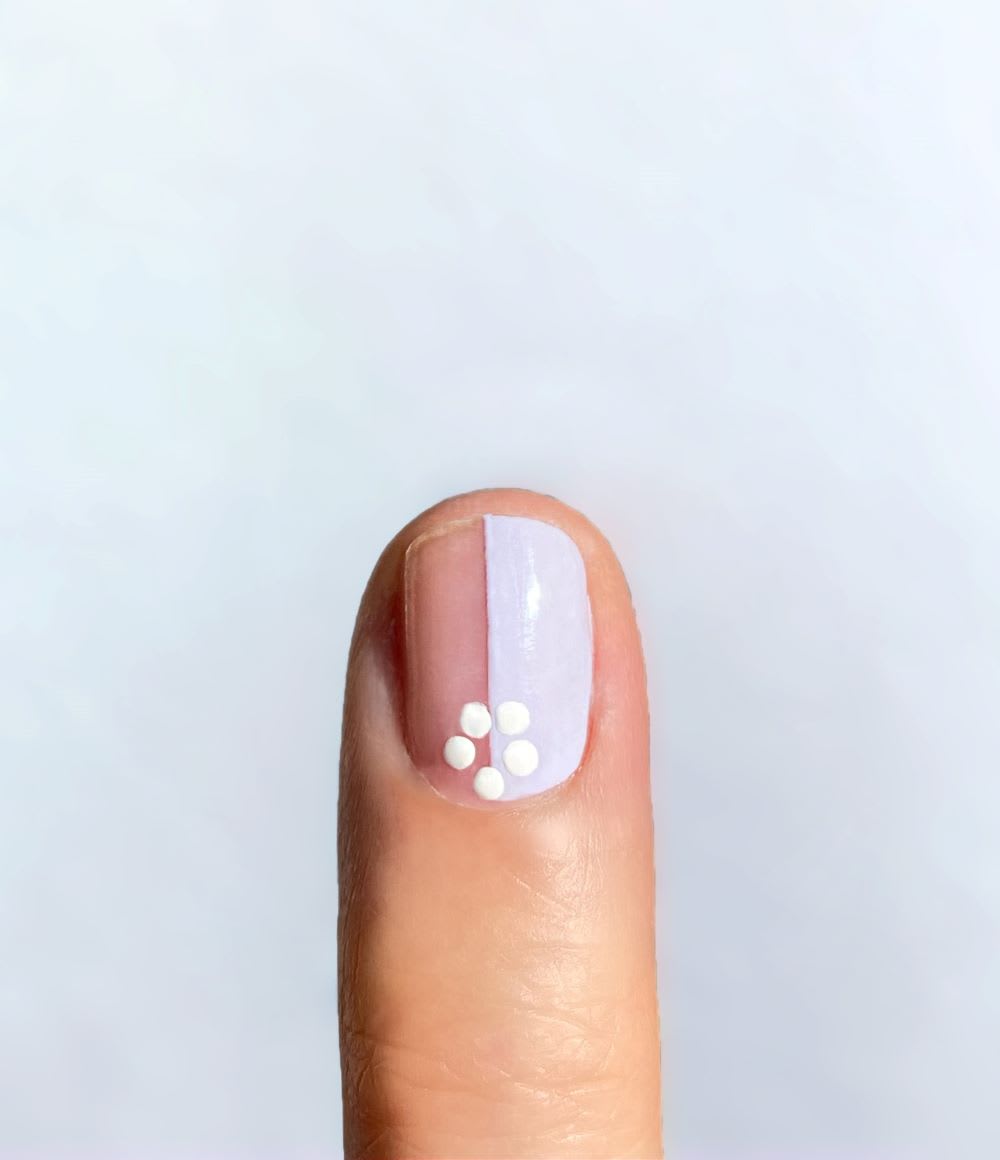
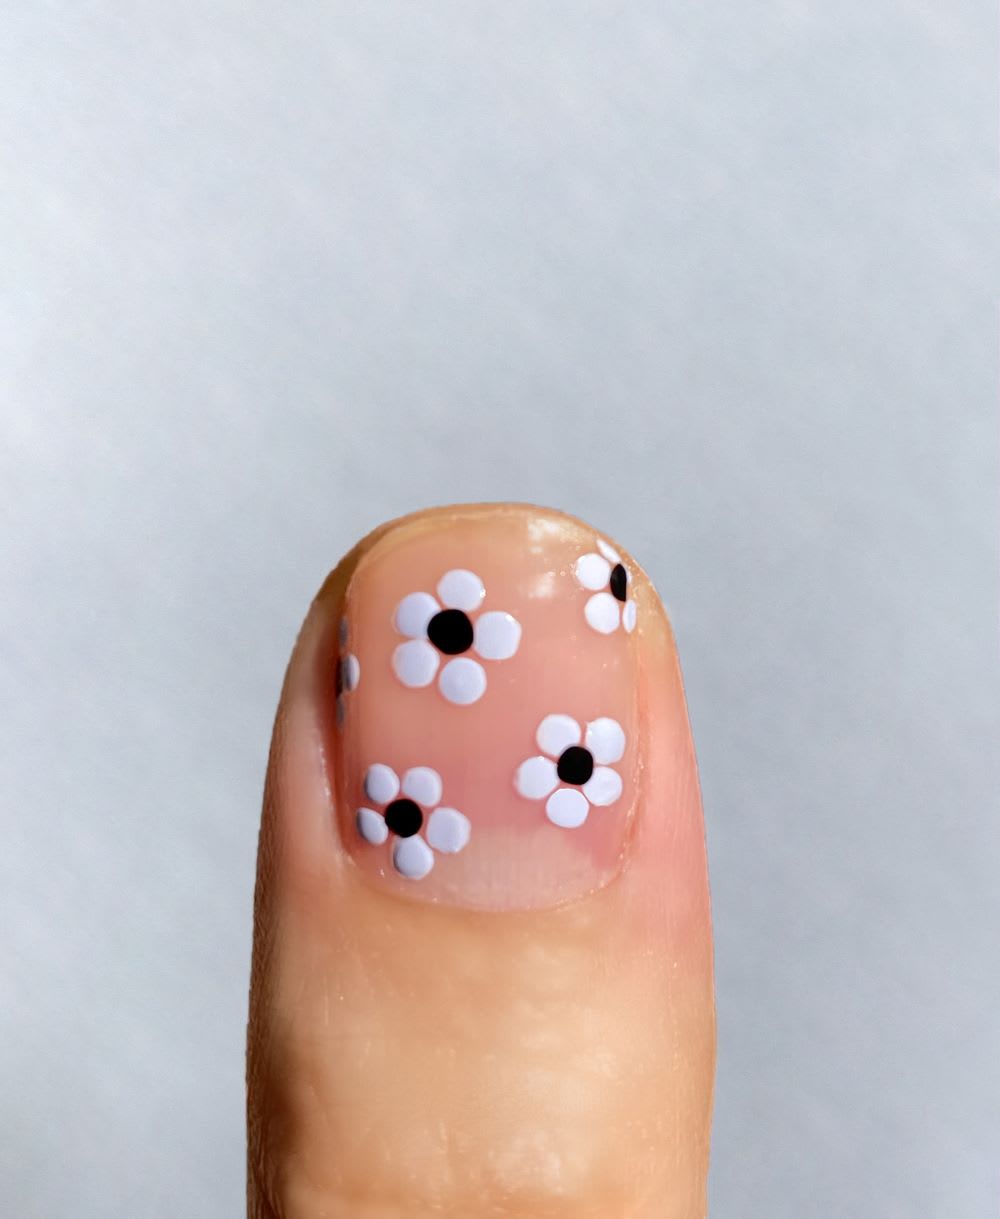
Step 2: With a dotting tool, add five white dots in the shape of a flower.
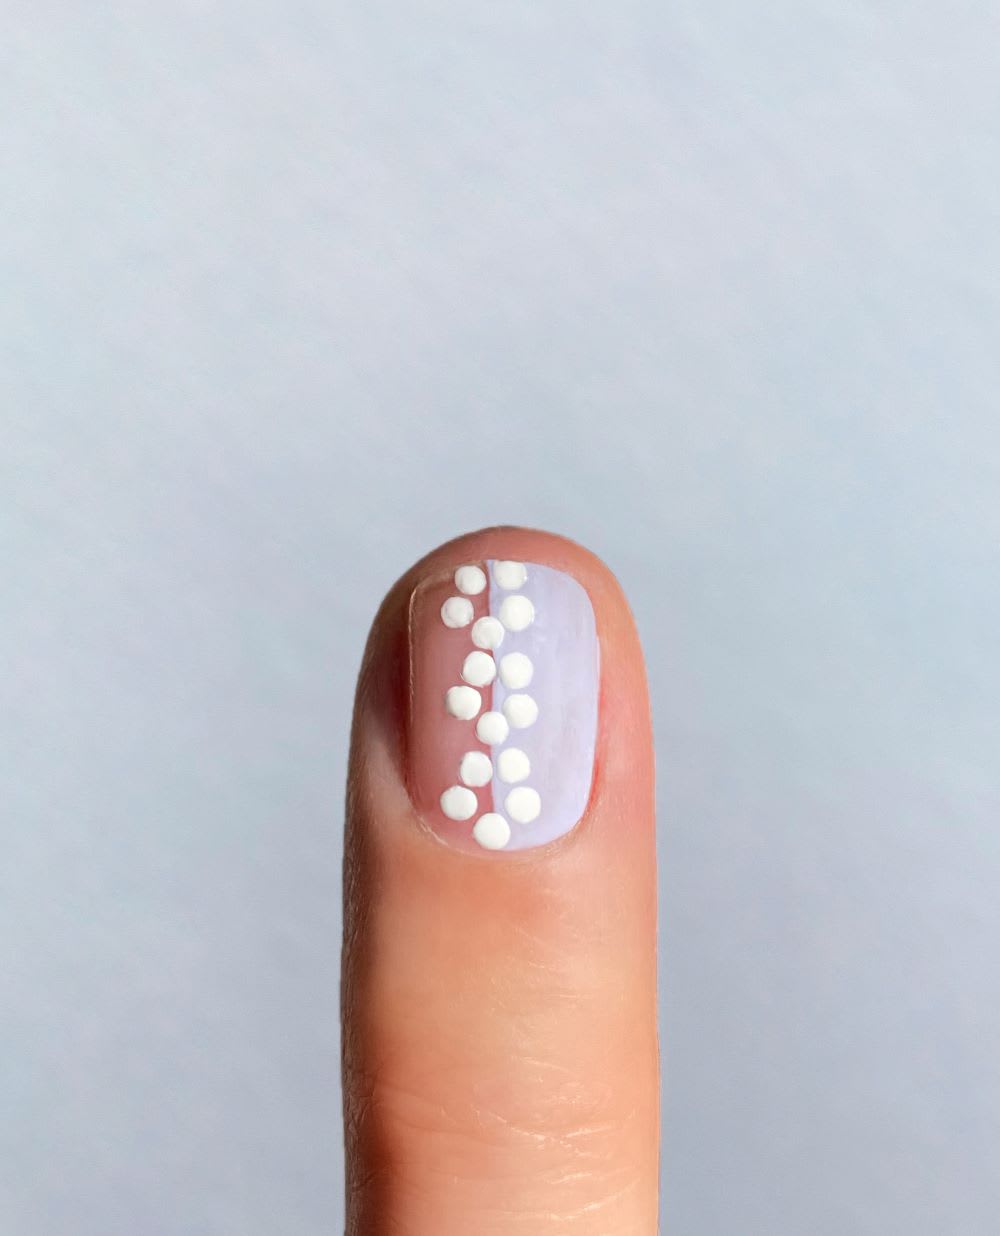
Step 3: Repeat the other two flowers down the middle of your nail.
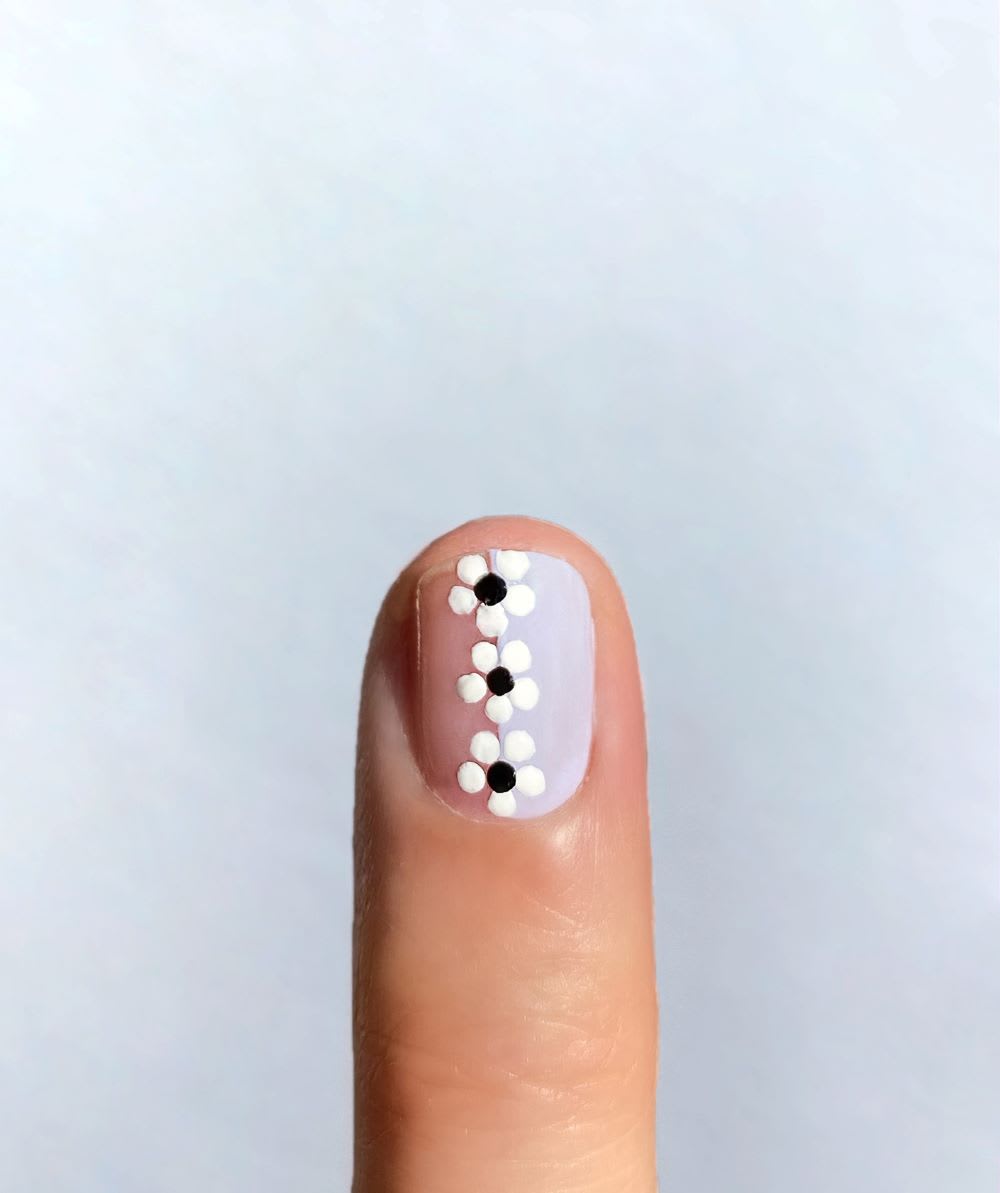
Step 4: With black polish, dot a circle in the middle of all three flowers.
Step 5: On the thumb, repeat the floral dots but with light blue petals. Wait for all nails to dry and add topcoat.
Did you try this daisy nail design? Show us your handiwork on Instagram @Lulus using #lovelulus!
(Images via Hang Nguyen; Additional copy by Rachel Aschenbrand-Robinson)
Join The Conversation (0)