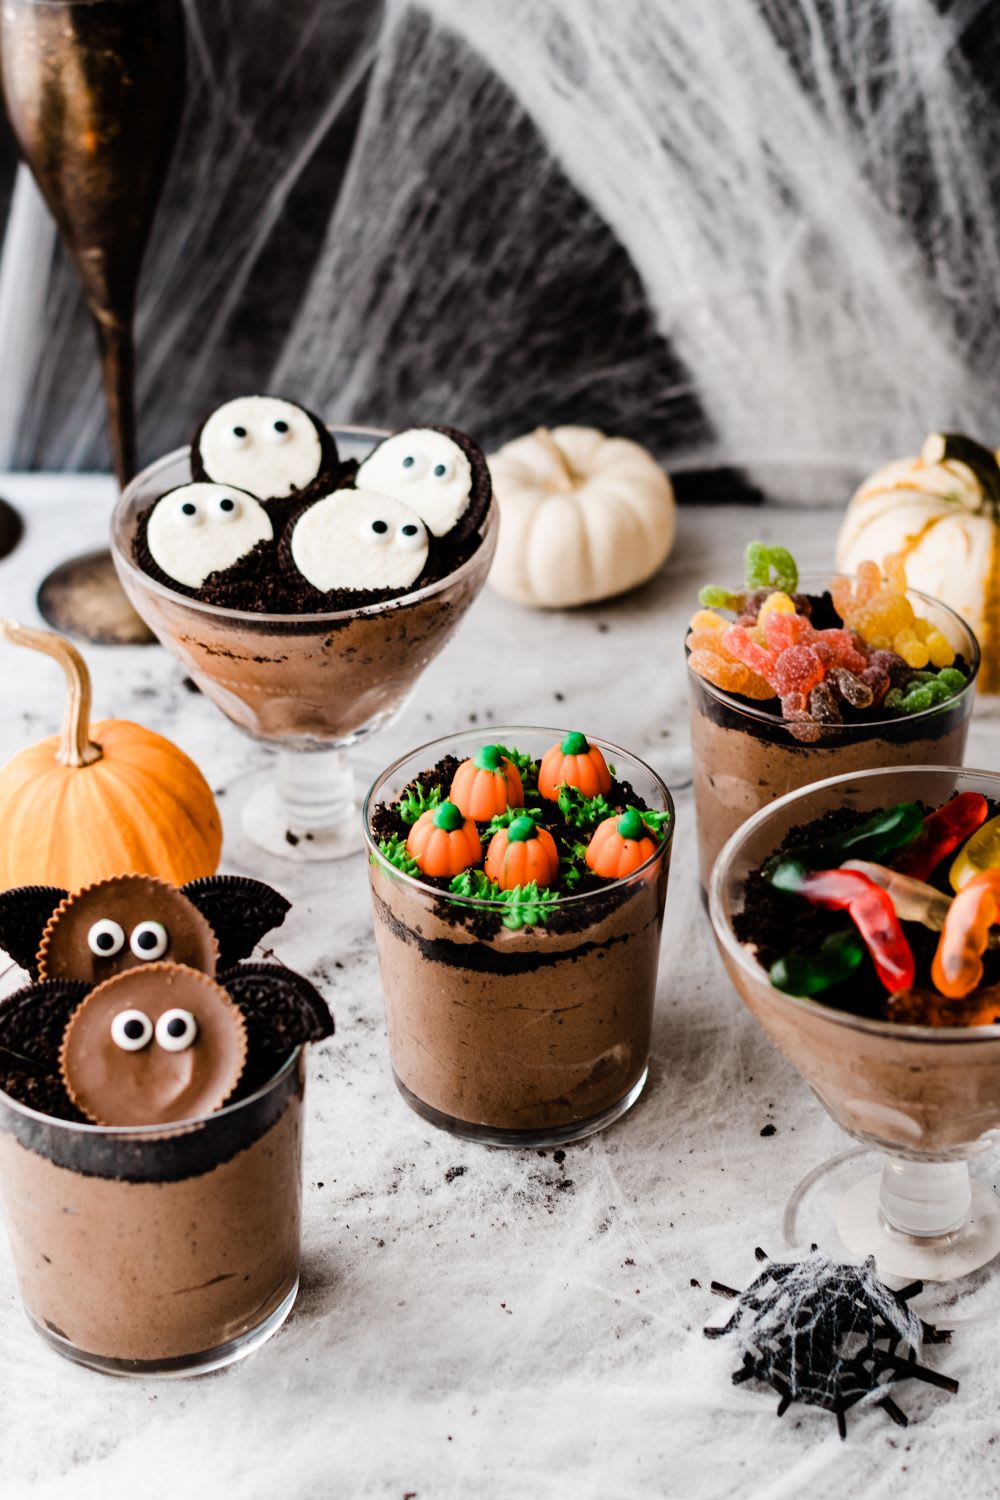
Is there any more nostalgic dessert than dirt cups? I think we’ve all had them at least once in our childhoods! This version is just as easy to make, but I’ve amped them up a bit to make an incredibly fun, festive Halloween dessert. ‘Tis the season to be spooky, after all.
The pudding filling for these cups is super simple–no baking required. It’s just pudding mix, Cool Whip, milk, and Oreo cookies. (Yum!)
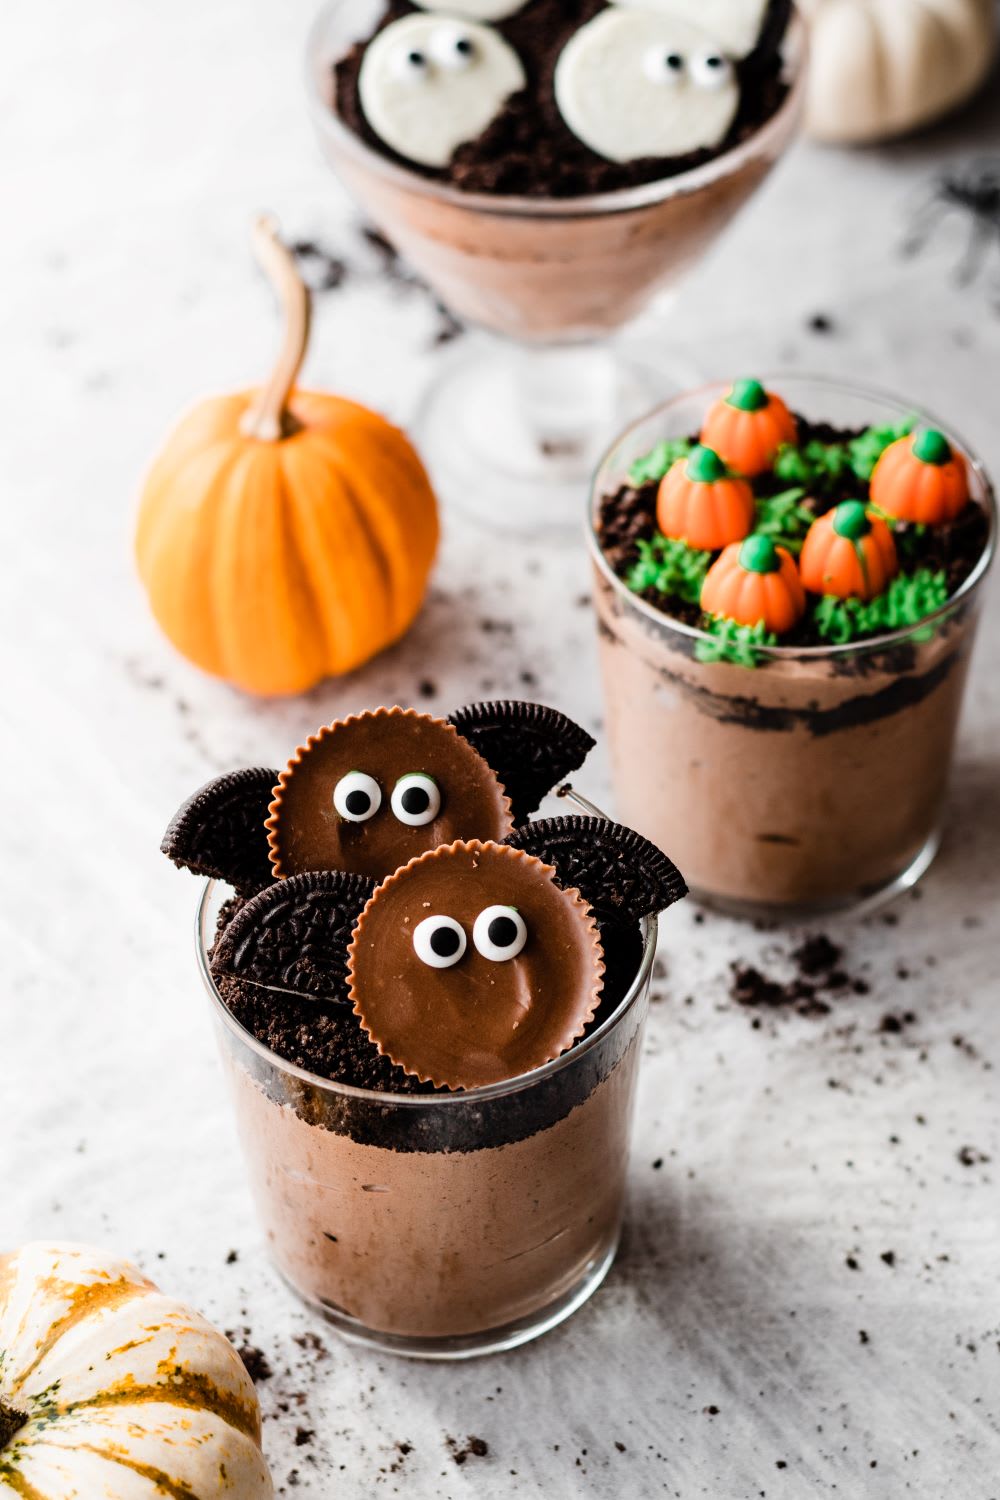
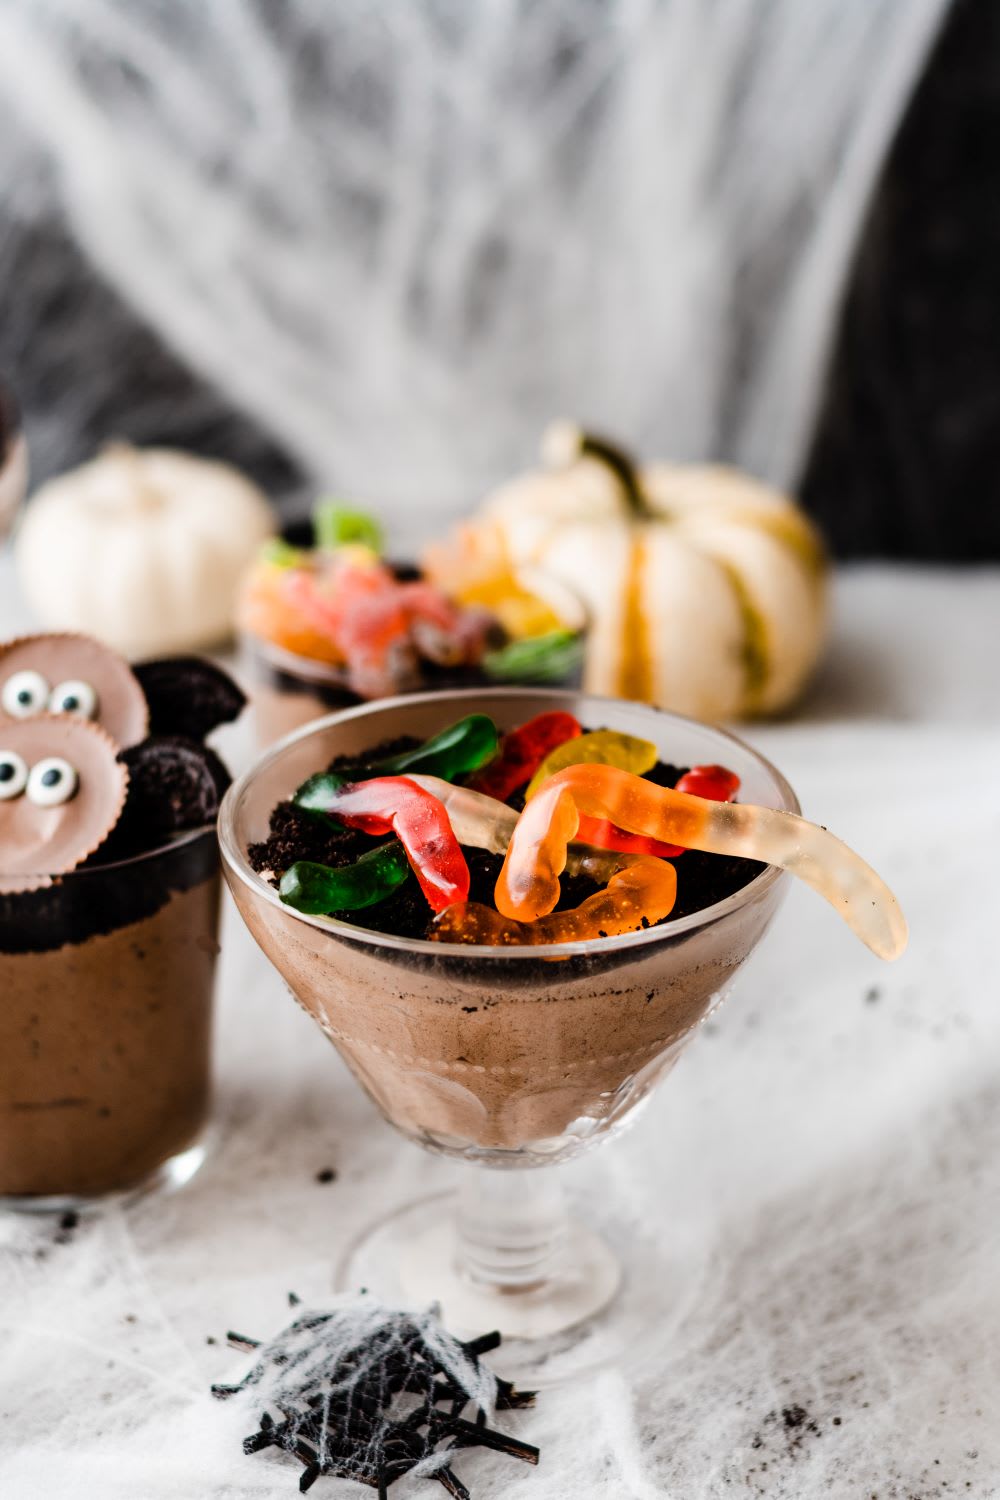
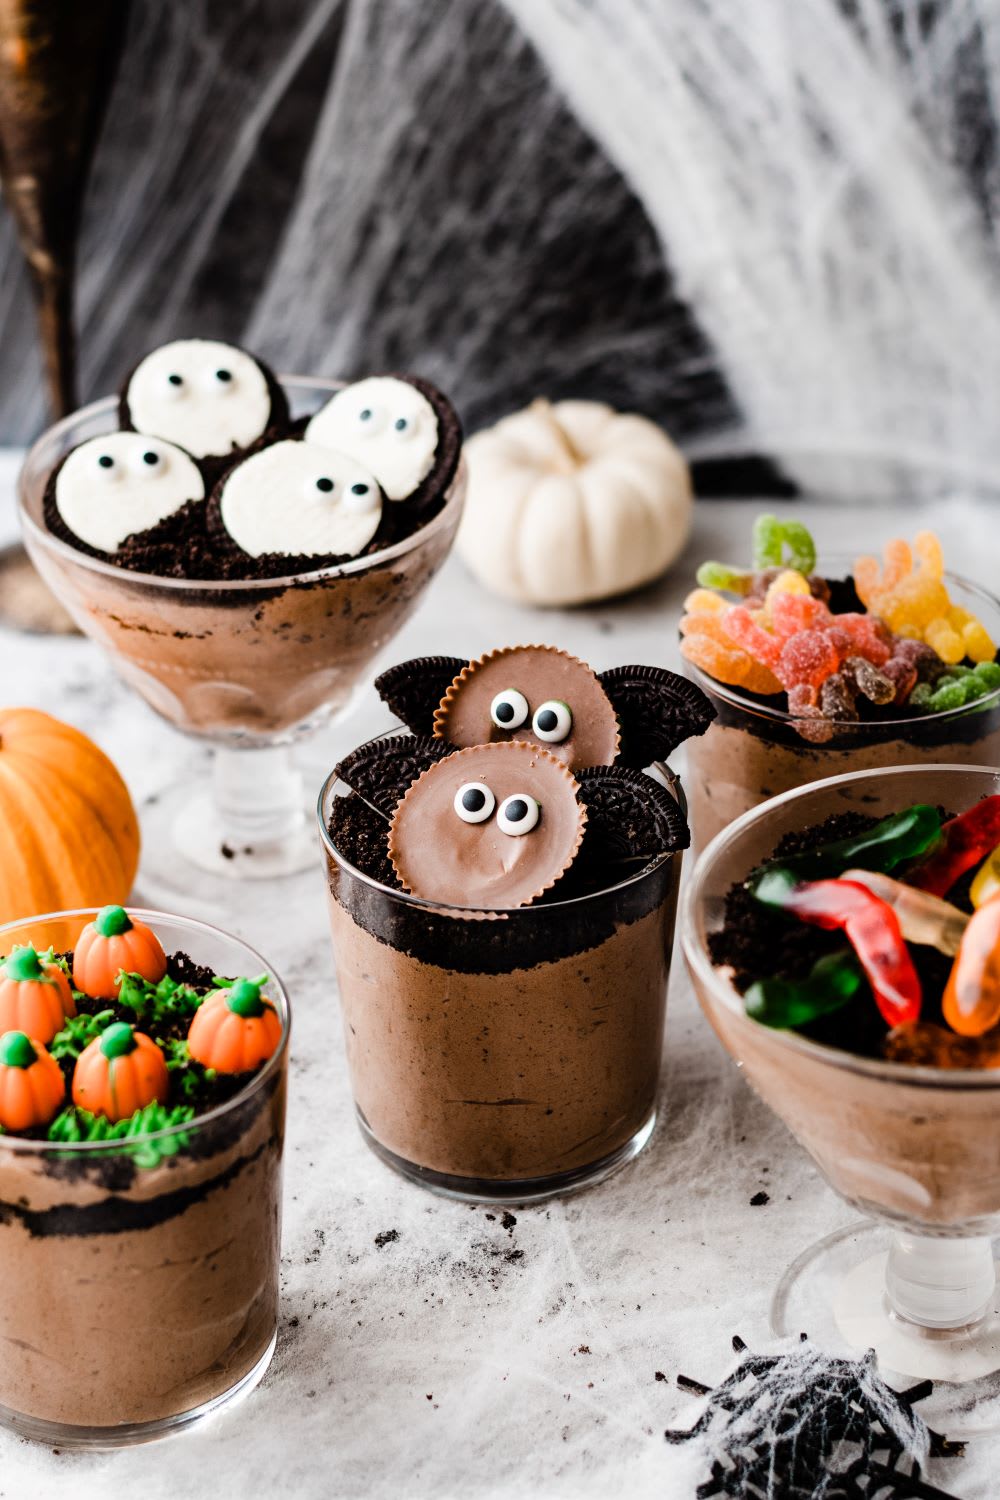
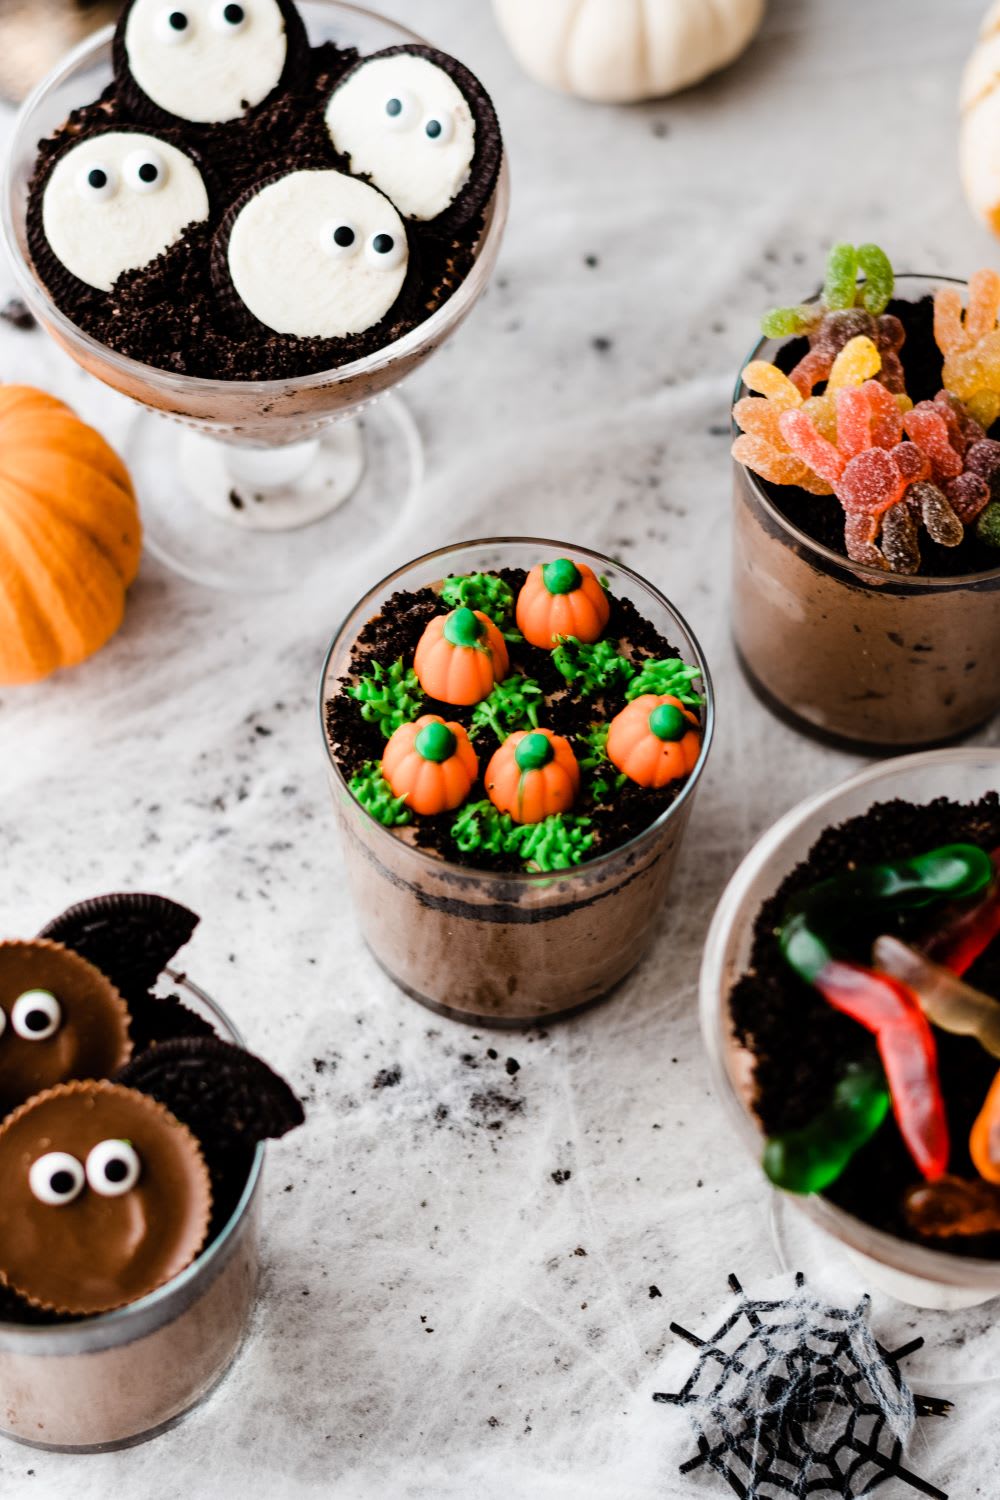
As for toppings for these Halloween dirt cups, they can be whatever you want! I’ve included directions in the recipe below for you to decorate your dessert cups with cute bats, spooky ghosts, a sincere pumpkin patch, or something as quick as gummy worms and spiders. Eek!
The topping options are really kind of endless–and they’re all simple decorations that I know you can rock! (Trust me, I’m not a fancy decorator type of person when to comes to dessert–but even I could handle these).
Scroll on for all the instructions to make this delicious Halloween dessert. Enjoy your dirt cups–and enjoy your holiday!
Halloween Dirt Cups:
Prep time: 30 minutes
Yield: 6 servings
Ingredients:
Pudding:
- 1 package instant chocolate pudding mix (3.9-ounce box)
- 2 cups cold milk
- 1 container (8 ounces) Cool Whip, thawed (do this in the fridge overnight)
- 30 Oreos, divided in half
Toppings:
Bats:
- Peanut Butter Cups
- Oreos
- Eyeball Sprinkles
- Frosting
Ghosts:
- Oreos
- Eyeball Sprinkle
Pumpkin Patch:
- Green frosting
- Candy pumpkins
Other Options:
- Candy Corn
- Gummy Worms
- Gummy Spiders
Instructions:
1. For the pudding:
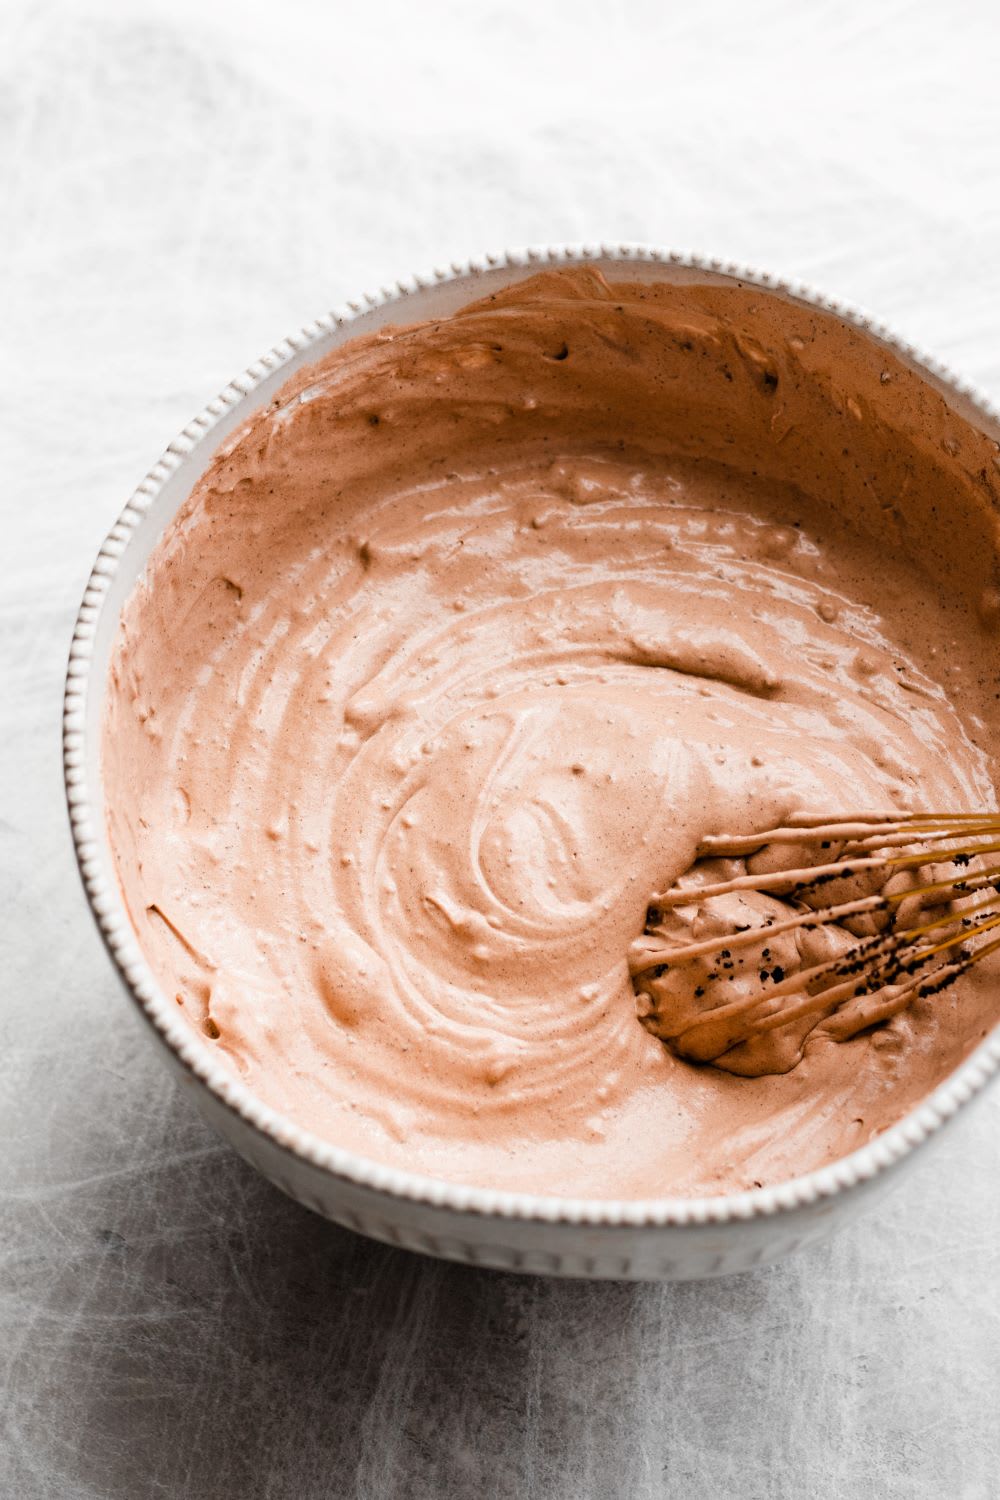
- Add the pudding mix to a large mixing bowl. Add the milk and whisk for 2 minutes to dissolve the pudding mix. Let stand for 5 minutes to thicken up.
- Stir in the whipped topping. Crush 15 of the Oreos (leave them chunky–it makes for nice texture!) and stir them in.
- Spoon the mixture into 6 glasses or bowls.
- Crush the remaining 15 Oreos more finely, using a food processor. Sprinkle over the tops of the pudding mixture in the cups, except if creating the pumpkin patch decorations. I found that it was easier to pipe the frosting onto the pudding (otherwise, it sticks to the Oreo dirt and pulls it out of the cup) and then sprinkle the Oreo dirt around after.
2. To make ghosts:
- Use the remaining Oreo halves with the Oreo cream to make the ghosts.
- Stick on the sprinkle eyes!
3. To make a pumpkin patch:
- Use a grass piping tip and pipe green frosting in patches all over the pudding in the cup.
- Sprinkle the Oreo dirt in between the grass patches and add candy pumpkins!
4. To make bats:
- Twist a few Oreos apart. Slice the side without the Oreo cream in half.
- Use a little frosting to attach each piece to the back of a peanut butter cup, and add a dot of frosting to stick on the sprinkle eyes.
- Use a grass piping tip and pipe green frosting in patches all over the pudding in the cup.
- Sprinkle the Oreo dirt in between the grass patches and add candy pumpkins!
5. Other ideas:
- Top the dirt with gummy worms, bats, skeletons, or any other decorations you like!
6. Serve and store:
- Enjoy immediately! These are best when fresh, but you can store leftovers in the fridge for 1-2 days, covered. I recommend pulling off the cookies/candy before refrigerating or they’ll dry out and get weird.
Did you make these Halloween dirt cups? Show us your spooky desserts on Instagram or TikTok @lulus using #lovelulus, then head to our Fall Fashion Shop for more seasonal must-haves!
This recipe comes from our food contributor, Stephanie Simmons, of Blue Bowl. Her goal with her kitchen-tested recipes is to get you excited about cooking, show you how good food can taste, and prove that you don’t need to spend hours in the kitchen to make a good meal.
This post was originally published in October 2020.
Join The Conversation (0)